OnlyFans has skyrocketed in popularity, becoming a top choice for creators eager to monetize their content directly with fans. Whether you’re a budding influencer or a seasoned content creator, understanding the platform’s dynamics is essential for maximizing your earnings.
High-quality video content is a game-changer on OnlyFans, driving subscriber growth and boosting your income potential. Crisp visuals and clear audio not only attract more viewers but also keep them engaged and coming back for more, helping you build a loyal fanbase.
Ready to elevate your OnlyFans game? Dive into VidQuickly’s comprehensive blog article to learn everything you need to know about the platform, how it operates, and effective strategies to make money. Don’t miss out—start boosting your OnlyFans Video Quality today!

Introduction
OnlyFans has rapidly evolved since its launch in 2016, becoming a leading platform for creators to share exclusive content directly with their audience. Originally popularized by adult content creators, OnlyFans has expanded to include fitness experts, musicians, and influencers. High-quality video content is now essential for standing out in this competitive space, ensuring that creators can effectively showcase their talents and engage their subscribers.
For creators, video quality plays a pivotal role in subscriber retention and growth. High-definition videos not only attract more viewers but also enhance the overall viewing experience, making audiences more likely to stay subscribed and interact with the content. Engaging and professionally produced videos foster a stronger connection with viewers, encouraging loyalty and word-of-mouth promotion.
This comprehensive guide is designed to help OnlyFans creators master the technical and creative aspects of video production. Readers will learn about essential video specifications, the best equipment to use, and actionable tips to enhance their video quality. By following this guide, creators can effectively build their brand, attract more subscribers, and maximize their earning potential on OnlyFans.
Understanding OnlyFans Video Specifications
Creating standout content on OnlyFans starts with understanding the technical specifications that ensure your videos look and sound their best. Whether you’re aiming to build a brand, attract viewers, or monetize your content effectively, mastering these video specs is your first step to success.
Supported File Formats

Recommended Formats (e.g., MP4)
When uploading videos to OnlyFans, the MP4 format is highly recommended. This format is widely supported across various devices and platforms, ensuring your content is accessible to all your subscribers without compatibility issues. MP4 offers a great balance between video quality and file size, making it ideal for streaming and quick uploads.
Benefits of MP4:
- High Compatibility: Works seamlessly on most devices and browsers.
- Efficient Compression: Maintains good quality without excessively large file sizes.
- Versatility: Supports a wide range of codecs, enhancing flexibility in editing and playback.
Other Compatible Formats (e.g., MOV, AVI)
While MP4 is preferred, OnlyFans also supports several other video formats, including MOV, AVI, MKV, FLV, WMV, and WebM. These formats offer varying levels of quality and compatibility:
- MOV: Developed by Apple, it offers high-quality video but can result in larger file sizes.
- AVI: Known for its simplicity and high quality, but less efficient compression compared to MP4.
- MKV: Supports multiple audio and subtitle tracks, ideal for complex projects.
- FLV & WMV: Often used for streaming, but less common for OnlyFans content.
- WebM: An open-source format suitable for web-based videos with efficient compression.
Pro Tip: While these formats are supported, sticking with MP4 ensures the smoothest upload experience and broadest compatibility for your audience.
>>> Read more: Vimeo Video Upload Specs Demystified: Start Earning Today
Resolution Guidelines
Maximum (1080p) vs. Minimum (480p) Resolutions
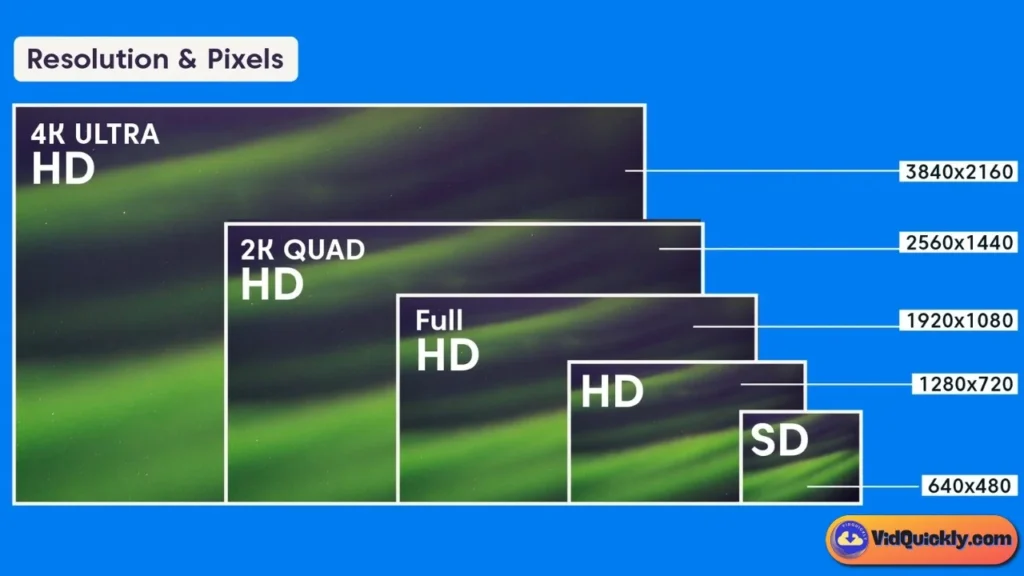
Resolution determines the clarity and detail of your video. OnlyFans supports a range of resolutions to cater to different content needs:
- Maximum Resolution: 1080p (1920 x 1080 pixels)
- Pros: Offers high-definition (HD) quality, making your videos crisp and professional.
- Ideal For: Detailed content, professional branding, and ensuring your audience enjoys the best possible viewing experience.
- Minimum Resolution: 480p (854 x 480 pixels)
- Pros: Smaller file sizes, quicker uploads, and lower bandwidth requirements.
- Ideal For: Quick content updates, tutorials, or when high resolution isn’t crucial.
Optimal Resolution for Balance Between Quality and File Size
For most creators, 720p (1280 x 720 pixels) strikes the perfect balance between quality and file size. It provides clear and sharp visuals without overwhelming your upload bandwidth or storage limits.
Why 720p?
- Efficient Quality: Clear enough for most viewing purposes without the need for excessive storage.
- Faster Uploads: Smaller files mean quicker upload times, keeping your content fresh and up-to-date.
- Universal Compatibility: Ensures your videos look good on both mobile devices and desktops.
Recommendation: Unless your content specifically benefits from higher resolution, 720p is generally the sweet spot for OnlyFans videos.
Frame Rate Standards
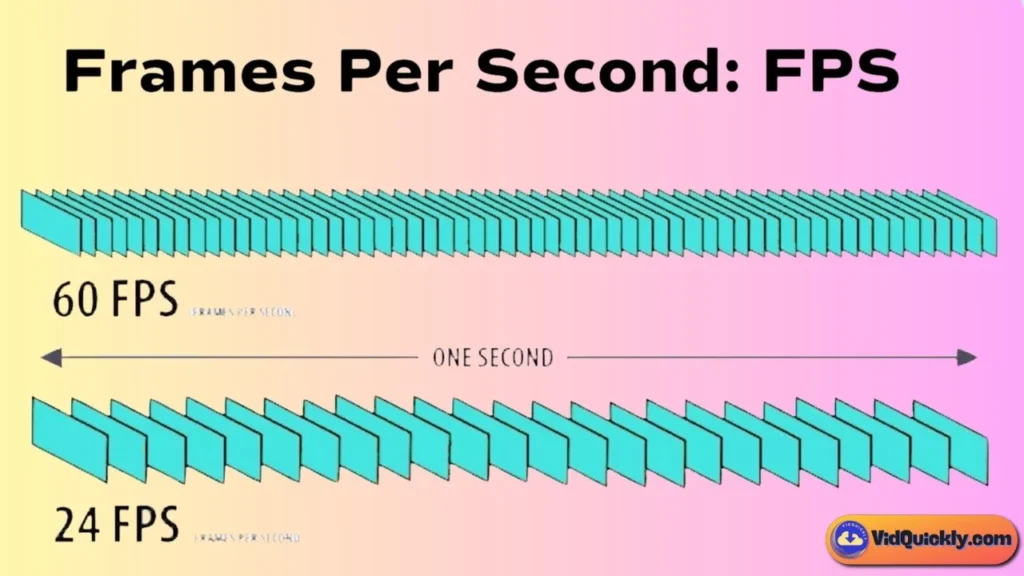
Recommended Frame Rates (30 fps)
A frame rate of 30 frames per second (fps) is the standard recommendation for OnlyFans videos. This frame rate provides smooth motion and is widely supported across all devices and platforms.
Benefits of 30 fps:
- Smooth Playback: Ensures that your videos look fluid and professional.
- Standardization: Aligns with most streaming and playback services, avoiding compatibility issues.
- Optimal Performance: Balances quality with file size and processing requirements.
Maximum Frame Rates (60 fps)
OnlyFans allows videos with frame rates up to 60 fps, which can be beneficial for certain types of content:
- Pros: Ideal for fast-paced or action-oriented videos, such as fitness routines or dynamic performances.
- Enhanced Clarity: Reduces motion blur, making movements appear sharper and more detailed.
Considerations:
- File Size: Higher frame rates result in larger file sizes, which can affect upload times and storage.
- Viewer’s Device: Ensure that your audience’s devices can handle higher frame rates for the best viewing experience.
Pro Tip: Stick to 30 fps for most content to maintain a balance between smoothness and file manageability. Use 60 fps selectively for content that truly benefits from the increased frame rate.
Bitrate Recommendations
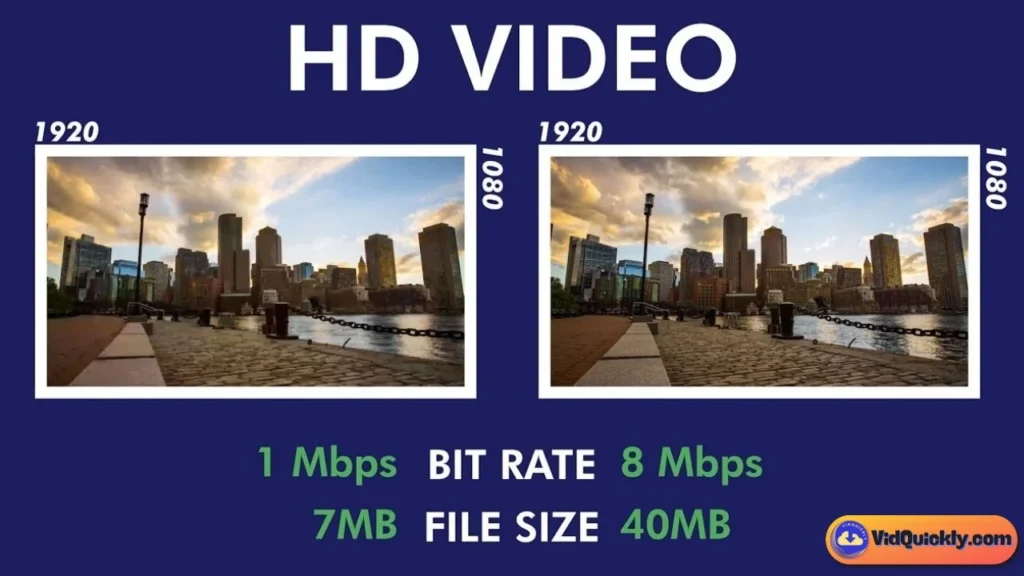
Optimal Bitrate for Different Resolutions
Bitrate controls the amount of data processed per second in your video, directly impacting quality and file size. Here are optimal bitrate settings based on resolution:
- 1080p (1920 x 1080)
- Bitrate: 3,500 kbps (kilobits per second)
- Why: Ensures high-definition clarity and detail, ideal for professional-looking content.
- 720p (1280 x 720)
- Bitrate: 2,500 kbps
- Why: Provides a good balance between quality and file size, perfect for most OnlyFans videos.
- 480p (854 x 480)
- Bitrate: 1,000 kbps
- Why: Suitable for quick uploads and smaller file sizes without sacrificing too much quality.
Adjusting Bitrate for Quality and Upload Speed
Finding the right bitrate is essential for optimizing both video quality and upload efficiency:
- High Bitrate: Enhances video quality but increases file size and upload time. Use for detailed, high-definition content.
- Lower Bitrate: Reduces file size and speeds up uploads but may compromise video clarity. Suitable for simpler or less detailed content.
Tips for Adjustment:
- Assess Your Content: High-action or detailed videos benefit from higher bitrates, while static or simple content can use lower bitrates.
- Test Uploads: Experiment with different bitrate settings to find the optimal balance for your specific needs and audience preferences.
- Consider Your Internet Speed: Ensure your upload bitrate aligns with your internet connection’s capabilities to avoid long upload times or failed uploads.
Pro Tip: Use video editing software to adjust and preview bitrate settings before finalizing your uploads, ensuring the best possible quality without unnecessary file size increases.
Audio Specifications
Preferred Audio Formats (AAC, MP3)
Clear and high-quality audio is just as important as sharp visuals. OnlyFans recommends using AAC or MP3 formats for audio to ensure compatibility and clarity.
- AAC (Advanced Audio Coding):
- Pros: Offers better sound quality at similar bitrates compared to MP3.
- Compatibility: Widely supported across devices and platforms.
- Use Case: Ideal for most OnlyFans content, providing crisp and clear audio.
- MP3:
- Pros: Universally compatible and widely recognized.
- Cons: Slightly lower audio quality compared to AAC at the same bitrate.
- Use Case: Suitable for content where audio fidelity is important but AAC is not available.
Sample Rates and Bitrates for Clear Audio
Proper audio settings ensure your viewers enjoy crisp and clear sound without distractions:
- Sample Rate:
- 44.1 kHz: Standard for most audio recordings, providing high-quality sound.
- 48 kHz: Preferred for video production, aligning with professional video standards.
- Bitrate:
- 128 kbps: Minimum for acceptable audio quality.
- 192 kbps or Higher: Ensures clear and rich audio, ideal for professional content and voice clarity.
Pro Tip: Always aim for at least a 44.1 kHz sample rate and 128 kbps bitrate. For the best results, especially if you’re speaking or using music, opt for 48 kHz and 192 kbps to enhance audio fidelity.
File Size Limitations

Maximum Upload Sizes
Understanding OnlyFans’ file size limits is crucial to ensure your content uploads successfully without unnecessary compression or loss of quality:
- Direct Uploads:
- Maximum File Size: Typically up to 100 MB per video.
- Impact: Larger files may require longer upload times and consume more bandwidth, potentially deterring frequent uploads.
- External Links:
- For Larger Files: If your video exceeds the direct upload limit, you can share it via external links (e.g., Google Drive, Dropbox).
- Benefits: Allows you to maintain high-quality video without compromising due to file size restrictions.
- Considerations: Ensure the external links are secure and accessible to your subscribers.
Solutions for Larger Files (e.g., External Links)
When dealing with larger video files, consider these strategies to manage file sizes effectively:
- Use Cloud Storage Services:
- Examples: Google Drive, Dropbox, OneDrive
- How: Upload your video to a cloud service and share the secure link with your subscribers.
- Benefits: Bypasses OnlyFans’ upload limits while keeping your content accessible.
- Compress Your Videos:
- Tools: HandBrake, Adobe Media Encoder
- How: Reduce file size by adjusting bitrate and resolution without significantly sacrificing quality.
- Benefits: Makes your video manageable for direct uploads, ensuring quicker access for your audience.
- Segment Your Content:
- How: Break longer videos into shorter segments to stay within file size limits.
- Benefits: Easier to upload and consume, keeping your audience engaged with regular content updates.
Pro Tip: Always preview your compressed videos to ensure the quality remains acceptable. Tools like HandBrake allow you to adjust compression settings to find the best balance between quality and file size.
Mastering OnlyFans video specifications is a foundational step toward creating professional and engaging content. By understanding and optimizing your file formats, resolutions, frame rates, bitrates, audio settings, and managing file sizes effectively, you set yourself up for success in building a loyal subscriber base and maximizing your earning potential.
Essential Equipment for High-Quality OnlyFans Videos
Creating standout content on OnlyFans isn’t just about creativity—it’s also about leveraging the right tools to ensure your videos look and sound professional. Investing in essential equipment can significantly enhance your production quality, helping you build a strong brand and attract more viewers.
Cameras
DSLR Cameras
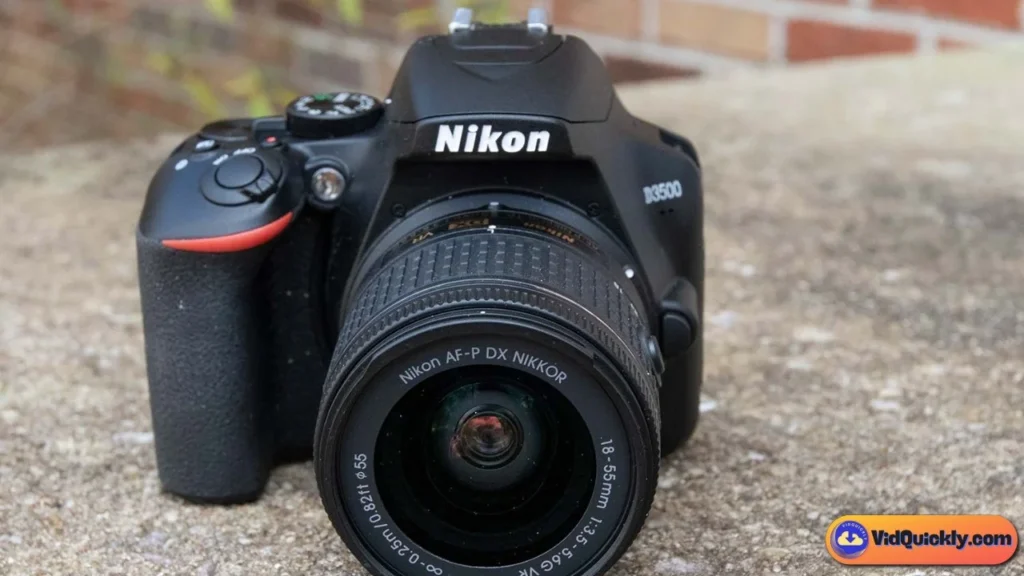
Benefits of DSLR Cameras
DSLR (Digital Single-Lens Reflex) cameras are a favorite among content creators for their exceptional image quality and versatility. They offer interchangeable lenses, manual controls for exposure and focus, and superior low-light performance, making them ideal for creating professional-grade videos.
Popular DSLR Models
- Canon EOS Rebel Series (e.g., T7i, T8i): Known for user-friendly interfaces and excellent autofocus.
- Nikon D3500: Offers great battery life and intuitive controls for beginners.
- Canon EOS 90D: A higher-end option with 4K video capabilities and robust build quality.
Pro Tip: When choosing a DSLR, consider factors like budget, ease of use, and the availability of lenses and accessories that match your content style.
Mirrorless Cameras
Advantages of Mirrorless Cameras
Mirrorless cameras are gaining popularity due to their compact design and advanced features. They offer high-quality video recording, faster autofocus systems, and lighter bodies compared to DSLRs, making them perfect for creators who need mobility without sacrificing performance.
Top Mirrorless Camera Choices
- Sony Alpha a6000 Series (e.g., a6400, a6600): Renowned for their excellent autofocus and video quality.
- Canon EOS M50 Mark II: Offers 4K recording and a vari-angle touchscreen, ideal for vlogging and dynamic shooting angles.
- Fujifilm X-T4: Known for its stunning color profiles and in-body image stabilization (IBIS).
Pro Tip: Mirrorless cameras often have better video features in a smaller package, making them a great choice for creators on the move.
High-Quality Smartphones
When to Use Smartphones
Modern smartphones come equipped with powerful cameras that can rival dedicated cameras in quality. They are perfect for creators who prioritize portability and ease of use without the need for extensive equipment.
Recommended Smartphone Models
- iPhone 14 Pro / Pro Max: Offers advanced camera systems with ProRAW and ProRes video capabilities.
- Samsung Galaxy S23 Ultra: Known for its high-resolution sensors and versatile camera modes.
- Google Pixel 7 Pro: Excellent for computational photography and video stabilization.
Pro Tip: Utilize smartphone accessories like external lenses and gimbals to enhance your mobile video production quality.
Action Cameras
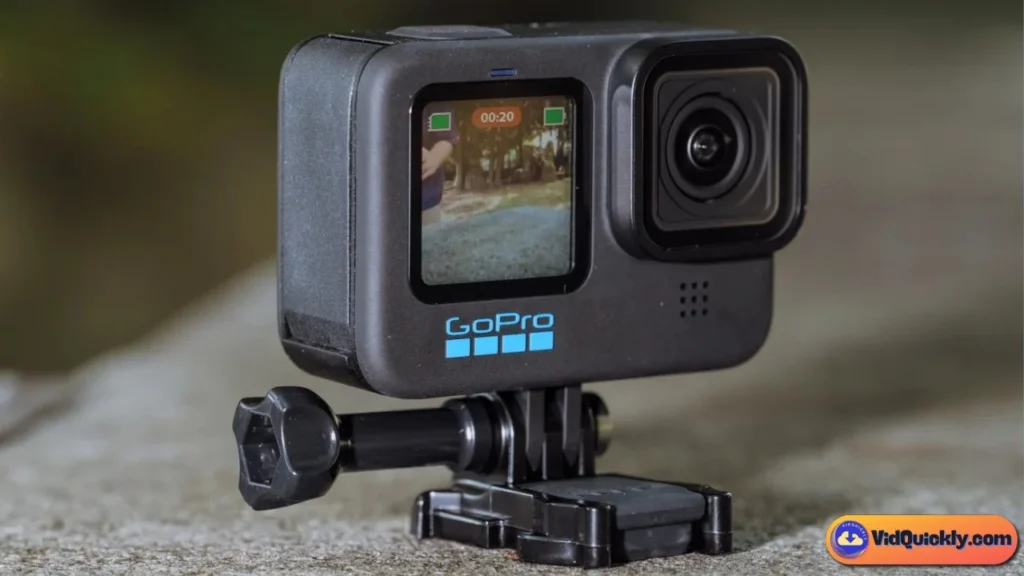
Use Cases for Action Cameras
Action cameras are designed for capturing dynamic and high-motion footage. They are compact, durable, and often waterproof, making them ideal for creators who incorporate action shots or need a versatile camera for various shooting environments.
Best Action Camera Options
- GoPro HERO10 Black: Offers superb stabilization and 5.3K video recording.
- DJI Osmo Action 3: Known for its front-facing screen and robust build quality.
- Insta360 ONE RS: Provides 360-degree recording and modular accessories for creative shooting.
Pro Tip: Action cameras are perfect for adding variety to your content, especially if you engage in activities that require mobility and resilience from your gear.
Lenses
Prime Lenses
Benefits for Depth of Field
Prime lenses, which have a fixed focal length, are celebrated for their ability to produce a shallow depth of field. This creates a beautiful bokeh effect, making your subject stand out against a blurred background, enhancing the visual appeal of your videos.
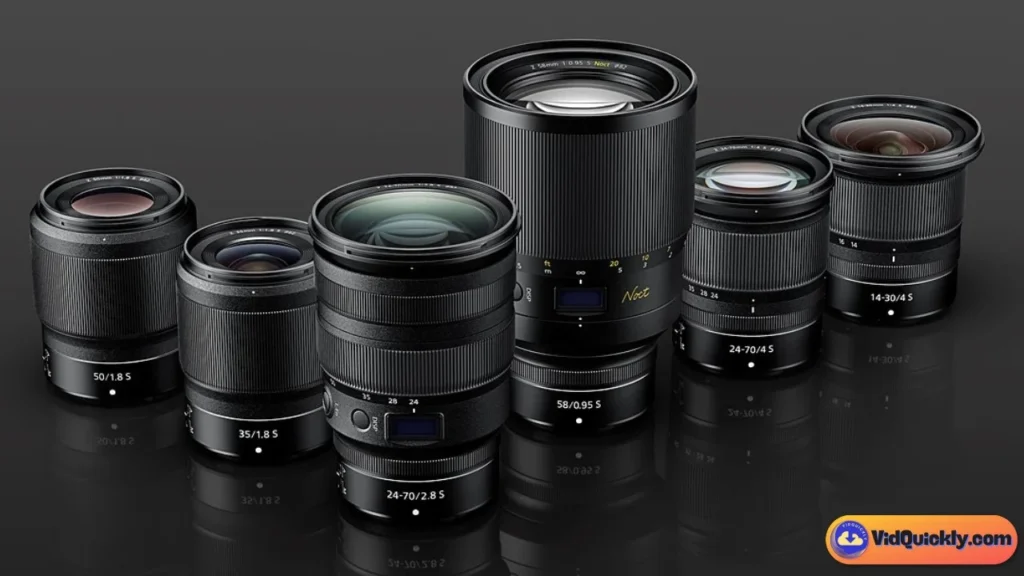
Popular Prime Lenses:
- 50mm f/1.8: Affordable and great for portraits and general use.
- 35mm f/1.4: Offers a wider field of view with excellent low-light performance.
- 85mm f/1.4: Perfect for tight shots and creating a professional look.
Pro Tip: Prime lenses are excellent for controlled environments where you want to emphasize your subject with minimal background distractions.
Zoom Lenses
Versatility in Shooting
Zoom lenses provide the flexibility to adjust the focal length, allowing you to capture a variety of shots without changing lenses. This versatility is beneficial for creators who shoot in different environments and need to quickly adapt to varying framing requirements.
Popular Zoom Lenses:
- 24-70mm f/2.8: A versatile range suitable for a wide array of shooting scenarios.
- 70-200mm f/2.8: Ideal for capturing distant subjects with stunning clarity.
- 18-55mm f/3.5-5.6: A budget-friendly option for beginners.
Pro Tip: Zoom lenses are perfect for creators who require flexibility in their shots, enabling smooth transitions between wide and close-up views.
Wide-Angle Lenses
Creative Shot Opportunities
Wide-angle lenses offer a broader field of view, allowing you to capture more of your environment. They are excellent for creative compositions, vlogging, and showcasing elaborate setups or backdrops.
Popular Wide-Angle Lenses:
- 16-35mm f/2.8: Great for expansive shots and low-light conditions.
- 10-18mm f/4.5-5.6: Perfect for ultra-wide perspectives and unique creative angles.
- 14mm f/1.8: Combines wide-angle with excellent low-light performance.
Pro Tip: Use wide-angle lenses to add depth and context to your videos, making your content more engaging and visually interesting.
Stabilization Tools
Tripods
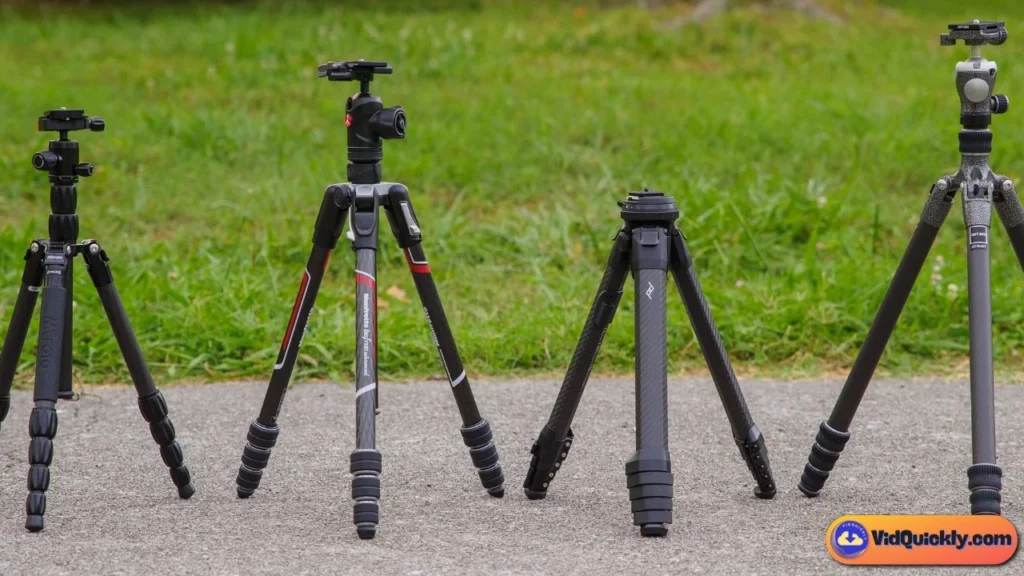
Importance for Stable Shots
A sturdy tripod is essential for maintaining stable and consistent shots, eliminating camera shake, and ensuring professional-looking videos. It allows for precise framing and hands-free operation, which is crucial for content creators who need to perform or interact with the camera.
Recommended Tripod Models
- Manfrotto Compact Action: Lightweight and versatile, perfect for beginners.
- Joby GorillaPod 5K: Flexible legs allow for creative positioning on uneven surfaces.
- Neewer Carbon Fiber Tripod: Durable and lightweight, suitable for both photography and videography.
Pro Tip: Invest in a tripod with adjustable height and smooth pan features to enhance your shooting flexibility and control.
Gimbals and Stabilizers
For Dynamic and Handheld Shooting
Gimbals and stabilizers are designed to provide smooth and steady footage, even during movement. They are ideal for creators who shoot handheld or need to incorporate dynamic camera movements without sacrificing video quality.
Top Gimbals and Stabilizers
- DJI Ronin-S: Offers excellent stabilization and is compatible with a wide range of cameras.
- Zhiyun Smooth 4: Perfect for smartphone videography with advanced control features.
- Moza AirCross 2: Lightweight and versatile, suitable for mirrorless and DSLR cameras.
Pro Tip: Gimbals are perfect for vlog-style videos, live performances, or any content that involves movement, ensuring your footage remains fluid and professional.
Lighting Equipment
Ring Lights
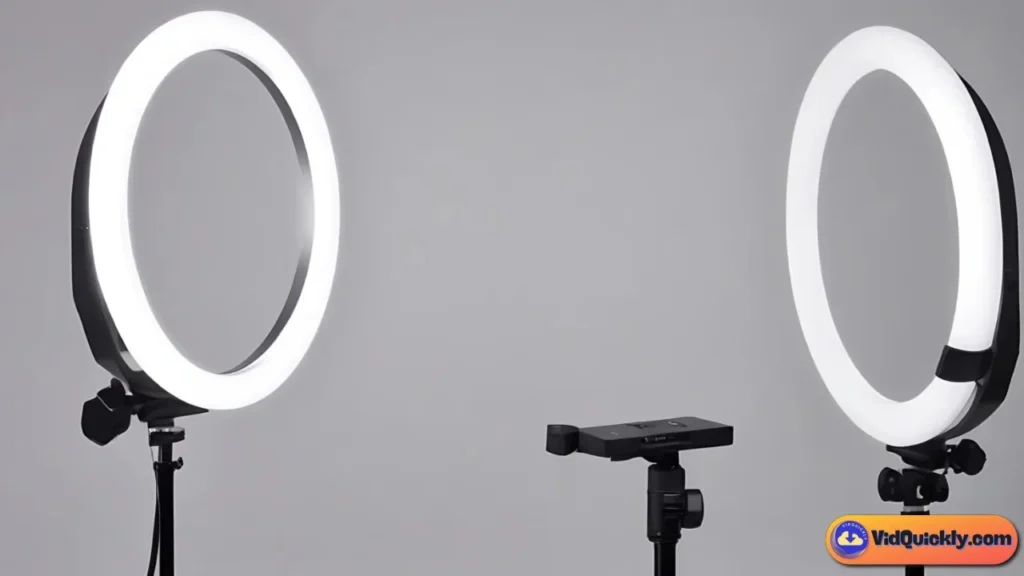
Pros and Cons
Ring lights are popular for their ability to provide even, flattering lighting, especially for beauty and portrait videos. They create a soft, diffused light that minimizes shadows and enhances facial features.
Pros:
- Even Lighting: Reduces harsh shadows and provides a consistent light source.
- Enhanced Eye Detail: Creates a distinct catchlight in the eyes, adding depth and vibrancy.
- Ease of Use: Simple setup with adjustable brightness and color temperature.
Cons:
- Ring Reflection: Can produce a noticeable ring-shaped reflection in the eyes, which may not be desirable for all content types.
- Limited Coverage: Best suited for front-facing shots and may not adequately illuminate larger scenes.
Recommended Ring Lights:
- Neewer Ring Light Kit: Offers adjustable brightness and multiple color temperature settings.
- Diva Ring Light Super Nova: Known for its professional quality and durability.
Pro Tip: Position the ring light at eye level and slightly in front of the camera to achieve the most flattering and professional lighting.
Softbox Lights

Advantages for Diffused Lighting
Softbox lights provide soft, diffused lighting that mimics natural light, making them ideal for creating a professional and polished look. They help in reducing harsh shadows and providing even illumination across your scene.
Pros:
- Soft and Even Light: Creates a natural and flattering light that enhances the overall quality of your video.
- Versatility: Can be used for various shooting scenarios, including interviews, product showcases, and more.
- Adjustable Settings: Many softbox kits offer adjustable brightness and color temperature.
Cons:
- Size and Portability: Softboxes are typically larger and less portable compared to other lighting options.
- Setup Complexity: Requires more time and space to set up correctly.
Recommended Softbox Lights:
- Fovitec Softbox Lighting Kit: Comes with multiple softboxes and adjustable stands for versatile lighting setups.
- Godox Softbox Kit: Known for its durability and high-quality light diffusion.
Pro Tip: Use multiple softbox lights at different angles to create depth and dimension in your videos, enhancing the visual appeal.
LED Panels

Flexibility and Adjustability
LED panels are highly versatile lighting tools that offer adjustable brightness and color temperature, making them suitable for a wide range of shooting conditions. They are lightweight and often portable, allowing for easy setup and repositioning.
Pros:
- Adjustable Brightness and Color Temperature: Allows for precise control over the lighting environment.
- Energy-Efficient: Consumes less power while providing ample illumination.
- Compact and Portable: Easy to move and set up in different locations.
Cons:
- Less Soft Light: May require additional diffusion to achieve the same softness as softbox or ring lights.
- Potential for Heat: Some LED panels can generate heat during prolonged use, requiring adequate ventilation.
Recommended LED Panels:
- Neewer LED Video Light: Offers adjustable brightness and color temperature with a slim design.
- Aputure AL-M9: A compact and portable option perfect for on-the-go shooting.
Pro Tip: Combine LED panels with diffusers or softboxes to create a softer and more natural lighting effect for your videos.
Portable Lighting Kits
On-the-Go Shooting Solutions
Portable lighting kits are essential for creators who shoot in various locations and need reliable lighting solutions that are easy to transport. These kits often include compact lights, stands, and mounting options, providing flexibility without sacrificing quality.
Pros:
- Portability: Lightweight and easy to carry, perfect for mobile creators.
- Versatile Mounting Options: Can be attached to cameras, tripods, or other equipment.
- Quick Setup: Designed for fast and hassle-free setup in different environments.
Cons:
- Limited Power: Portable lights may have lower brightness compared to larger lighting setups.
- Battery Dependency: Some portable kits rely on battery power, which may require frequent recharging.
Recommended Portable Lighting Kits:
- Aputure Amaran Portable Kit: Includes compact LED lights with adjustable settings, ideal for mobile shooting.
- Lume Cube Lighting Kit: Durable and waterproof, perfect for outdoor and adventurous shoots.
Pro Tip: Invest in portable lighting kits with rechargeable batteries and multiple mounting options to maximize their usability across various shooting scenarios.
Audio Equipment
External Microphones
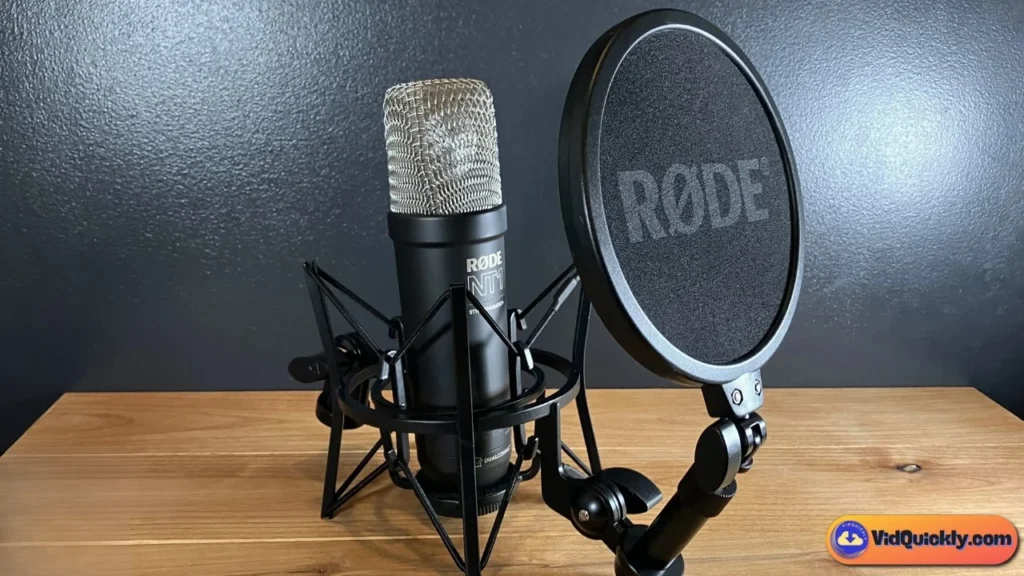
Types: Lavalier, Shotgun, USB Condenser
High-quality audio is crucial for maintaining viewer engagement and professionalism in your videos. External microphones provide superior sound quality compared to built-in camera or smartphone mics, ensuring clear and crisp audio.
Lavalier (Lapel) Mics:
- Pros: Discreet and hands-free, perfect for interviews and on-the-move recording.
- Cons: Limited range and may pick up ambient noise.
- Recommended Models: Rode SmartLav+, Sennheiser ClipMic.
Shotgun Mics:
- Pros: Directional audio capture, reducing background noise and focusing on the subject’s voice.
- Cons: Typically require mounting on a camera or boom pole.
- Recommended Models: Rode VideoMic Pro, Deity V-Mic D3 Pro.
USB Condenser Mics:
- Pros: High-quality audio for voiceovers and streaming, easy to use with computers.
- Cons: Less portable, requires a stable setup.
- Recommended Models: Blue Yeti, Audio-Technica AT2020USB+.
Pro Tip: Choose a microphone type that best suits your recording environment and content style to achieve optimal audio clarity.
Audio Recorders
Benefits and Top Choices
Audio recorders are essential for capturing high-quality sound separately from your camera, allowing for greater control in post-production. They offer multiple input options and professional-grade sound quality, making them ideal for creators who prioritize audio excellence.
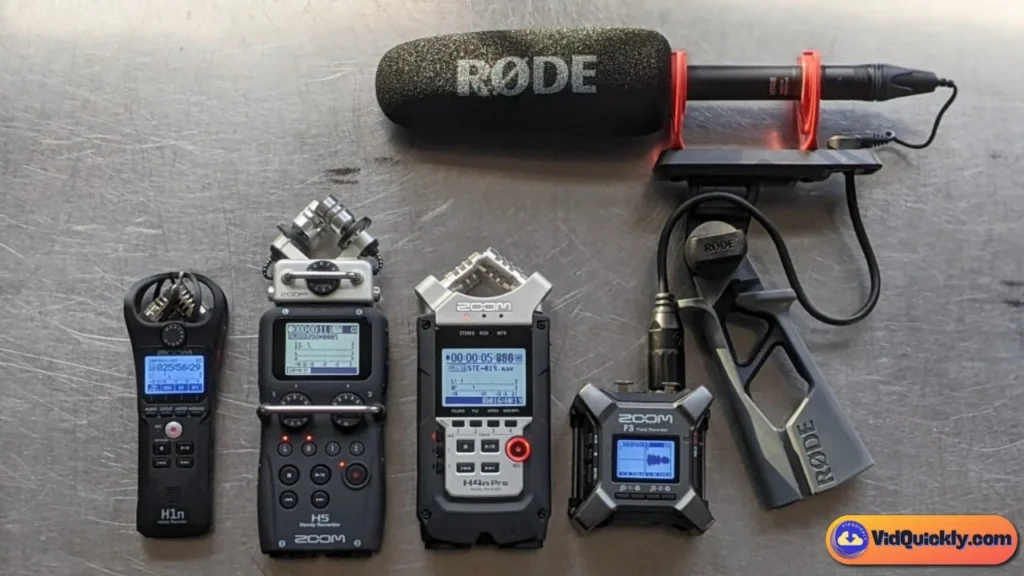
Benefits:
- Superior Sound Quality: Captures clear and detailed audio, enhancing the overall production value.
- Multiple Inputs: Allows for recording from various sources simultaneously.
- Portability: Compact and easy to transport for on-location shoots.
Top Audio Recorders:
- Zoom H4n Pro: Versatile with multiple input options and high-quality recording capabilities.
- Tascam DR-05X: User-friendly with excellent sound quality and durability.
- Sony PCM-A10: Compact and wireless, ideal for creators on the go.
Pro Tip: Use audio recorders in conjunction with external microphones to capture the best possible sound, and ensure synchronization during editing.
Pop Filters and Windshields
Importance for Clean Audio
Pop filters and windshields are essential accessories for enhancing audio quality by reducing unwanted sounds such as plosives (e.g., “p” and “b” sounds) and wind noise. They ensure that your recordings are smooth and free from distracting artifacts.
Pop Filters:
- Purpose: Placed in front of microphones to diffuse harsh plosive sounds, preventing audio distortion.
- Recommended Models: Aokeo Professional Pop Filter, Stedman Proscreen XL.
Windshields:
- Purpose: Used primarily for outdoor recordings to minimize wind noise and protect the microphone from moisture.
- Recommended Models: Rode DeadCat, Movo WS-2.
Pro Tip: Always use a pop filter when recording close-mic to ensure clear and professional-sounding audio, especially for voice-centric content.
Backdrops and Props
Backdrops
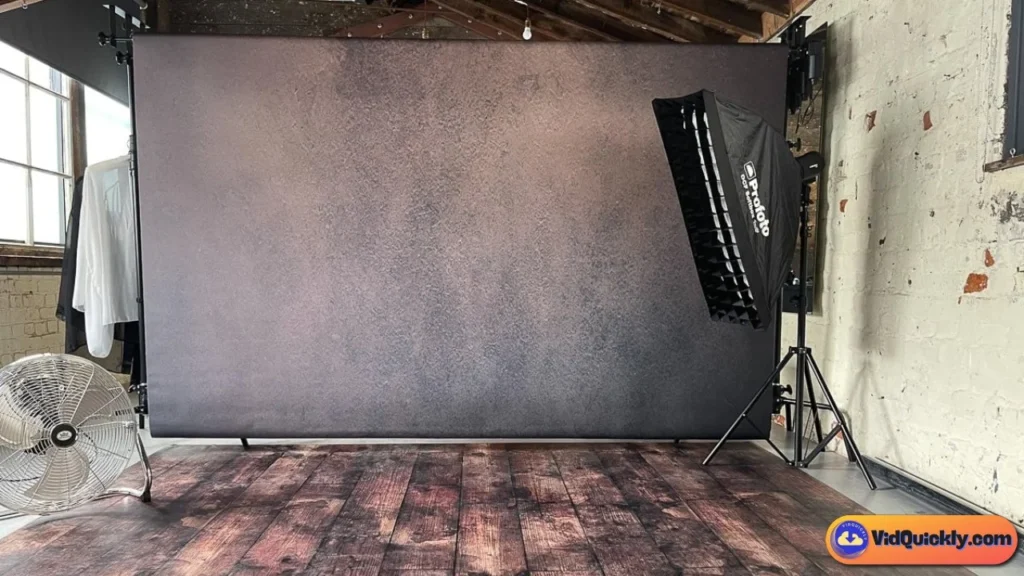
Types and Purposes
Backdrops play a crucial role in setting the scene and enhancing the visual appeal of your videos. They provide a consistent background, allowing your content to stand out and look professional.
Types of Backdrops:
- Solid Colors: Simple and versatile, ideal for focusing attention on the subject.
- Patterned: Adds texture and interest without being overly distracting.
- Green Screens: Enables creative post-production effects and virtual backgrounds.
- Thematic Backdrops: Customized designs that reflect your brand or content theme.
Recommended Backdrop Options:
- Solid Color Paper Backdrops: Available in various colors, easy to set up and replace.
- Collapsible Green Screens: Portable and convenient for dynamic shooting environments.
- Vinyl Backdrops: Durable and easy to clean, suitable for frequent use.
Pro Tip: Choose a backdrop that complements your content style and brand identity, and ensure it is free from wrinkles and distractions for the best visual impact.
Props
Enhancing Visual Appeal
Props can significantly enhance the storytelling and engagement of your videos by adding context, creativity, and personality. They help in making your content more dynamic and visually interesting.
Types of Props:
- Furniture: Chairs, tables, and decorative pieces to create a comfortable and appealing setup.
- Thematic Accessories: Items that align with your content theme, such as books, gadgets, or fashion accessories.
- Decorative Items: Plants, artwork, and lighting accents to add depth and character to your scenes.
- Interactive Props: Items that you can use or interact with during your videos to engage viewers.
Pro Tip: Use props sparingly and purposefully to enhance your content without cluttering the scene. Ensure they are relevant to your message and contribute to the overall aesthetic.
Editing Hardware and Software
Computers and Laptops
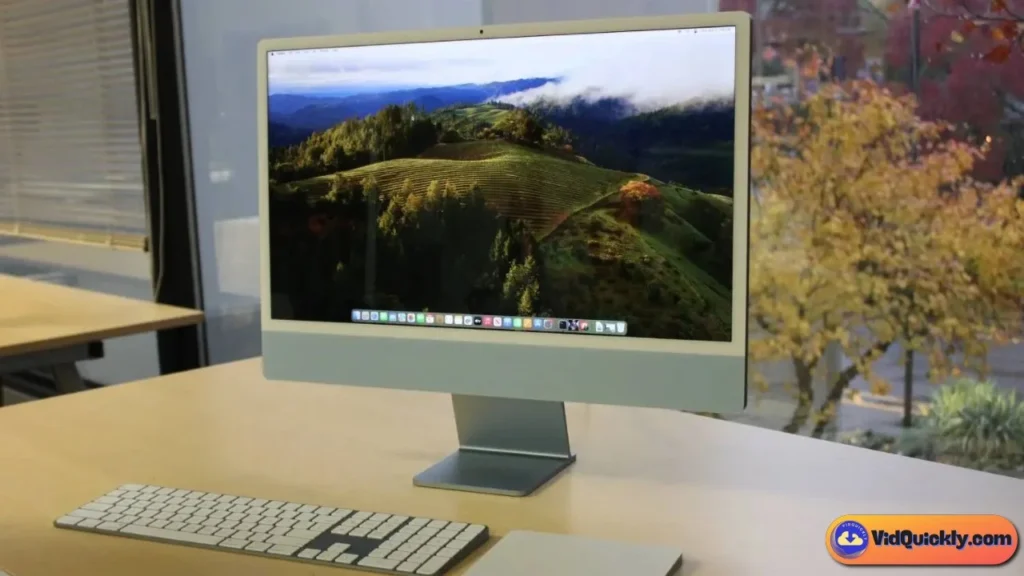
Minimum Specifications for Editing
A powerful computer is essential for smooth and efficient video editing. Investing in a machine with adequate processing power, memory, and storage ensures that you can handle high-resolution videos and complex editing tasks without lag or crashes.
Recommended Specifications:
- Processor: Intel i7 or AMD Ryzen 7 (or higher) for fast rendering and multitasking.
- RAM: At least 16GB, preferably 32GB for handling large files and intensive applications.
- Storage: SSDs (Solid State Drives) for faster data access and file transfers, with at least 512GB capacity.
- Graphics Card: Dedicated GPU (e.g., NVIDIA GeForce RTX series) to accelerate video rendering and effects processing.
Recommended Computers:
- Apple MacBook Pro (16-inch, M1 Pro/M1 Max): Known for its powerful performance and seamless integration with video editing software.
- Dell XPS 15: Offers robust hardware specifications and a high-quality display.
- HP Spectre x360: A versatile and powerful laptop suitable for both editing and on-the-go use.
Pro Tip: If you’re using resource-intensive editing software, prioritize a high-performance CPU and ample RAM to ensure smooth and efficient workflows.
External Storage Solutions
Importance of Backups and Fast Access
External storage is vital for managing large video files, ensuring quick access during editing, and safeguarding your content through reliable backups. It helps in organizing your projects and prevents data loss due to hardware failures or accidental deletions.
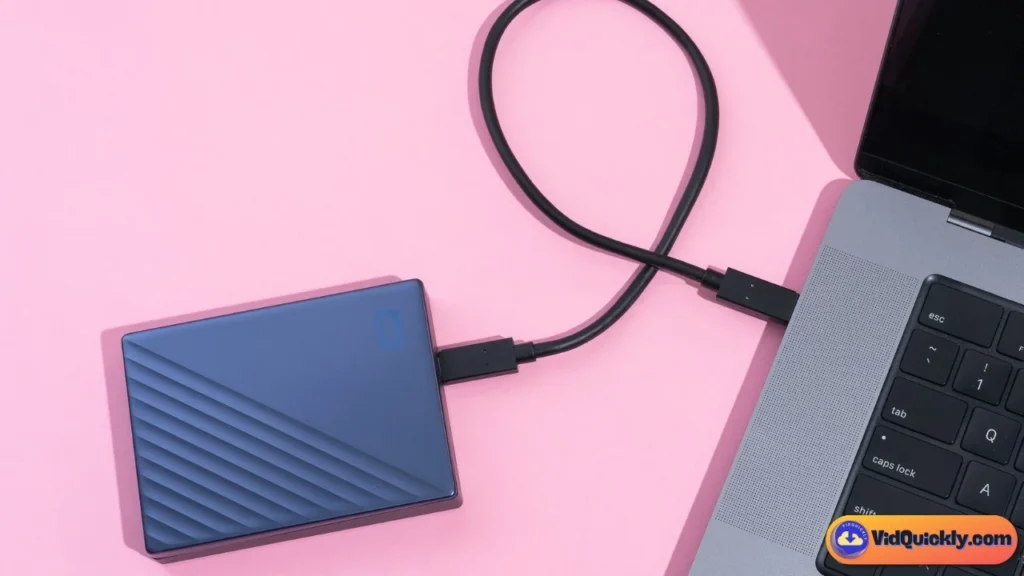
Types of External Storage:
- External Hard Drives (HDDs): Offer large storage capacities at affordable prices, suitable for bulk storage.
- Solid State Drives (SSDs): Provide faster data transfer speeds and better durability, ideal for active editing projects.
- Network Attached Storage (NAS): Allows for centralized storage and easy access from multiple devices, perfect for collaborative workflows.
Recommended External Storage Solutions:
- Samsung T7 Portable SSD: Compact, fast, and reliable for on-the-go storage needs.
- Western Digital My Passport HDD: Offers high storage capacity and robust data protection.
- Seagate Backup Plus Hub: Combines high-capacity storage with additional USB ports for device connectivity.
Pro Tip: Implement a 3-2-1 backup strategy: keep three copies of your data, store two on different media, and keep one offsite to ensure maximum data security.
Video Editing Software
Professional vs. Beginner-Friendly Options
Choosing the right video editing software is crucial for creating polished and engaging content. Whether you’re a seasoned editor or just starting, there’s software tailored to your skill level and needs.
Professional Editing Software:
- Adobe Premiere Pro: Industry-standard with a comprehensive set of tools and seamless integration with other Adobe products.
- Final Cut Pro X: Optimized for Mac users, offering powerful editing features and efficient performance.
- DaVinci Resolve: Known for its advanced color grading and professional editing capabilities, available in both free and paid versions.
Beginner-Friendly Editing Software:
- iMovie: Free for Mac users, offering intuitive tools and basic editing features.
- Filmora: User-friendly interface with a good balance of features and simplicity.
- Adobe Premiere Elements: Simplified version of Premiere Pro, suitable for beginners looking to learn the basics.
Pro Tip: Start with beginner-friendly software to build your editing skills, then transition to professional tools as your proficiency and project complexity grow.
Additional Accessories
Reflectors
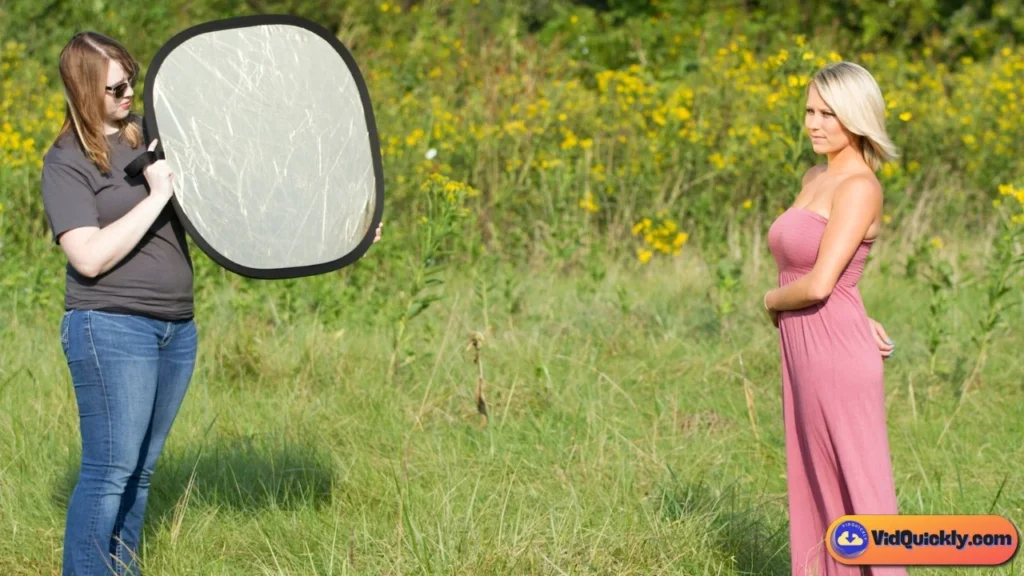
Purpose and Benefits
Reflectors are essential for manipulating natural or artificial light to enhance your video’s lighting setup. They help in reducing shadows, highlighting your subject, and adding a professional touch to your lighting scheme.
Types of Reflectors:
- Circular Reflectors: Offer versatile angles and easy handling for various shooting scenarios.
- Foldable Reflectors: Portable and easy to store, perfect for on-the-go adjustments.
- Tri-fold Reflectors: Provide multiple surfaces (e.g., white, silver, gold) for different lighting effects.
Recommended Reflectors:
- Neewer 5-in-1 Reflector: Versatile and includes multiple surfaces for different lighting needs.
- Westcott 40-Inch 5-in-1 Reflector: Durable and easy to use, ideal for both studio and outdoor shoots.
Pro Tip: Use reflectors to bounce light onto your subject’s face, enhancing highlights and reducing unwanted shadows for a more balanced and professional look.
Teleprompters
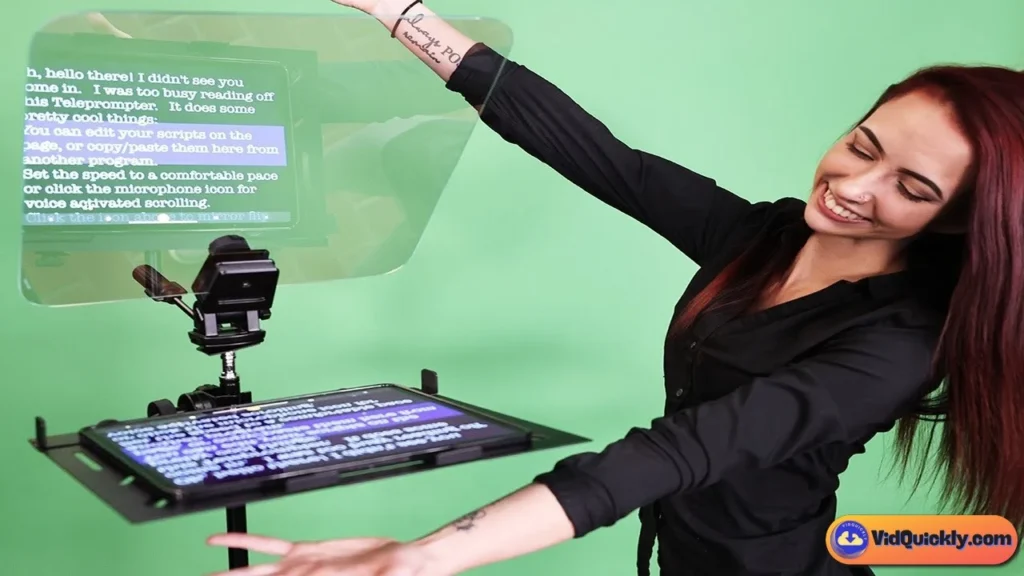
Enhancing Scripted Content Delivery
Teleprompters are invaluable for creators who deliver scripted content, ensuring smooth and confident delivery while maintaining eye contact with the camera. They help in presenting information clearly without the need for memorization.
Recommended Teleprompters:
- Glide Gear TMP100: Compatible with most smartphones and tablets, offering adjustable settings for ease of use.
- Parrot Teleprompter: Compact and portable, perfect for on-the-go scripting needs.
Pro Tip: Position the teleprompter directly in front of the camera lens to maintain natural eye contact with your audience, enhancing engagement and professionalism.
Cables and Adapters
Ensuring Seamless Connectivity
Having the right cables and adapters is crucial for connecting various equipment, ensuring compatibility, and maintaining optimal performance during shoots.
Essential Cables and Adapters:
- HDMI Cables: For connecting cameras to external monitors or recorders.
- USB Cables: For data transfer and connecting peripherals like microphones and audio interfaces.
- Audio Adapters: For integrating external microphones with different devices.
- Power Adapters: To ensure your equipment receives consistent power during extended shoots.
Recommended Brands:
- Anker PowerLine: Known for durability and reliability.
- AmazonBasics: Affordable and reliable options for everyday use.
- Belkin Adapters: High-quality adapters for various connectivity needs.
Pro Tip: Invest in high-quality cables to prevent connectivity issues and ensure reliable performance, especially during long shoots or live recordings.
Power Solutions
Ensuring Continuous Power Supply
Reliable power solutions are essential for maintaining uninterrupted shooting sessions, especially when using multiple devices that consume significant power.
Power Solutions:
- Portable Power Banks: Provide on-the-go charging for smartphones, cameras, and other portable devices.
- Extra Batteries: Essential for cameras and other equipment to extend shooting time without relying on mains power.
- AC Adapters: Ensure a stable power supply for stationary setups, reducing the risk of power interruptions.
Recommended Power Solutions:
- Anker PowerCore 20100mAh: High-capacity power bank suitable for charging multiple devices.
- Canon LP-E6N Batteries: Reliable extra batteries for Canon DSLR cameras.
- RAVPower AC Adapters: Durable and efficient adapters for various electronic devices.
Pro Tip: Always have backup power sources available, especially during long shoots or when filming in locations without easy access to power outlets.
Investing in the right equipment is a pivotal step in enhancing your OnlyFans video quality. By prioritizing high-quality cameras, lenses, stabilization tools, lighting, audio equipment, backdrops, editing hardware, and additional accessories, you can create professional and engaging content that resonates with your audience.
Remember to continually assess and upgrade your setup as your content evolves to maintain and improve the quality of your offerings.
Step-by-Step Tips to Enhance OnlyFans Video Quality
Creating captivating content on OnlyFans requires more than just a great idea—it demands meticulous planning and execution. By following these step-by-step tips, you can enhance your video quality, engage your audience, and boost your earnings. Let’s break down each aspect to help you produce professional and enticing videos.
Planning Your Content

Storyboarding and Scripting
Planning is the cornerstone of any successful video. Storyboarding and scripting help you visualize your content and ensure a smooth production process.
- Storyboarding:
- Visual Planning: Sketch out each scene or shot to visualize the flow of your video. This helps in organizing your ideas and ensuring that your content is cohesive.
- Scene Breakdown: Identify key moments, transitions, and angles. This minimizes the chances of missing essential shots during filming.
- Time Management: Allocate specific time slots for each scene to keep your video concise and engaging.
- Scripting:
- Dialogue and Narration: Write down what you’ll say to ensure clear and confident delivery. A script helps in maintaining focus and avoiding unnecessary pauses.
- Action Cues: Include notes on actions, movements, and gestures to complement your dialogue. This enhances the visual appeal and keeps viewers interested.
- Flow and Structure: Organize your script with a clear beginning, middle, and end. This provides a logical progression and keeps your audience engaged from start to finish.
Pro Tip: Use free tools like Storyboard That or Canva to create digital storyboards, making it easier to visualize and share your ideas.
Understanding Your Audience
Knowing your audience is crucial for creating content that resonates and engages.
- Demographics:
- Age and Gender: Tailor your content style, language, and themes to match the preferences of your primary audience.
- Interests and Preferences: Understand what your subscribers enjoy—be it fitness, lifestyle, beauty, or exclusive behind-the-scenes content.
- Engagement Patterns:
- Content Consumption: Identify the types of videos your audience prefers (e.g., tutorials, vlogs, live streams) and the optimal length for engagement.
- Feedback and Preferences: Regularly seek feedback through polls, comments, and direct messages to understand what works and what doesn’t.
- Behavioral Insights:
- Peak Activity Times: Upload your videos when your audience is most active to maximize visibility and engagement.
- Subscription Trends: Analyze which types of content lead to higher subscription rates and tailor your strategy accordingly.
Pro Tip: Utilize OnlyFans’ analytics tools to gain insights into your audience’s behavior and preferences, allowing you to create more targeted and effective content.
Setting Up Your Shooting Environment
Choosing the Right Location

The environment where you shoot your videos significantly impacts the overall quality and appeal.
- Lighting Considerations:
- Natural Light: Choose locations with ample natural light, such as near large windows. Natural light provides a soft and flattering illumination.
- Control Over Lighting: Select spaces where you can control the lighting conditions to avoid unwanted shadows and glare.
- Noise Levels:
- Quiet Spaces: Opt for quiet environments to minimize background noise, ensuring clear audio quality.
- Soundproofing: Use rooms with carpets, curtains, and soft furnishings to absorb sound and reduce echo.
- Aesthetic Appeal:
- Clean and Organized: Keep your shooting area tidy and clutter-free to maintain a professional look.
- Thematic Decor: Decorate your space to match your brand or content theme, making your videos more visually appealing.
Pro Tip: Create a dedicated shooting space that can be easily set up and modified, allowing for quick transitions between different types of content.
Managing Background and Props
A well-managed background and thoughtfully chosen props enhance the visual storytelling of your videos.
- Background Setup:
- Consistent Backdrops: Use consistent backgrounds to create a recognizable and professional brand image.
- Green Screens: Incorporate green screens for creative post-production effects and versatile background options.
- Using Props:
- Relevant Props: Select props that complement your content and add value to your storytelling. For example, use fitness equipment for workout videos or beauty products for makeup tutorials.
- Minimalism: Avoid overcrowding the scene with too many props. Focus on a few key items that enhance your content without causing distractions.
- Organization:
- Easy Access: Keep your props organized and easily accessible to streamline your shooting process.
- Storage Solutions: Use shelves, drawers, or storage boxes to neatly arrange your props and maintain a clutter-free environment.
Pro Tip: Rotate your props and background elements periodically to keep your content fresh and interesting for returning subscribers.
Optimizing Lighting
Balancing Natural and Artificial Light
Achieving the right lighting balance is essential for high-quality video production.
- Natural Light:
- Advantages: Provides soft, flattering illumination that enhances skin tones and reduces harsh shadows.
- Challenges: Can be inconsistent due to weather changes and time of day. Position yourself to make the most of available natural light.
- Artificial Light:
- Supplementing Natural Light: Use artificial lights to fill in shadows and maintain consistent lighting, especially when natural light is insufficient.
- Types of Artificial Lights:
- Key Light: The primary light source that illuminates the subject.
- Fill Light: Softens shadows created by the key light.
- Back Light: Adds depth by separating the subject from the background.
Pro Tip: Use a combination of natural and artificial lighting to create a balanced and professional look. Experiment with different light sources to find the optimal setup for your content.
Avoiding Shadows and Glare
Proper lighting setup minimizes unwanted shadows and glare, ensuring clear and visually appealing videos.
- Shadow Reduction:
- Soft Lighting: Utilize softbox lights or diffusers to spread light evenly and reduce harsh shadows.
- Multiple Light Sources: Position multiple lights at different angles to minimize shadow formation and create a more balanced illumination.
- Glare Prevention:
- Angle Adjustment: Adjust the angle of your lights to prevent direct glare on reflective surfaces or the camera lens.
- Polarizing Filters: Use polarizing filters on your lenses to reduce glare and improve image clarity.
Pro Tip: Test your lighting setup before recording by taking sample shots. Adjust the positions and intensities of your lights until you achieve a shadow-free and glare-free environment.
Ensuring Stable Footage

Proper Use of Tripods and Stabilizers
Stability is crucial for professional-looking videos. Using the right equipment ensures smooth and steady footage.
- Tripods:
- Steady Base: Provides a stable platform for your camera, eliminating shaky footage.
- Adjustable Height and Angles: Allows for precise framing and consistent shot composition.
- Stabilizers and Gimbals:
- Handheld Stability: Gimbals help in capturing smooth footage while moving, perfect for dynamic shots.
- Versatility: Suitable for both smartphones and dedicated cameras, offering flexibility in various shooting scenarios.
Recommended Equipment:
- Manfrotto Compact Action Tripod: Lightweight and versatile, ideal for beginners.
- DJI Ronin-S Gimbal: Excellent stabilization for DSLRs and mirrorless cameras.
- Zhiyun Smooth 4: Perfect for smartphone videography with advanced control features.
Pro Tip: Invest in a good-quality tripod and gimbal to ensure consistent and professional-looking footage. Practice using these tools to maximize their benefits in your shooting process.
Techniques for Smooth Camera Movements
Even with stabilization tools, applying the right techniques can further enhance the smoothness of your footage.
- Slow Panning and Tilting:
- Controlled Movements: Move the camera slowly and steadily to avoid abrupt shifts that can disorient viewers.
- Purposeful Angles: Use panning and tilting to guide the viewer’s attention to specific areas or actions within the frame.
- Tracking Shots:
- Following Movement: Smoothly track your subject as they move, maintaining a consistent distance and angle.
- Use of Gimbals: Utilize gimbals to achieve fluid tracking shots without camera shake.
- Over-the-Shoulder Shots:
- Engaging Perspective: Position the camera over your shoulder to create an immersive and engaging viewpoint.
- Depth and Context: Adds depth to your videos by including elements of the environment or interaction with props.
Pro Tip: Plan your camera movements in advance and rehearse them to ensure smooth and natural transitions during filming. Avoid sudden or jerky movements that can disrupt the viewer’s experience.
Enhancing Audio Quality
Selecting the Right Microphone
Clear and crisp audio is essential for maintaining viewer engagement and professionalism.
- Types of Microphones:
- Lavalier (Lapel) Mics:
- Pros: Discreet and hands-free, ideal for interviews and on-the-move recording.
- Cons: Limited range and may pick up ambient noise.
- Recommended Models: Rode SmartLav+, Sennheiser ClipMic Digital.
- Shotgun Mics:
- Pros: Directional audio capture, reducing background noise and focusing on the subject’s voice.
- Cons: Typically require mounting on a camera or boom pole.
- Recommended Models: Rode VideoMic Pro, Deity V-Mic D3 Pro.
- USB Condenser Mics:
- Pros: High-quality audio for voiceovers and streaming, easy to use with computers.
- Cons: Less portable, requires a stable setup.
- Recommended Models: Blue Yeti, Audio-Technica AT2020USB+.
- Lavalier (Lapel) Mics:
Pro Tip: Choose a microphone that best suits your recording environment and content style. For on-camera speaking, lavalier mics offer convenience, while shotgun mics are ideal for controlled environments with minimal background noise.
Minimizing Background Noise
Reducing unwanted sounds ensures your audio remains clear and professional.
- Environment Control:
- Quiet Location: Select a quiet room away from traffic, appliances, and other noise sources.
- Soundproofing: Use rugs, curtains, and soft furnishings to absorb sound and minimize echo.
- Microphone Techniques:
- Proper Placement: Position your microphone close to the sound source to capture clear audio while reducing ambient noise.
- Use Pop Filters: Attach pop filters to your microphones to eliminate plosive sounds and reduce sibilance.
- Post-Production Tools:
- Noise Reduction Software: Use tools like Audacity or Adobe Audition to remove background noise during editing.
- Equalization (EQ): Adjust EQ settings to enhance voice clarity and reduce unwanted frequencies.
Pro Tip: Conduct a soundcheck before recording to identify and mitigate potential noise issues. Adjust microphone placement and environmental factors to achieve the best possible audio quality.
Capturing High-Quality Footage
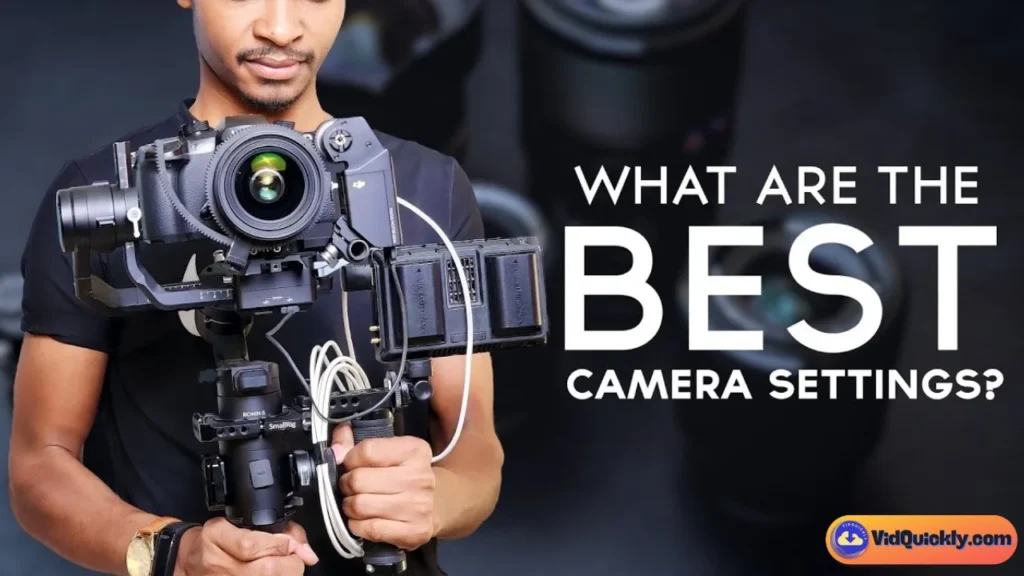
Camera Settings for Optimal Video
Optimizing your camera settings ensures that your videos are clear, vibrant, and professional.
- Resolution and Frame Rate:
- Resolution: Set your camera to at least 720p (1280 x 720) for a balance between quality and file size. Opt for 1080p (1920 x 1080) for higher-definition content.
- Frame Rate: Use 30 fps for smooth motion. Select 60 fps for action-packed or fast-paced videos.
- Exposure Settings:
- ISO: Keep ISO as low as possible (e.g., 100-400) to reduce noise and maintain image clarity.
- Aperture: Use a wide aperture (low f-number) for a shallow depth of field, or a narrow aperture (high f-number) for more depth and focus.
- Shutter Speed: Set your shutter speed to double your frame rate (e.g., 1/60 for 30 fps) to ensure natural motion blur.
- White Balance:
- Consistency: Set a consistent white balance to maintain accurate color representation. Use presets (e.g., daylight, tungsten) or manually adjust to match your lighting conditions.
- Focus:
- Manual vs. Auto Focus: Use manual focus for controlled environments to maintain sharpness on your subject. Utilize continuous autofocus for dynamic scenes where the subject moves frequently.
Pro Tip: Shoot in Manual Mode to have full control over your camera settings, ensuring consistency and quality across all your videos.
Tips for Framing and Composition
Effective framing and composition enhance the visual appeal and storytelling of your videos.
- Rule of Thirds:
- Grid Lines: Imagine a 3×3 grid overlay on your frame. Position key elements along these lines or at their intersections to create a balanced and engaging composition.
- Subject Placement: Place your subject off-center to add depth and interest to your shots.
- Headroom and Lead Room:
- Headroom: Ensure there is adequate space above your subject’s head to avoid a cramped appearance.
- Lead Room: Provide space in the direction your subject is looking or moving towards, creating a sense of movement and balance.
- Background and Foreground Elements:
- Depth: Incorporate background and foreground elements to add depth and context to your shots.
- Clutter-Free: Keep the background simple and free from distractions to maintain focus on your subject.
- Variety in Shots:
- Different Angles: Use a mix of wide, medium, and close-up shots to add variety and keep viewers engaged.
- Dynamic Framing: Experiment with different perspectives, such as high-angle or low-angle shots, to create unique and visually interesting content.
Pro Tip: Use a mix of static and dynamic shots to maintain viewer interest. Planning your shot variety during storyboarding can help achieve a more engaging video.
Post-Production Editing
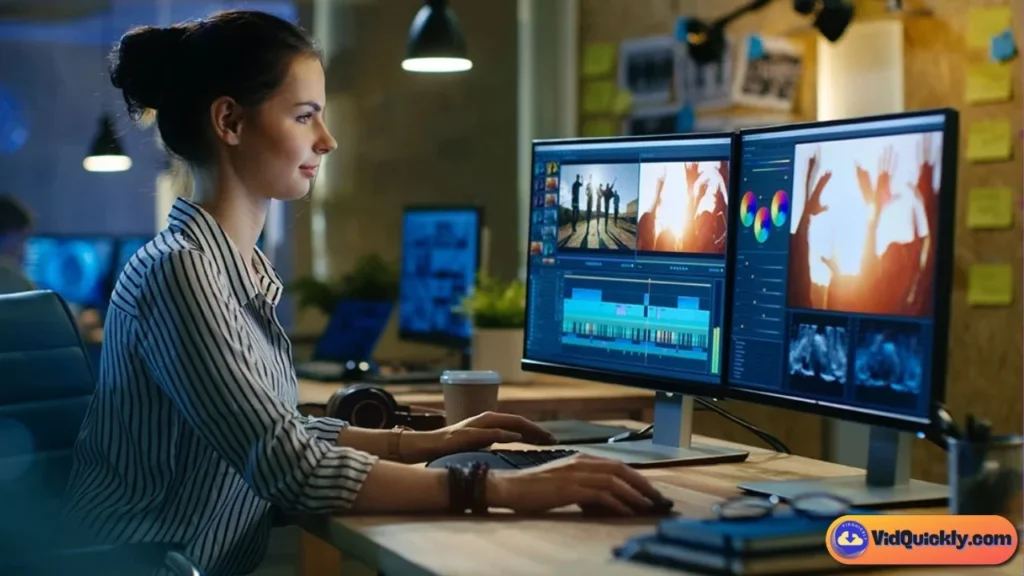
Color Correction and Grading
Enhancing the color of your videos can significantly improve their visual appeal and consistency.
- Color Correction:
- White Balance Adjustment: Ensure that the colors in your video are accurate and natural by adjusting the white balance.
- Exposure and Contrast: Fine-tune the brightness and contrast to achieve a balanced and clear image.
- Color Balancing: Adjust individual color channels to eliminate any color casts and ensure a cohesive look.
- Color Grading:
- Mood and Tone: Apply color grading to set the mood and tone of your video. For example, warmer tones can create a cozy atmosphere, while cooler tones can add a modern and sleek feel.
- Consistency: Maintain consistent color grading across all your videos to establish a recognizable and professional brand image.
Recommended Software:
- DaVinci Resolve: Known for its advanced color correction and grading tools.
- Adobe Premiere Pro: Offers comprehensive color grading features with Lumetri Color.
- Final Cut Pro X: Provides powerful color adjustment capabilities for Mac users.
Pro Tip: Use LUTs (Look-Up Tables) to apply predefined color grading styles quickly. Customize LUTs to match your brand’s aesthetic for a unique and consistent look.
Cutting and Trimming for Engagement
Editing your footage to remove unnecessary parts keeps your videos concise and engaging.
- Removing Unnecessary Footage:
- Tight Editing: Cut out long pauses, mistakes, or irrelevant sections to maintain a fast-paced and engaging flow.
- Focus on Key Moments: Highlight the most important and interesting parts of your video to keep viewers hooked.
- Smooth Transitions:
- Consistency: Use consistent transitions to maintain a professional look throughout your video.
- Variety: Incorporate different types of transitions (e.g., cuts, fades, wipes) to add visual interest without overwhelming the viewer.
- Maintaining Flow:
- Logical Sequence: Ensure that your cuts and trims follow a logical sequence, maintaining the narrative and flow of your content.
- Pacing: Adjust the pacing to match the content’s energy and keep the audience engaged from start to finish.
Pro Tip: Use jump cuts strategically to create a dynamic and fast-paced editing style, especially for tutorial or informational videos.
Adding Transitions and Effects
Enhancing your videos with transitions and effects can make them more visually appealing and professional.
- Transitions:
- Cut: The most basic transition, ideal for seamless scene changes.
- Fade: Gradual transition to or from black, useful for starting or ending scenes.
- Dissolve: Smooth blending of two scenes, adding a soft and professional touch.
- Wipe: A linear transition that moves across the screen, suitable for creative scene changes.
- Effects:
- Text Overlays: Add titles, captions, and annotations to provide context and information.
- Motion Graphics: Incorporate animated graphics to enhance visual storytelling.
- Visual Effects (VFX): Use effects like slow motion, time-lapse, or green screen effects to add creativity and variety to your videos.
Recommended Software:
- Adobe After Effects: Advanced tool for creating motion graphics and visual effects.
- Final Cut Pro X: Offers a wide range of built-in effects and transitions.
- Filmora: User-friendly software with a good selection of effects and transitions for beginners.
Pro Tip: Use transitions and effects sparingly to avoid overwhelming your audience. Focus on enhancing the storytelling and visual appeal without distracting from the main content.
Exporting and Compressing Videos
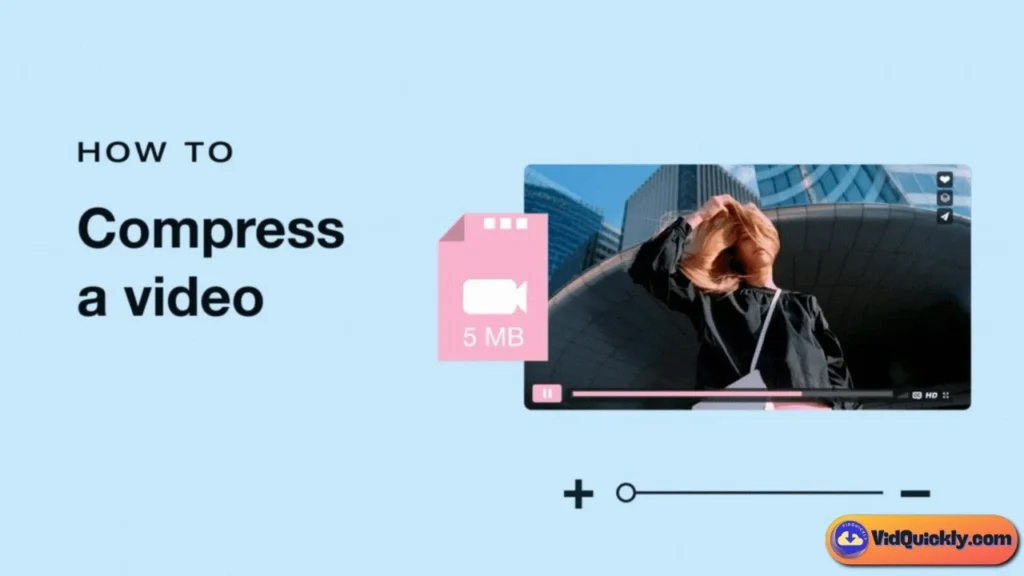
Choosing the Right Export Settings
Export settings determine the final quality and compatibility of your videos. Selecting the appropriate settings ensures your content looks great on OnlyFans and other platforms.
- Resolution and Frame Rate:
- Match Original Settings: Export at the same resolution and frame rate as your original footage to maintain quality.
- Platform Requirements: Ensure your export settings comply with OnlyFans’ specifications (e.g., MP4 format, up to 1080p resolution, 30 fps).
- Bitrate Settings:
- Balanced Bitrate: Choose a bitrate that maintains high quality without creating excessively large file sizes. Refer to OnlyFans’ bitrate recommendations for guidance.
- Variable Bitrate (VBR): Allows for higher quality in complex scenes and lower bitrate in simpler scenes, optimizing overall quality and file size.
- Compression Settings:
- Efficient Compression: Use codecs like H.264 for efficient compression without significant loss of quality.
- Two-Pass Encoding: Improves video quality by analyzing the video twice during the encoding process, optimizing bitrate distribution.
Pro Tip: Use preset export settings tailored for YouTube or Vimeo as a starting point, then adjust based on OnlyFans’ requirements to streamline your workflow.
Balancing Quality and File Size
Finding the right balance between video quality and file size is essential for efficient uploads and storage management.
- High-Quality Compression:
- Pros: Maintains visual clarity and detail, enhancing viewer experience.
- Cons: Results in larger file sizes, which can slow down upload times and consume more storage.
- Lower Quality Compression:
- Pros: Reduces file size, allowing for quicker uploads and easier storage management.
- Cons: May compromise visual quality, leading to pixelation or loss of detail.
- Strategies for Balancing:
- Selective Compression: Apply higher compression to less detailed sections and lower compression to crucial scenes.
- Resolution Adjustment: Downscale resolution slightly (e.g., from 1080p to 720p) to significantly reduce file size without a noticeable loss in quality.
- Bitrate Optimization: Adjust the bitrate to find the sweet spot where quality remains high, and file size is manageable.
Pro Tip: Regularly test different compression settings by exporting short clips and evaluating the quality before finalizing your entire video. This helps in identifying the optimal balance for your specific content needs.
Uploading to OnlyFans
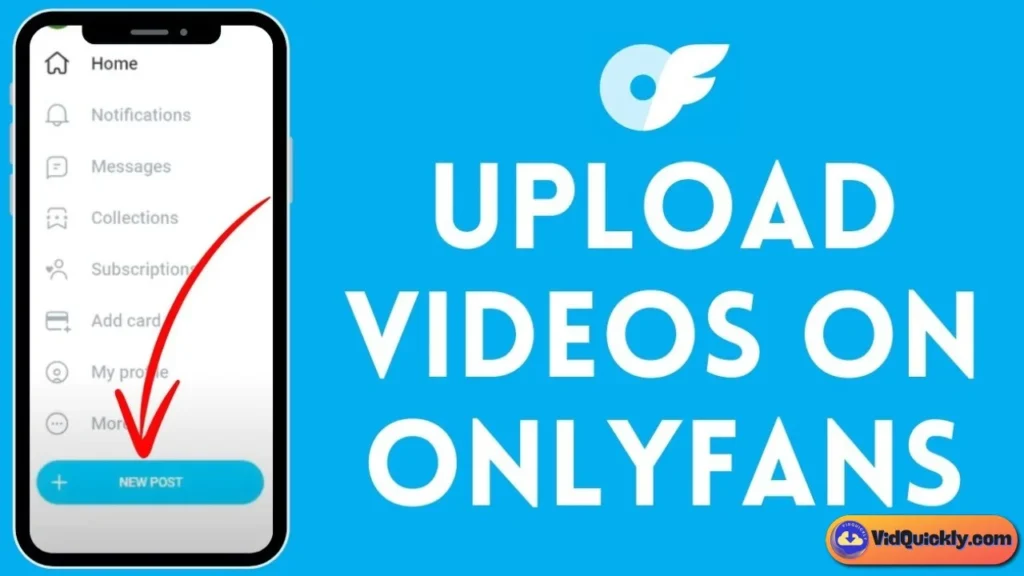
Best Practices for Uploading
Ensuring a smooth upload process maximizes your content’s reach and maintains its quality.
- Stable Internet Connection:
- High-Speed Uploads: Use a reliable and fast internet connection to prevent upload interruptions and ensure quick processing.
- Wired Connections: Prefer wired Ethernet connections over Wi-Fi for more stable and consistent upload speeds.
- File Naming Conventions:
- Descriptive Names: Use clear and descriptive file names that reflect the content of your video, making it easier to organize and manage.
- Consistency: Maintain a consistent naming scheme to streamline your workflow and improve file management.
- Metadata Optimization:
- Title and Description: Craft compelling titles and detailed descriptions that include relevant keywords to enhance discoverability.
- Tags and Categories: Use appropriate tags and categories to categorize your content effectively, making it easier for subscribers to find.
Pro Tip: Schedule your uploads during off-peak hours to reduce the chances of upload slowdowns and ensure your content goes live smoothly.
Utilizing External Links for Larger Files
When your video exceeds OnlyFans’ direct upload limits, external links offer a convenient workaround.
- Cloud Storage Services:
- Options: Use platforms like Google Drive, Dropbox, or OneDrive to host your larger files.
- Security: Ensure your links are secure and only accessible to your subscribers to protect your content.
- File Sharing Platforms:
- Options: Platforms like WeTransfer or MediaFire allow you to share large files with ease.
- Accessibility: Provide clear instructions to your subscribers on how to access and download the content from these platforms.
- Link Management:
- Shortened Links: Use URL shorteners like Bitly for cleaner and more manageable links.
- Expiration Settings: Set expiration dates for your links if you want to limit access after a certain period.
Pro Tip: Clearly communicate with your subscribers about where and how to access larger files. Provide step-by-step instructions if necessary to ensure a smooth experience.
Thumbnails and Titles

Creating Eye-Catching Thumbnails
Thumbnails are the first impression your content makes on potential viewers. A compelling thumbnail can significantly increase your video’s click-through rate.
- Visual Appeal:
- High Resolution: Use high-resolution images to ensure your thumbnails look sharp and professional.
- Bright and Vibrant Colors: Utilize contrasting colors to make your thumbnails stand out in the feed.
- Clarity and Relevance:
- Clear Subject: Ensure the main subject is easily identifiable and not cluttered by unnecessary elements.
- Contextual Imagery: Use images that accurately represent the content of your video, setting clear expectations for viewers.
- Text Overlays:
- Descriptive Text: Add concise and descriptive text to highlight the main theme or key points of your video.
- Readable Fonts: Use bold and legible fonts that are easy to read even in small thumbnail sizes.
Recommended Tools:
- Canva: User-friendly design tool with pre-made templates for thumbnails.
- Adobe Spark: Offers customizable templates and advanced design features.
- PicMonkey: Provides a variety of design tools and effects for creating professional thumbnails.
Pro Tip: Maintain a consistent style for your thumbnails to create a recognizable brand identity, making it easier for subscribers to identify your content at a glance.
Crafting Descriptive and Enticing Titles
Your video’s title plays a crucial role in attracting viewers and improving searchability. An effective title should be both descriptive and enticing.
- Keyword Integration:
- Relevant Keywords: Incorporate primary keywords related to your content to enhance discoverability and SEO.
- Natural Flow: Ensure keywords are integrated naturally without disrupting the readability of the title.
- Clarity and Precision:
- Clear Message: Clearly convey the main topic or benefit of your video to set accurate expectations.
- Avoid Clickbait: Ensure your title accurately represents the content to build trust with your audience.
- Engagement Boosters:
- Power Words: Use compelling words like “Ultimate,” “Exclusive,” “Top Tips,” or “How To” to make your titles more attractive.
- Numbers and Lists: Incorporate numbers (e.g., “5 Tips,” “Top 10”) to indicate structured and easily digestible content.
Examples:
- Before: “Workout Video”
- After: “5 Essential Workout Tips for a Killer Routine”
Pro Tip: Experiment with different title formats and analyze their performance using OnlyFans’ analytics to determine what resonates best with your audience.
Advanced Techniques for Superior Video Quality
Ready to transform your OnlyFans videos from great to extraordinary? Dive into these advanced techniques that will not only enhance your video quality but also captivate your audience and boost your earning potential. Let’s unlock the secrets to creating standout content that leaves a lasting impression.
Utilizing Green Screens and Virtual Backgrounds
How to Set Up and Use Green Screens
Green screens are a powerful tool that allows you to replace your background with virtually any image or video, providing endless creative possibilities for your OnlyFans content.
Steps to Set Up a Green Screen:
- Choose the Right Green Screen:
- Fabric vs. Paint: Fabric green screens are portable and easy to set up, while painted walls offer a permanent solution.
- Color Consistency: Ensure the green screen is a uniform shade to avoid color spills and shadows.
- Proper Lighting:
- Even Illumination: Use softbox lights or LED panels to evenly light the green screen, minimizing shadows and color inconsistencies.
- Separate Subject Lighting: Light your subject separately from the green screen to enhance the separation and make the background replacement more effective.
- Positioning:
- Distance from Green Screen: Place your subject at least 3-4 feet away from the green screen to reduce green spill (unwanted green reflections on your subject).
- Camera Setup: Mount your camera on a tripod or stable surface to maintain consistent framing.
- Shooting:
- Consistent Settings: Use manual camera settings to maintain consistent exposure and white balance throughout your shoot.
- Avoid Green Clothing: Ensure your subject isn’t wearing green to prevent parts of them from being replaced along with the background.
- Post-Production:
- Chroma Keying: Use video editing software to remove the green background and replace it with your desired virtual background.
- Fine-Tuning: Adjust settings like edge feathering and spill suppression to achieve a seamless blend between your subject and the new background.
Pro Tip: Invest in high-quality lighting and maintain a consistent shooting environment to ensure the best results when using green screens.
Benefits for Creative Content
Incorporating green screens and virtual backgrounds into your OnlyFans videos offers numerous creative advantages:
- Unlimited Background Options: From exotic locations to thematic settings, green screens allow you to transport your content anywhere without the need for physical travel.
- Enhanced Storytelling: Create immersive narratives by placing yourself in different environments that complement your content’s theme.
- Professional Appearance: High-quality virtual backgrounds can give your videos a polished and professional look, elevating your brand image.
- Flexibility and Versatility: Easily switch backgrounds between different scenes or videos, keeping your content fresh and engaging.
- Cost-Effective Production: Save on costs related to location rentals, props, and set designs by using virtual backgrounds.
Pro Tip: Experiment with different virtual backgrounds to find what resonates best with your audience and aligns with your brand’s aesthetic.
Incorporating Motion Graphics and Animations
Enhancing Videos with Graphics
Motion graphics and animations can significantly elevate the visual appeal of your OnlyFans videos, making them more dynamic and engaging.
Ways to Enhance Your Videos:
- Title and Lower Thirds:
- Introduction Titles: Create animated titles to introduce your videos professionally.
- Lower Thirds: Use animated text overlays to display your name, social media handles, or important information without distracting from the main content.
- Transitions:
- Creative Transitions: Incorporate smooth and visually appealing transitions between scenes to maintain a polished flow.
- Themed Transitions: Use transitions that match your content’s theme, such as glitter effects for glamour content or sleek wipes for tech-related videos.
- Animated Logos and Branding:
- Intro and Outro Animations: Include animated versions of your logo at the beginning and end of your videos to reinforce your brand identity.
- Watermarks: Add subtle animated watermarks to protect your content and promote brand recognition.
- Infographics and Visual Aids:
- Data Visualization: Use animated charts or graphs to present information in an engaging manner.
- Step-by-Step Guides: Incorporate animated arrows, highlights, or text to emphasize key points in tutorials or instructional videos.
- Special Effects:
- Visual Enhancements: Add sparkles, glows, or other special effects to highlight specific moments or add flair to your content.
- Character Animations: Introduce animated characters or mascots to interact with your content, adding a unique and entertaining element.
Pro Tip: Use motion graphics and animations to complement your content without overwhelming the viewer. Aim for a balance that enhances rather than distracts from your main message.
Tools and Software Recommendations
To create stunning motion graphics and animations, you’ll need the right tools. Here are some popular options:
- Adobe After Effects:
- Features: Industry-standard software for creating complex motion graphics, visual effects, and animations.
- Pros: Extensive range of tools and plugins, seamless integration with other Adobe products.
- Cons: Steep learning curve for beginners.
- Blender:
- Features: Free and open-source software for 3D modeling, animation, and visual effects.
- Pros: Powerful features without the cost, active community support.
- Cons: Can be complex for those unfamiliar with 3D design.
- Final Cut Pro X:
- Features: Professional video editing software with built-in motion graphics capabilities.
- Pros: Optimized for Mac users, user-friendly interface.
- Cons: Only available for macOS, premium pricing.
- Filmora:
- Features: User-friendly video editing software with a variety of built-in motion graphics and effects.
- Pros: Easy to learn, affordable, suitable for beginners.
- Cons: Limited advanced features compared to professional software.
- Canva Pro:
- Features: Web-based design tool with simple animation features for creating basic motion graphics.
- Pros: Intuitive interface, accessible for all skill levels.
- Cons: Limited animation capabilities compared to dedicated software.
Pro Tip: Start with beginner-friendly tools like Filmora or Canva Pro to get comfortable with motion graphics before transitioning to more advanced software like Adobe After Effects.
Implementing Multi-Camera Setups
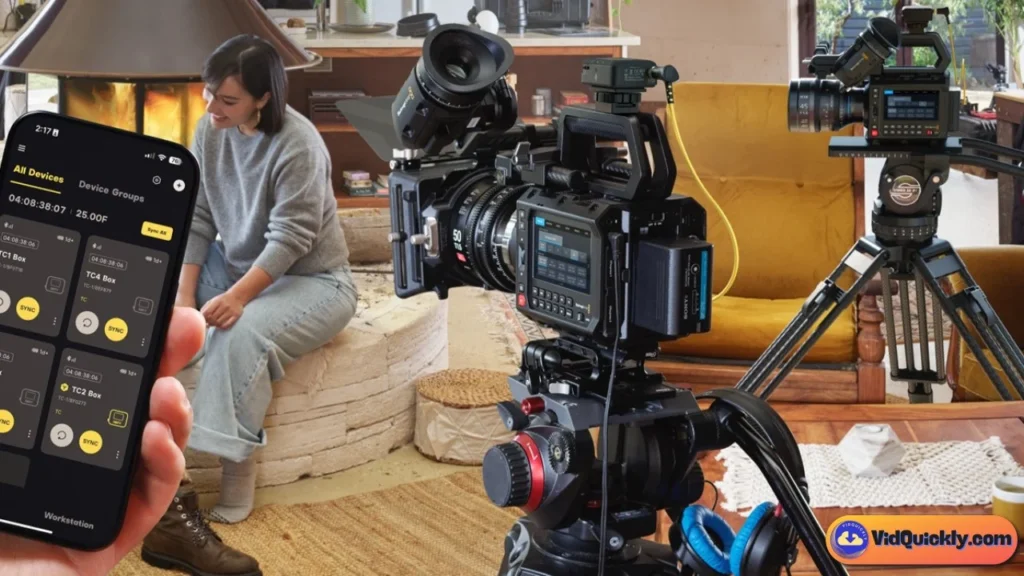
Benefits of Different Angles
Using multiple cameras in your OnlyFans setup offers several advantages that can enhance the overall quality and engagement of your videos:
- Dynamic Perspectives:
- Variety of Angles: Different camera angles keep your content visually interesting and prevent it from becoming monotonous.
- Emphasizing Details: Highlight specific aspects of your content by focusing on different angles, such as close-ups or wide shots.
- Enhanced Storytelling:
- Layered Storytelling: Use different angles to tell a more comprehensive story, providing context and depth to your narrative.
- Seamless Transitions: Smoothly switch between angles to create a fluid and professional-looking video.
- Professional Look:
- Cinematic Quality: Multi-camera setups can give your videos a more polished and professional appearance, similar to high-budget productions.
- Visual Interest: Incorporating various angles can make your videos more engaging, keeping viewers hooked throughout the duration.
- Improved Editing Flexibility:
- Creative Editing: Having multiple angles allows for more creative editing techniques, such as cutaways, reaction shots, and parallel editing.
- Backup Footage: Provides backup footage in case one camera encounters issues during shooting.
Pro Tip: Plan your camera angles in advance to ensure they complement each other and enhance the overall narrative of your video. Avoid overlapping angles that may confuse the viewer.
Synchronizing Multiple Cameras
To effectively use a multi-camera setup, proper synchronization is essential to ensure smooth editing and cohesive storytelling.
Steps to Synchronize Multiple Cameras:
- Consistent Settings:
- Camera Settings: Ensure all cameras have the same resolution, frame rate, and white balance settings to maintain visual consistency across angles.
- Lens Selection: Use similar or matching lenses to achieve a uniform look between different camera feeds.
- Clap or Marker:
- Clap Technique: Start each take by clapping your hands in front of all cameras. The audio spike created by the clap serves as a synchronization marker during editing.
- Visual Markers: Use a visual marker, such as a clapperboard or a simple hand gesture, to create a reference point for aligning footage.
- Timecode Synchronization:
- Timecode Generators: Use devices or software that generate a common timecode for all cameras, allowing for precise synchronization in post-production.
- Software Solutions: Some video editing software offers built-in tools for syncing footage based on audio or visual cues.
- Software Editing Tools:
- Adobe Premiere Pro: Offers multi-camera editing features that automatically synchronize footage based on audio or timecode.
- Final Cut Pro X: Provides robust multi-camera editing capabilities with easy synchronization options.
- DaVinci Resolve: Includes multi-camera editing tools that allow for manual and automatic synchronization.
- Consistent Recording Start:
- Simultaneous Start: Start recording on all cameras at the same time to ensure minimal time differences between recordings.
- Monitoring: Use headphones to monitor audio across all cameras, ensuring consistent audio capture for easier synchronization.
Pro Tip: Regularly test your synchronization process before major shoots to identify and resolve any potential issues, ensuring a smooth editing workflow.
Live Streaming Enhancements
Equipment and Settings for High-Quality Live Streams
Live streaming on OnlyFans offers real-time interaction with your audience, but delivering high-quality streams requires the right equipment and settings.
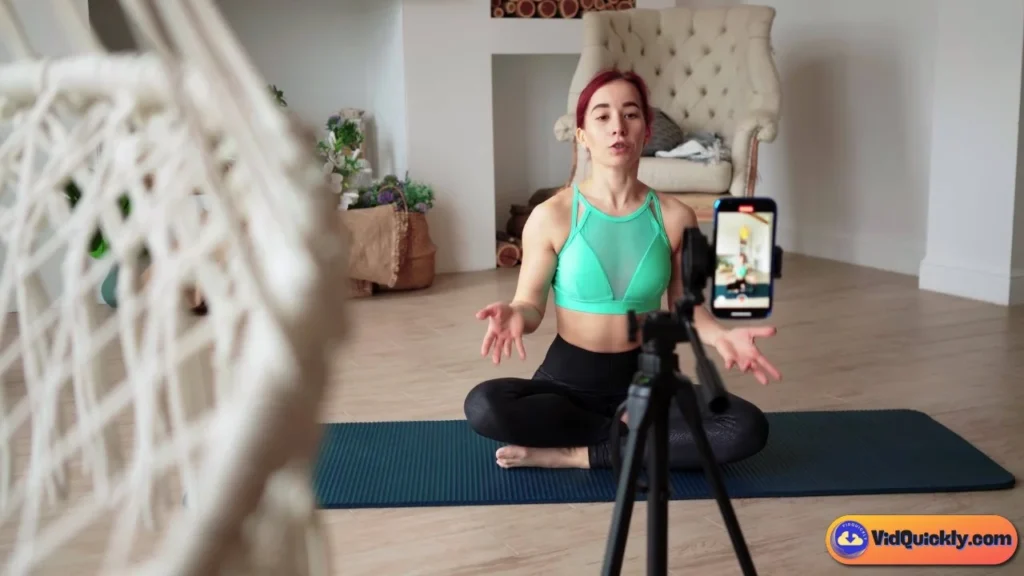
Essential Equipment for Live Streaming:
- High-Quality Camera:
- Webcams: Logitech C920 or C922 offer excellent video quality for live streams.
- DSLR/Mirrorless Cameras: Use cameras like the Sony Alpha a6400 or Canon EOS M50 Mark II with a capture card (e.g., Elgato Cam Link 4K) for superior video quality.
- Reliable Microphone:
- USB Condenser Mics: Blue Yeti or Audio-Technica AT2020USB+ provide clear and professional audio.
- Shotgun Mics: Rode VideoMic Pro offers directional audio capture, reducing background noise.
- Capture Card:
- Purpose: Connects your DSLR or mirrorless camera to your computer for live streaming.
- Recommended Models: Elgato Cam Link 4K, AVerMedia Live Gamer Mini.
- Lighting Setup:
- Ring Lights: Neewer Ring Light Kit provides even and flattering lighting.
- Softbox Lights: Godox Softbox Kit offers soft, diffused light for a professional appearance.
- Stable Internet Connection:
- High-Speed Broadband: Ensure you have a reliable internet connection with at least 10 Mbps upload speed for smooth streaming.
- Wired Connection: Use an Ethernet cable instead of Wi-Fi to minimize latency and avoid interruptions.
- Streaming Software:
- OBS Studio: Free and open-source software with extensive customization options.
- Streamlabs OBS: User-friendly interface with integrated widgets and themes.
- XSplit: Offers advanced features for professional live streaming setups.
Optimal Streaming Settings:
- Resolution: Stream at 1080p for high-definition quality, or 720p for a balance between quality and bandwidth.
- Frame Rate: Use 30 fps for smooth motion. Opt for 60 fps if your content involves fast-paced actions.
- Bitrate: Set your bitrate between 3,000 to 6,000 kbps for 1080p streams. Adjust based on your internet speed and desired quality.
- Encoder: Use hardware encoding (e.g., NVENC) if available, to reduce CPU load and ensure smooth streaming performance.
Pro Tip: Perform test streams to fine-tune your settings and ensure everything runs smoothly before going live to your audience.
Engaging with Your Audience in Real-Time
Engaging with your audience during live streams fosters a sense of community and keeps viewers coming back for more.
Strategies to Enhance Engagement:
- Interactive Q&A Sessions:
- Live Questions: Encourage viewers to ask questions and respond to them in real-time, making the interaction personal and engaging.
- Topic-Focused Q&As: Host Q&A sessions centered around specific topics related to your content to provide value and insights.
- Live Polls and Surveys:
- Interactive Polls: Use polling features to let your audience vote on topics, content ideas, or decisions during the stream.
- Feedback Surveys: Collect feedback through live surveys to understand your audience’s preferences and improve future content.
- Exclusive Live Content:
- Behind-the-Scenes: Share exclusive behind-the-scenes glimpses of your content creation process, building a deeper connection with your audience.
- Special Announcements: Use live streams to announce new content, promotions, or collaborations, creating excitement and anticipation.
- Engaging Visuals and Graphics:
- On-Screen Graphics: Incorporate overlays, animations, and branded graphics to make your live stream visually appealing.
- Live Reactions: Display real-time reactions or comments from your audience to acknowledge their participation and make them feel valued.
- Consistent Scheduling:
- Regular Live Sessions: Establish a consistent schedule for live streams to build anticipation and ensure your audience knows when to tune in.
- Event-Based Streams: Host live streams around specific events, holidays, or milestones to keep your content fresh and relevant.
- Personal Interaction:
- Address Viewers by Name: Use viewers’ names when responding to comments and questions to create a personalized experience.
- Show Genuine Interest: Display enthusiasm and genuine interest in your audience’s input, making them feel appreciated and heard.
Pro Tip: Encourage viewer participation by asking questions, requesting feedback, and acknowledging comments during your live streams. The more interactive and responsive you are, the more engaged your audience will become.
Troubleshooting Common Video Quality Issues
Every content creator faces challenges, but knowing how to troubleshoot and resolve common video quality issues can set you apart from the crowd. Whether it’s poor lighting, audio distortions, video lag, or editing errors, addressing these problems promptly ensures your OnlyFans content remains professional and appealing to your audience.
Poor Lighting Solutions
Identifying and Correcting Lighting Problems
Poor lighting can make your videos look unprofessional and detract from the overall viewer experience. Here’s how to identify and fix common lighting issues:
Common Lighting Problems:
- Underexposure: Videos appear too dark, hiding details and making subjects hard to see.
- Overexposure: Bright spots or washed-out areas where details are lost due to excessive light.
- Uneven Lighting: Shadows or bright spots caused by inconsistent light distribution.
- Color Casts: Unnatural color tones (e.g., too yellow or too blue) that distort the true colors of your scene.
Solutions to Correct Lighting Problems:
- Adjust Light Placement:
- Three-Point Lighting: Utilize key light, fill light, and back light to create balanced and flattering illumination.
- Avoid Direct Lighting: Prevent harsh shadows by positioning lights at a 45-degree angle from your subject.
- Use Softboxes and Diffusers:
- Soft Lighting: Softboxes and diffusers spread light evenly, reducing harsh shadows and creating a more natural look.
- Even Distribution: Ensure light sources cover the entire shooting area uniformly to avoid dark spots.
- Control Natural Light:
- Window Treatments: Use curtains or blinds to regulate the amount of natural light entering your shooting space.
- Time Your Shoots: Schedule your recordings during times of day when natural light is optimal and consistent.
- White Balance Adjustment:
- Color Accuracy: Adjust your camera’s white balance settings to match your light sources, ensuring colors appear natural.
- Custom White Balance: Set a custom white balance using a gray card or white surface for precise color correction.
- Increase Lighting Intensity:
- Additional Lights: Add more light sources to brighten up the scene without overexposing any part of the frame.
- Reflectors: Use reflectors to bounce light back onto your subject, enhancing overall brightness and reducing shadows.
Pro Tip: Conduct a lighting test before recording by taking sample shots and adjusting your setup until you achieve the desired balance and clarity. This proactive approach helps identify and fix issues before the actual shoot.
Audio Distortions and Fixes
Resolving Common Audio Issues
Clear audio is crucial for maintaining viewer engagement and conveying your message effectively. Here are common audio problems and how to fix them:
Common Audio Problems:
- Background Noise: Unwanted sounds like traffic, appliances, or ambient chatter can distract viewers.
- Echo and Reverb: Excessive reflections of sound in a room can make audio unclear and muddled.
- Audio Clipping: Distortion caused by audio levels being too high, resulting in a harsh and unpleasant sound.
- Low Volume: Audio that is too quiet, making it difficult for viewers to hear clearly.
Solutions to Fix Audio Issues:
- Use Quality Microphones:
- External Mics: Invest in external microphones (e.g., lavalier, shotgun, or USB condenser) to capture clearer and more professional audio.
- Directional Mics: Use directional microphones like shotgun mics to focus on your voice and minimize background noise.
- Optimize Microphone Placement:
- Close Proximity: Place your microphone close to your mouth to capture clear audio while reducing ambient sounds.
- Avoid Obstructions: Ensure the microphone is not blocked by clothing, accessories, or other objects that could muffle sound.
- Control the Recording Environment:
- Soundproofing: Use rugs, curtains, and soft furnishings to absorb sound and reduce echo and reverb in your shooting space.
- Quiet Locations: Choose a quiet room away from noise sources like windows, doors, and electronics.
- Utilize Pop Filters and Windshields:
- Pop Filters: Attach pop filters to your microphone to reduce plosive sounds (e.g., “p” and “b” sounds) that can cause audio distortion.
- Windshields: Use windshields or foam covers to minimize wind noise and protect your mic from moisture.
- Adjust Audio Levels:
- Proper Gain Settings: Set your microphone’s gain levels appropriately to prevent clipping while ensuring clear audio capture.
- Monitoring: Use headphones to monitor audio levels in real-time and make adjustments as needed during recording.
- Post-Production Audio Editing:
- Noise Reduction: Use software like Audacity or Adobe Audition to remove background noise and enhance audio clarity.
- Equalization (EQ): Adjust EQ settings to balance frequencies, enhancing voice clarity and reducing unwanted tones.
- Compression: Apply compression to even out audio levels, ensuring consistent volume throughout the video.
Pro Tip: Record a short test clip before your main shoot to check audio quality and make necessary adjustments. This helps identify and resolve audio issues early, saving time during post-production.
Video Lag and Buffering

Optimizing Upload Settings and Internet Connection
Video lag and buffering can frustrate viewers and reduce the overall quality of your OnlyFans experience. Here’s how to minimize these issues:
Common Causes of Video Lag and Buffering:
- High Bitrate: Excessively high bitrate settings can lead to large file sizes, causing slow uploads and playback issues.
- Poor Internet Connection: Inadequate upload speeds or unstable connections can result in interrupted uploads and buffering during playback.
- High Resolution and Frame Rates: Higher resolutions and frame rates require more bandwidth, which can strain your internet connection.
Solutions to Minimize Video Lag and Buffering:
- Optimize Video Bitrate:
- Balanced Bitrate: Follow OnlyFans’ recommended bitrate settings (e.g., 3,500 kbps for 1080p, 2,500 kbps for 720p) to maintain quality without creating excessively large files.
- Variable Bitrate (VBR): Use VBR settings to allocate more bitrate to complex scenes and less to simpler ones, optimizing overall quality and file size.
- Adjust Resolution and Frame Rate:
- Appropriate Resolution: Choose a resolution that balances quality and file size, such as 720p for most content needs.
- Standard Frame Rate: Stick to 30 fps unless your content specifically benefits from higher frame rates like 60 fps, which can increase file size and bandwidth requirements.
- Enhance Your Internet Connection:
- High-Speed Broadband: Upgrade to a faster internet plan with higher upload speeds (preferably 20 Mbps or more) to handle large video uploads efficiently.
- Wired Connection: Use Ethernet cables instead of Wi-Fi to ensure a stable and consistent internet connection during uploads and live streams.
- Bandwidth Management: Limit other internet activities (e.g., streaming, gaming) while uploading or streaming to allocate maximum bandwidth to your OnlyFans content.
- Use Efficient Compression Tools:
- Video Compression Software: Utilize tools like HandBrake or Adobe Media Encoder to compress videos without significant quality loss, reducing file size for faster uploads.
- Preset Settings: Use preset export settings optimized for online streaming platforms to streamline your compression process.
- Segment Large Videos:
- Break Down Content: Split longer videos into smaller segments to stay within file size limits and facilitate quicker uploads.
- Sequential Uploads: Upload video segments sequentially, maintaining a logical flow for your audience to follow.
- Monitor Uploads and Playback:
- Progress Indicators: Use upload progress indicators to monitor the status and ensure uploads complete successfully.
- Playback Testing: After uploading, test video playback on different devices and connections to ensure smooth viewing for your subscribers.
Pro Tip: Invest in a reliable router with Quality of Service (QoS) settings to prioritize bandwidth for your OnlyFans activities, ensuring smoother uploads and streaming even when other devices are in use.
Editing Errors and How to Avoid Them
Best Practices in Post-Production
Effective post-production editing is key to delivering polished and professional OnlyFans videos. Avoiding common editing errors ensures your content remains high-quality and engaging.

Common Editing Errors:
- Poor Color Grading: Inconsistent or unnatural color tones that disrupt the visual harmony of your video.
- Overuse of Effects: Excessive use of transitions, filters, or effects that distract from the main content.
- Audio Sync Issues: Misalignment between audio and video tracks, causing a disjointed viewing experience.
- Inconsistent Cuts: Uneven or abrupt cuts that disrupt the flow and pacing of your video.
- Low-Quality Exports: Exporting videos with incorrect settings, resulting in pixelation, compression artifacts, or reduced clarity.
Solutions to Avoid Editing Errors:
- Maintain Consistent Color Grading:
- Uniform Tone: Ensure color grading is consistent across all scenes to maintain a cohesive look.
- Reference Standards: Use color grading presets or reference images to achieve a balanced and natural color palette.
- Avoid Over-Editing: Enhance colors subtly without making them appear unnatural or overly saturated.
- Use Effects Sparingly:
- Purposeful Effects: Apply transitions and effects only when they add value to the storytelling or enhance the visual appeal.
- Minimalist Approach: Stick to simple and clean transitions like cuts, fades, and dissolves to maintain a professional look.
- Avoid Distractions: Ensure that effects do not overpower the main content or distract viewers from the message.
- Ensure Audio-Video Synchronization:
- Sync Tools: Use video editing software with built-in synchronization tools to align audio and video tracks accurately.
- Manual Adjustment: If automatic syncing fails, manually adjust the audio track to match the video cues.
- Consistent Recording: Maintain consistent audio recording practices to minimize synchronization issues during editing.
- Implement Smooth and Logical Cuts:
- Cutting Techniques: Use techniques like match cuts, jump cuts, and L-cuts to create a seamless and engaging flow.
- Avoid Abrupt Transitions: Ensure that cuts between scenes or shots are smooth and do not disrupt the viewer’s experience.
- Maintain Pacing: Adjust the pacing of your cuts to match the energy and tone of your content, keeping viewers engaged.
- Optimize Export Settings:
- Correct Resolution and Frame Rate: Export videos in the resolution and frame rate that matches your original footage and OnlyFans’ requirements.
- Proper Bitrate: Choose a bitrate that preserves quality without creating excessively large file sizes.
- Use Appropriate Codecs: Utilize efficient codecs like H.264 for compression, ensuring compatibility and quality.
- Preview Before Finalizing: Always preview your exported video to check for any quality issues or errors before publishing.
- Organize Your Project Files:
- File Management: Keep your project files, assets, and exports organized in clearly labeled folders to streamline your editing workflow.
- Backup Projects: Regularly backup your editing projects to prevent data loss and facilitate easy recovery in case of errors.
- Stay Updated with Software Features:
- Learn New Tools: Keep up with the latest features and updates in your editing software to enhance your editing capabilities.
- Training and Tutorials: Invest time in learning advanced editing techniques through tutorials, courses, and online resources.
Pro Tip: Create a standardized editing workflow that includes consistent naming conventions, project organization, and regular backups. This approach minimizes errors and enhances efficiency, allowing you to focus on creating high-quality content.

Conclusion
In conclusion, OnlyFans presents an exciting opportunity for creators to monetize their content and engage with their audience in a unique way. However, the quality of your videos plays a crucial role in attracting and retaining subscribers. High-quality visuals and sound not only enhance the viewer experience but also contribute significantly to your success on the platform.
By implementing the strategies discussed in this guide, you can elevate your video production standards and create content that stands out. Remember, investing time in improving your video quality will pay off in increased subscriber loyalty and engagement.
To further enhance your skills and knowledge about OnlyFans and other social networks, be sure to explore more tutorials on VidQuickly’s Blog. With the right tools and techniques, you can maximize your earning potential and thrive in the digital content landscape!
FAQs
What is the best video resolution to upload on OnlyFans?
The ideal resolution for uploading videos on OnlyFans is 1080p (1920 x 1080) for high-definition clarity. This resolution provides a great balance between quality and file size, ensuring your videos look sharp while being easy to upload. If you need smaller file sizes, 720p is also a good option.
What video format does OnlyFans support?
OnlyFans supports a variety of video formats, but the recommended format is MP4. MP4 files offer excellent video quality with efficient compression, making them the best choice for fast uploads and smooth playback on different devices.
How can I improve my video quality on OnlyFans?
To enhance your video quality, ensure proper lighting, use a good camera (DSLR, mirrorless, or a high-quality smartphone), and invest in external microphones for clearer audio. Additionally, shoot in 1080p with a 30 fps frame rate, and use editing software to fine-tune your video before uploading.
Why is my video lagging or buffering on OnlyFans?
Video lag or buffering may be caused by a high bitrate or large file size. Optimize your video’s bitrate and resolution to match OnlyFans’ recommended settings. Also, check your internet connection speed—using a wired connection for uploads can prevent slow performance.
What’s the maximum file size for video uploads on OnlyFans?
OnlyFans allows video uploads up to 100 MB directly through the platform. If your video exceeds this size, you can compress the file using software like HandBrake or use external links (e.g., Google Drive) to share larger files with your subscribers.

