In the dynamic world of video production, understanding the various video formats is essential for professional video creators and editors. The right format can elevate your content, ensuring it meets the highest standards of quality and compatibility across different platforms. From MP4’s versatility to MOV’s superior editing capabilities on Apple devices, mastering these formats is key to successful video production.
Dive deeper into the technicalities and practical applications of video formats. Explore our comprehensive tutorials and stay updated with the latest news at VidQuickly Blog – the ultimate destination for downloading videos from Facebook, YouTube, TikTok, Instagram, and more.
Introduction
What are Video Formats?
Video formats are standardized file formats used to store and compress video data. Common formats include MP4, AVI, MOV, and MKV, each with different codecs and containers affecting quality and compatibility. MP4 is popular for its balance of quality and file size, while MOV is favored for editing on Apple devices.
Brief overview of video formats and their importance in digital media.
Video formats are like the outfits your videos wear. They determine how your video looks, how big it is, and where it can hang out. Think of MP4 as the classic jeans – versatile and goes with everything. Then there’s MOV, like those high-end designer jeans – fancy but not everyone can pull them off. Each format has its own style and personality.
Why does it matter? Well, picking the right outfit for your video is like choosing the perfect outfit for a party. You want it to look good and fit in with the crowd. The wrong format can make your video look pixelated, load slowly, or even be unplayable on certain devices.
So, whether you’re a TikTok star, a YouTube influencer, or just someone who loves sharing videos with friends, understanding video formats is key to looking your best online.
Understanding Video File Formats
What is a Video File Format?
Alright, let’s break this down. Ever wondered how your videos are saved and shared across different devices and platforms? That’s where video file formats come into play. These formats are essential for storing and playing digital videos, making sure they look and sound just right.
Definition and Components of a Video File Format
A video file format is like a digital wrapper that contains all the ingredients needed to play a video. These ingredients are organized into three main components:
- Container: Think of this as the box holding all the different parts of your video. It packages video, audio, subtitles, and metadata (like the title, creator info, etc.) together. Common containers include MP4, AVI, and MKV.
- Codec: This is short for “compressor-decompressor.” It’s a tool used to shrink the video and audio files to save space and then decompress them for playback. Popular codecs include H.264 for video and AAC for audio.
- Essence: This term refers to the raw, uncompressed video and audio data inside the container. It’s the actual content you see and hear when you play the video.
Explanation of Containers, Codecs, and Essence
- Containers: Imagine the container as a lunchbox. It keeps your sandwich (video), drink (audio), napkin (subtitles), and a note from mom (metadata) all in one place. Containers manage how these elements are synchronized and stored. For example, an MKV file can hold different audio tracks and subtitles in multiple languages, while MP4 is more streamlined and widely compatible with most devices.
- Codecs: Codecs are like the kitchen appliances that prepare your meal. When you save a video, the codec compresses it, making it smaller and easier to store or share. When you watch the video, the codec decompresses it, so it looks and sounds good. Common video codecs include H.264, H.265 (for higher compression with the same quality), and VP9 (used by YouTube for streaming).
- Essence: The essence is the actual video and audio content, untouched and unprocessed. If you imagine a movie, the essence would be the raw footage and sound recordings before any editing or compression.
Examples of Common Containers and Codecs
Here are a few examples to give you a clearer picture:
- MP4 (Container): Often used for videos on YouTube and social media, it supports H.264 or H.265 (HEVC) for video and AAC for audio.
- AVI (Container): One of the oldest video formats, it can contain various codecs but is less efficient than newer formats.
- MKV (Container): Known for its flexibility, it can hold an unlimited number of video, audio, picture, or subtitle tracks in one file, using codecs like H.264 or VP9.
Understanding these basics will help you choose the right format for your videos, ensuring they look great and play smoothly on any device. For more detailed info, check out these resources on video file formats and video codecs on Wikipedia.
Types of Video File Formats
Lossy vs. Lossless formats.
Ever wondered why some videos look amazing but take up a ton of space, while others are more compact but not as sharp? It all comes down to the type of compression used: lossy or lossless. Let’s break down these two formats in simple terms.

Lossy Formats
- What Are They?
- Lossy formats compress video files by discarding some data, which reduces the file size but also slightly decreases the quality. This process aims to strike a balance between quality and file size, making it ideal for everyday use.
- Common Lossy Formats
- MP4: Widely used for streaming and sharing videos online. Great balance of quality and size.
- AVI: An older format that can support various codecs, making it versatile but often resulting in larger files.
- WMV: Developed by Microsoft, good for Windows users with efficient compression.
- FLV: Once popular for web video, now less common due to declining support.
- When to Use
- Streaming: Platforms like YouTube and Instagram rely heavily on lossy formats to ensure videos load quickly and don’t consume too much bandwidth.
- Sharing: Ideal for sending videos over the internet or storing them on devices with limited storage.
Lossless Formats
- What Are They?
- Lossless formats compress video files without losing any quality, preserving every bit of data from the original file. This results in larger file sizes but retains perfect quality.
- Common Lossless Formats
- MOV: Often used in professional video editing, especially on Apple devices.
- MKV: Highly flexible, supporting multiple audio and subtitle tracks, ideal for high-definition content.
- FLAC (for audio): Preserves high fidelity of sound without any loss of quality.
- When to Use
- Professional Editing: Essential for video editors who need the highest quality for post-production work.
- Archiving: Perfect for storing videos where maintaining original quality is crucial, like in digital libraries or for future editing.
Comparison of Lossy and Lossless Formats
| Aspect | Lossy | Lossless |
|---|---|---|
| Quality | Slightly reduced | Perfect preservation |
| File Size | Smaller, more manageable | Larger, requires more storage |
| Use Case | Streaming, sharing online | Professional editing, archiving |
| Examples | MP4, AVI, WMV, FLV | MOV, MKV, FLAC (audio) |
In a nutshell, choose lossy formats when you need efficient storage and quick access, like for streaming or sharing. Opt for lossless formats when quality is your top priority, such as in professional editing or archiving. Understanding these differences will help you pick the right format for your specific needs, ensuring your videos always look their best.
Popular formats: MP4, AVI, MOV, WMV, FLV, MKV.
Ever struggled to figure out which video format to use? Each format has its own strengths, so let’s break down some of the most popular ones you’ll come across.
MP4 (MPEG-4 Part 14)
- Overview: MP4 is the jack-of-all-trades video format. It’s super versatile and works almost everywhere.
- Pros: High compatibility with most devices and platforms, good balance between quality and file size.
- Cons: Limited editing capabilities compared to some other formats.
- Use Case: Perfect for streaming on YouTube, Instagram, and other social media platforms.
AVI (Audio Video Interleave)
- Overview: AVI is one of the oldest video formats, offering flexibility but with some drawbacks.
- Pros: Supports high-quality video and audio, compatible with many codecs.
- Cons: Large file sizes, not ideal for web streaming or mobile use.
- Use Case: Great for professional video recording and editing where quality is more important than file size.
MOV (QuickTime Movie)
- Overview: MOV is Apple’s baby, designed for high-quality video and seamless integration with Mac devices.
- Pros: Excellent video quality, ideal for professional editing.
- Cons: Large file sizes, mostly used on Apple devices.
- Use Case: Professional videography and editing, especially on Mac platforms.
WMV (Windows Media Video)
- Overview: Developed by Microsoft, WMV is designed for efficient compression, making it ideal for Windows users.
- Pros: Smaller file sizes with good quality, highly efficient on Windows platforms.
- Cons: Limited compatibility outside of Windows devices.
- Use Case: Streaming and sharing videos on Windows platforms, ideal for PowerPoint presentations.
FLV (Flash Video)
- Overview: FLV was the go-to for web videos back in the day but is now less common.
- Pros: Small file sizes, efficient for web-based streaming.
- Cons: Poor compatibility with mobile devices and modern browsers.
- Use Case: Older web videos and some streaming services, though it’s being phased out.
MKV (Matroska Video)
- Overview: MKV is the Swiss Army knife of video formats. It’s super flexible and supports almost everything.
- Pros: Can hold multiple audio and subtitle tracks, excellent for high-definition content.
- Cons: Larger file sizes, not as universally supported as MP4.
- Use Case: High-definition videos, Blu-ray rips, and projects requiring multiple audio and subtitle options.
Comparison of Popular Formats
| Format | Quality | File Size | Compatibility | Best For |
|---|---|---|---|---|
| MP4 | High | Medium | Excellent (almost all devices) | Streaming, sharing online |
| AVI | Very High | Large | Limited (older devices, some players) | Professional recording and editing |
| MOV | Very High | Large | Good (mainly Apple devices) | Editing on Macs, professional videography |
| WMV | High | Small | Limited (Windows platforms) | Streaming on Windows devices |
| FLV | Medium | Small | Poor (mainly older web content) | Older web videos, web-based streaming |
| MKV | Very High | Large | Moderate (modern players and devices) | High-definition content, multiple audio/subtitles |
Each of these formats has its own perks, so choose the one that best fits your needs. Whether you’re sharing videos online, editing professionally, or streaming on different platforms, there’s a format that’s just right for you.
Popular Video Formats for Different Platforms
YouTube Video Formats
Uploading videos to YouTube and making sure they look top-notch can be a bit tricky. Let’s dive into the best formats and settings to use for YouTube to make your content shine.

Best Formats for YouTube
- MP4 (MPEG-4 Part 14)
- Why MP4?: This format is highly recommended by YouTube because it offers the best balance of quality and file size. MP4 files are widely compatible with most devices and video players.
- Pros: Great quality, small file size, fast upload.
- Cons: Limited editing capabilities compared to other formats.
- MOV (QuickTime Movie)
- Why MOV?: This format is another solid choice, especially if you’re editing your videos on a Mac. MOV files maintain high video quality, which is crucial for professional-looking content.
- Pros: High-quality video, good for editing.
- Cons: Larger file sizes, primarily optimized for Apple devices.
Recommended Settings for Upload
To ensure your videos look their best on YouTube, follow these recommended settings:
- Resolution
- Options: 2160p (4K), 1440p (2K), 1080p (Full HD), 720p (HD).
- Best Practice: Always upload at the highest resolution possible. For most creators, 1080p is the sweet spot for quality and upload speed, but if you have the capability, 4K provides the best viewing experience.
- Bitrate
- Recommended Bitrates:
- 1080p (Full HD): 8 Mbps for standard frame rate, 12 Mbps for high frame rate (60fps).
- 1440p (2K): 16 Mbps for standard frame rate, 24 Mbps for high frame rate.
- 2160p (4K): 35-45 Mbps for standard frame rate, 53-68 Mbps for high frame rate.
- Tip: Higher bitrates mean better quality but larger files. Use the highest bitrate your internet connection and upload speed can handle.
- Recommended Bitrates:
- Frame Rate
- Options: 24, 30, 48, 50, 60 fps.
- Best Practice: Match the frame rate of your source video. Most YouTube videos are either 24 or 30 fps, but gaming videos often benefit from 60 fps for smoother motion.
- Audio Settings
- Codec: AAC-LC.
- Bitrate: 384 kbps.
- Sample Rate: 48 kHz or 96 kHz.
Why These Settings Matter
Using these settings ensures that your videos are processed and displayed by YouTube in the best possible quality. High-resolution uploads with the correct bitrates prevent unnecessary compression, maintaining the clarity and detail of your content. Matching the frame rate keeps motion smooth and natural.
Instagram Video Formats
Ready to make your Instagram videos look amazing? Knowing the right formats and settings is key to maximizing your content’s impact on Instagram. Let’s break it down.
Supported Formats
- MP4 (MPEG-4 Part 14)
- Why MP4?: MP4 is the go-to format for Instagram due to its high quality and efficient compression. It’s compatible with most devices and maintains excellent video quality.
- Pros: High quality, small file size, fast upload.
- Cons: Limited editing flexibility compared to some other formats.
- MOV (QuickTime Movie)
- Why MOV?: MOV is also supported and is particularly useful for those editing videos on Apple devices. It offers great video quality but results in larger file sizes.
- Pros: High-quality video, ideal for professional editing.
- Cons: Larger file sizes, primarily optimized for Apple devices.
Optimal Settings for Instagram
- Feed Posts
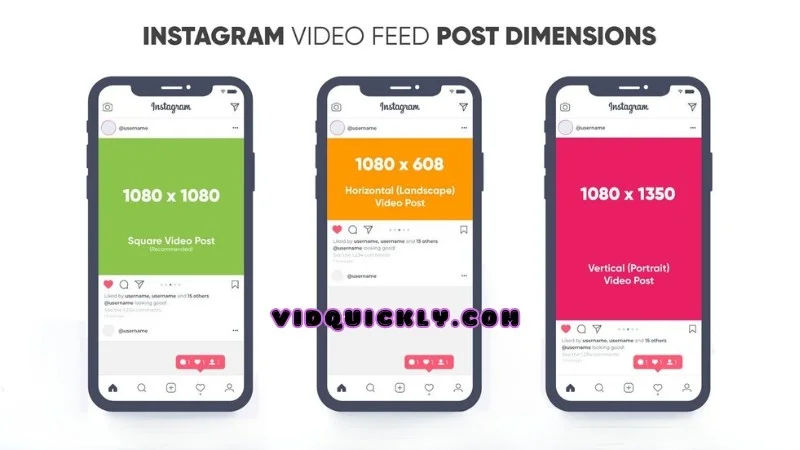
- Resolution: 1080 x 1080 pixels (square), 1080 x 1350 pixels (portrait), or 1080 x 608 pixels (landscape).
- Bitrate: 5 Mbps.
- Frame Rate: 30 fps.
- Aspect Ratio: 1:1 (square), 4:5 (portrait), 16:9 (landscape).
- Audio: AAC, 128 kbps, 44.1 kHz.
- Stories
- Resolution: 1080 x 1920 pixels.
- Bitrate: 4 Mbps.
- Frame Rate: 30 fps.
- Aspect Ratio: 9:16 (vertical).
- Audio: AAC, 128 kbps, 44.1 kHz.
- Reels
- Resolution: 1080 x 1920 pixels.
- Bitrate: 5 Mbps.
- Frame Rate: 30 fps.
- Aspect Ratio: 9:16 (vertical).
- Audio: AAC, 128 kbps, 44.1 kHz.
- IGTV
- Resolution: 1080 x 1920 pixels.
- Bitrate: 4 Mbps.
- Frame Rate: 30 fps.
- Aspect Ratio: 9:16 (vertical), 16:9 (horizontal).
- Audio: AAC, 128 kbps, 44.1 kHz.
Why These Settings Matter
Using these optimal settings ensures your videos look sharp and professional on Instagram, no matter where they’re viewed. High resolution and bitrate keep your videos clear and crisp, while the correct aspect ratio ensures they display properly on mobile screens. Matching the audio settings keeps your sound clear and consistent.
Facebook Video Formats
Want your videos to look amazing on Facebook? Choosing the right format and following best practices is key. Let’s dive into the best formats and tips for uploading videos on Facebook.

Recommended Formats
- MP4 (MPEG-4 Part 14)
- Why MP4?: MP4 is the top recommended format for Facebook. It offers a perfect balance between quality and file size, ensuring your videos look great without taking forever to upload.
- Pros: High compatibility, good quality, small file size.
- Cons: Slightly less quality compared to lossless formats but still excellent for social media.
- MOV (QuickTime Movie)
- Why MOV?: MOV is another solid choice, especially if you’re working on a Mac. It maintains high video quality, which is ideal for professional content.
- Pros: Excellent video quality, great for editing.
- Cons: Larger file sizes, primarily optimized for Apple devices.
Best Practices for Video Uploads on Facebook
- Resolution and Aspect Ratio
- Resolution: Aim for at least 1080p (1920 x 1080 pixels) for high-definition quality. Facebook supports up to 4K (2160p) resolution.
- Aspect Ratio: 16:9 is standard for landscape videos, but 1:1 and 4:5 work well for mobile viewers. For vertical videos, 9:16 is recommended.
- Sources: Facebook Help Center.
- Bitrate
- Recommended Bitrates:
- 1080p (Full HD): 8 Mbps for standard frame rate (30 fps), 12 Mbps for high frame rate (60 fps).
- 2160p (4K): 35-45 Mbps for standard frame rate, 53-68 Mbps for high frame rate.
- Why It Matters: Proper bitrate ensures your video maintains quality without unnecessary buffering or long upload times.
- Sources: Facebook for Developers.
- Recommended Bitrates:
- Frame Rate
- Options: Facebook supports up to 60 fps. Most videos should use 30 fps, but for smooth action shots or gaming videos, 60 fps is ideal.
- Best Practice: Match the frame rate of your source video to avoid any issues during playback.
- Audio Settings
- Codec: Use AAC for audio.
- Bitrate: 128 kbps or higher.
- Sample Rate: 44.1 kHz or 48 kHz.
- Why It Matters: High-quality audio ensures your message is heard loud and clear.
- Sources: Facebook Help Center.
- File Size and Length
- File Size: Keep it under 4GB to ensure smooth upload and processing.
- Length: Facebook supports videos up to 240 minutes long, but shorter videos (under 2 minutes) are often more engaging.
- Sources: Facebook for Business.
Additional Tips
- Captions and Subtitles: Adding captions can boost engagement, especially since many users watch videos without sound.
- Thumbnails: Use custom thumbnails to attract viewers’ attention.
- Mobile Optimization: Ensure your video looks good on mobile devices, as most Facebook users access the platform via their phones.
Following these best practices will help ensure your videos look great and engage your audience effectively on Facebook. For more detailed info, check out the official Facebook video guidelines. Happy uploading!
Twitter Supported Video Formats
Want to make your videos pop on Twitter? It’s all about using the right formats and settings. Here’s the lowdown on what works best for Twitter.
Supported Formats
- MP4 (MPEG-4 Part 14)
- Why MP4?: MP4 is the preferred format for Twitter due to its efficient compression and compatibility. It ensures your videos look great while keeping file sizes manageable.
- Pros: High compatibility, good quality, smaller file size.
- Cons: Less flexibility in editing compared to some formats.
- MOV (QuickTime Movie)
- Why MOV?: MOV is also supported and works well, especially if you’re editing videos on a Mac. It offers high quality but results in larger files.
- Pros: High-quality video, ideal for editing on Apple devices.
- Cons: Larger file sizes, primarily optimized for Apple devices.
Recommended Specifications for Twitter Videos
- Resolution and Aspect Ratio
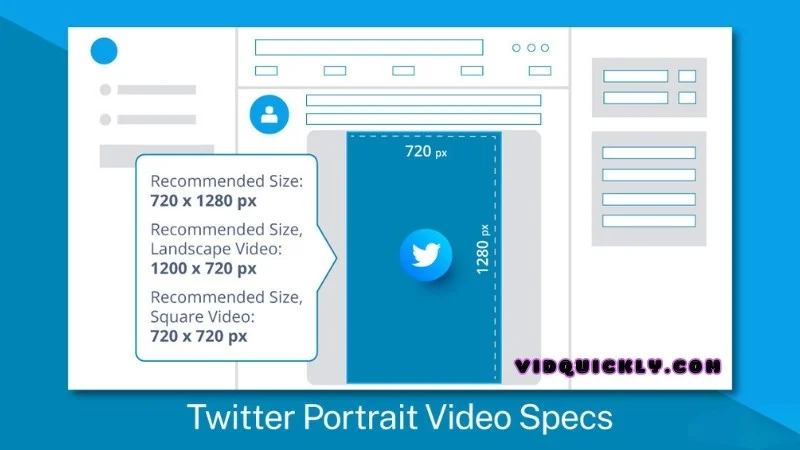
- Resolution: Minimum of 320 x 320 pixels, up to 1920 x 1200 pixels (and 1200 x 1900 pixels for vertical videos).
- Aspect Ratio: Between 1:2.39 and 2.39:1. Common aspect ratios are 16:9 (landscape) and 1:1 (square).
- Why It Matters: Ensuring your video fits within these dimensions keeps it looking sharp and professional across all devices.
- Bitrate
- Recommended Bitrates:
- 1080p (Full HD): Up to 25 Mbps.
- 720p (HD): Up to 5 Mbps.
- Why It Matters: Proper bitrate helps maintain video quality without unnecessary buffering or long upload times.
- Recommended Bitrates:
- Frame Rate
- Options: Up to 60 fps. Most videos perform well at 30 fps, but for smoother motion, especially in action or gaming videos, 60 fps is ideal.
- Best Practice: Match the frame rate of your source video to avoid playback issues.
- Audio Settings
- Codec: AAC (Advanced Audio Codec).
- Bitrate: 128 kbps or higher.
- Sample Rate: 44.1 kHz or 48 kHz.
- Why It Matters: High-quality audio ensures clear and engaging sound, crucial for keeping viewers hooked.
- File Size and Length
- File Size: Keep it under 512 MB to ensure smooth upload and playback.
- Length: Twitter supports videos up to 2 minutes and 20 seconds long.
- Why It Matters: Keeping within these limits ensures your video uploads quickly and is easy for followers to watch.
Additional Tips
- Captions and Subtitles: Add captions to increase accessibility and engagement, especially since many users watch videos without sound.
- Thumbnails: Use eye-catching thumbnails to attract viewers’ attention.
- Mobile Optimization: Make sure your video looks good on mobile devices, as a significant portion of Twitter users access the platform via their phones.
Following these guidelines will help your videos stand out and engage your audience effectively on Twitter. For more detailed info, check out Twitter’s official video upload specifications. Happy tweeting!
TikTok Video Formats
Creating viral content on TikTok means knowing the best formats and how to optimize your videos. Here’s the lowdown on what works best for TikTok.
Preferred Formats for TikTok
- MP4 (MPEG-4 Part 14)
- Why MP4?: MP4 is TikTok’s preferred format due to its high quality and efficient compression. It ensures your videos look crisp without being too large to upload quickly.
- Pros: High compatibility, good quality, smaller file size.
- Cons: Less flexibility in editing compared to some formats.
- MOV (QuickTime Movie)
- Why MOV?: While not as commonly recommended as MP4, MOV files are also supported and can be useful, especially if you’re editing on a Mac.
- Pros: High-quality video, great for professional editing.
- Cons: Larger file sizes, optimized for Apple devices.
Tips for Optimizing Video Content for TikTok
- Resolution and Aspect Ratio
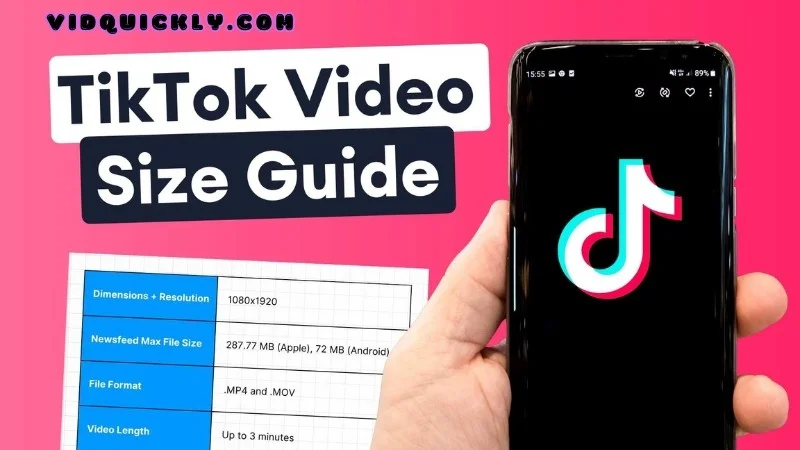
- Resolution: 1080 x 1920 pixels (Full HD) for the best quality.
- Aspect Ratio: 9:16 (vertical) to fit the full screen on mobile devices.
- Why It Matters: Ensuring your video is high resolution and vertically oriented keeps it looking sharp and professional on TikTok’s mobile-focused platform.
- Bitrate
- Recommended Bitrate: 8 Mbps is optimal for high-quality videos.
- Why It Matters: Proper bitrate ensures your video maintains quality without causing long upload times or buffering issues.
- Frame Rate
- Options: 30 fps is the standard for smooth and natural motion.
- Why It Matters: Matching TikTok’s standard frame rate ensures your videos play smoothly.
- Audio Settings
- Codec: AAC (Advanced Audio Codec).
- Bitrate: 128 kbps or higher.
- Sample Rate: 44.1 kHz.
- Why It Matters: High-quality audio is crucial for keeping viewers engaged, especially on a platform where sound is key.
- Video Length
- Length: Videos can be up to 60 seconds long, but shorter videos (15-30 seconds) often perform better.
- Why It Matters: Keeping your videos concise helps maintain viewer interest and increases the chances of them watching to the end.
Additional Tips
- Engage Quickly: Capture attention within the first few seconds. Use catchy music, exciting visuals, or intriguing questions to hook viewers immediately.
- Use Trends: Stay updated on TikTok trends and challenges to boost visibility. Participating in popular trends increases the likelihood of your video being discovered.
- Captions and Text: Adding captions or on-screen text can enhance storytelling and make your video accessible to more viewers.
- Lighting and Quality: Good lighting and clear visuals are essential. Poor quality videos are less likely to hold viewers’ attention.
- Editing Apps: Use TikTok’s in-app editing tools or external apps like Adobe Premiere Rush or InShot for more advanced editing.
Following these tips ensures your videos are optimized for TikTok, making them more engaging and likely to go viral. For more detailed info, check out TikTok’s official video guidelines. Happy creating!
iPhone Video File Formats
If you’ve ever shot a video on your iPhone, you might have noticed it uses some specific formats. Here’s a deep dive into the default formats used by iPhones and tips for converting them to other formats.
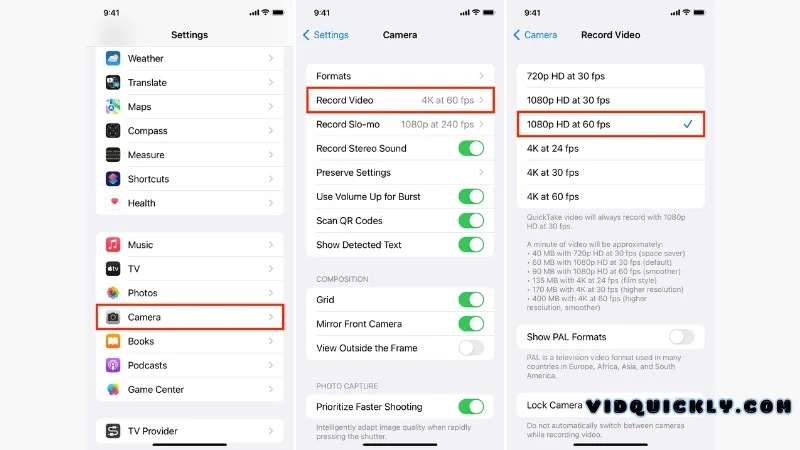
Default Formats Used by iPhone
- MOV (QuickTime Movie)
- Why MOV?: This is the default format for iPhone videos, providing high-quality video and audio, especially when editing on Apple devices. It’s been around for a while and integrates smoothly with Apple’s ecosystem.
- Pros: Excellent quality, great for editing, widely supported on Apple devices.
- Cons: Larger file sizes, not always the best for non-Apple devices.
- HEVC (High Efficiency Video Coding)
- Why HEVC?: Also known as H.265, this format offers superior compression, maintaining high quality while reducing file size. Apple introduced HEVC with iOS 11 to save space without sacrificing video quality.
- Pros: Smaller file sizes with high quality, efficient for storage and streaming.
- Cons: Not as widely compatible with older devices or non-Apple platforms.
Tips for Converting iPhone Videos to Other Formats
- Using iMovie (Mac)
- Steps:
- Open iMovie and import your video.
- Edit if necessary, then click on the “File” menu and select “Share” -> “File”.
- Choose your desired resolution and quality settings.
- Select the output format (MP4 is a good universal choice) and export.
- Why iMovie?: It’s free, easy to use, and fully compatible with iPhone video formats.
- Steps:
- Using HandBrake (Windows/Mac)
- Steps:
- Download and install HandBrake.
- Open HandBrake and load your iPhone video file.
- Choose a preset like “Fast 1080p30” for a quick conversion.
- Set the format to MP4 in the “Summary” tab.
- Click “Start Encode” to begin the conversion.
- Why HandBrake?: It’s a powerful, open-source tool that supports a wide range of formats and provides extensive customization options.
- Steps:
- Using Online Converters
- Steps:
- Visit an online converter site like CloudConvert or Convertio.
- Upload your iPhone video file.
- Select the desired output format (MP4, AVI, etc.).
- Adjust settings if needed, then convert and download the file.
- Why Online Converters?: Convenient and no software installation required, though they might have file size limits and depend on internet speed.
- Steps:
- Using VLC Media Player
- Steps:
- Download and install VLC Media Player.
- Open VLC and go to “Media” -> “Convert/Save”.
- Add your iPhone video file and click “Convert/Save”.
- Choose the output format and destination file path.
- Click “Start” to begin the conversion.
- Why VLC?: It’s free, versatile, and supports many formats.
- Steps:
Additional Tips
- Check Compatibility: Ensure the format you’re converting to is compatible with your intended device or platform.
- Maintain Quality: Adjust bitrate and resolution settings to maintain the desired quality. Higher settings mean better quality but larger files.
- Batch Conversion: If you have multiple videos, look for tools that support batch conversion to save time.
By following these tips, you can easily convert your iPhone videos to formats that suit your needs, whether for editing, sharing, or storing. For more detailed info, check out Apple’s support page on video formats.
Special Video Formats
NTSC Video Format
Ever wondered why some old TVs look different in various parts of the world? That’s where the NTSC video format comes into play. Let’s dive into what NTSC is and why it still matters today.

Explanation of NTSC Standard
- What is NTSC?
- NTSC (National Television System Committee): This is an analog television color system that was first introduced in the United States in 1953. It standardizes how video signals are transmitted, ensuring compatibility across devices.
- Technical Specs: NTSC video typically has a resolution of 525 lines (480 of which are visible) and a frame rate of 29.97 frames per second (fps). The color is encoded using a method called YIQ, where Y represents the luminance (brightness), and I and Q represent chrominance (color information).
- History and Development
- Initial Purpose: NTSC was developed to provide a standardized system for broadcasting color television, ensuring that color broadcasts would be compatible with older black-and-white TVs.
- Global Use: While NTSC was widely adopted in North America, parts of South America, and Japan, other regions like Europe and Asia used different standards like PAL and SECAM.
Use Cases and Relevance in 2024
- Legacy Devices
- Older Equipment: Many older television sets and VCRs still use NTSC. While digital broadcasting has largely replaced analog, NTSC is still relevant for those using legacy equipment.
- Home Videos: Home videos recorded on older camcorders often use the NTSC format, and these videos need compatible playback devices or conversion to digital formats.
- Media Production and Conversion
- Film and TV Production: Some content creators still use NTSC as a reference for producing content that needs to be compatible with older systems or specific markets that continue to use NTSC.
- Conversion: Converting old NTSC tapes to modern digital formats is a common practice, preserving old memories and content for future use.
- Educational Purposes
- Learning and Research: NTSC is often studied in media and communication courses to understand the evolution of broadcast technology and the challenges of transitioning from analog to digital.
- Global Broadcast Standards
- International Use: While NTSC isn’t the global standard anymore, understanding it is crucial for media professionals working in international markets, as content might need to be converted between NTSC, PAL, and SECAM formats.
In today’s digital age, NTSC might seem outdated, but it’s still an essential part of the history and ongoing practice of video production and broadcasting. Understanding NTSC helps appreciate the evolution of video technology and ensures compatibility across various devices and formats.
VCD Video Format
Remember the days when DVDs were a big deal? Before DVDs took over, VCDs were the go-to format for watching movies at home. Let’s explore what VCDs are and why they were so important.

Overview of VCD Format
- What is a VCD?
- VCD (Video Compact Disc): A VCD is a digital video format distributed on a standard compact disc. It uses MPEG-1 compression to store video and audio, making it possible to fit a full movie on a single disc.
- Technical Specs: VCDs have a resolution of 352 x 240 pixels for NTSC or 352 x 288 pixels for PAL/SECAM systems, with a bit rate of about 1.15 Mbps. The audio is typically encoded in MPEG-1 Audio Layer II format, providing decent quality sound.
- How Does It Work?
- Playback: VCDs can be played on dedicated VCD players, many DVD players, and computers with CD drives. They offer a user-friendly interface with simple navigation menus.
- Content: A standard VCD can hold up to 74 minutes of video on a 650 MB disc, or 80 minutes on a 700 MB disc, which is sufficient for most movies and TV shows.
Historical Context and Current Usage
- Historical Context
- Rise to Popularity: VCDs emerged in the early 1990s as a cost-effective alternative to VHS tapes. They became particularly popular in Asia due to their affordability and the widespread availability of compatible hardware.
- Competition with VHS and DVD: While VHS was the dominant format for home video during the 90s, VCDs offered better picture quality and durability. However, they were eventually overshadowed by DVDs, which provided even higher quality video and greater storage capacity.
- Current Usage
- Niche Markets: While VCDs are largely obsolete today, they still hold a nostalgic value and are collected by enthusiasts. Some regions, particularly in Asia, continue to produce and sell VCDs due to their low cost.
- Educational and Archival Use: VCDs are sometimes used in educational settings and for archiving older video content that was originally distributed in this format.
- Legacy Content: Many older movies and TV shows that were initially released on VCD are still available in this format, providing a glimpse into the early days of digital video distribution.
Why VCDs Matter
Despite being overshadowed by DVDs and later by Blu-rays and streaming services, VCDs played a crucial role in the transition from analog to digital video. They made video content more accessible and affordable, especially in regions where DVDs were too expensive or unavailable.
Raw Video File Format
Curious about raw video formats? These are the go-to for serious filmmakers and video editors. Let’s break down what raw video formats are, their uses, and the pros and cons.
Definition and Use Cases
- What is a Raw Video Format?
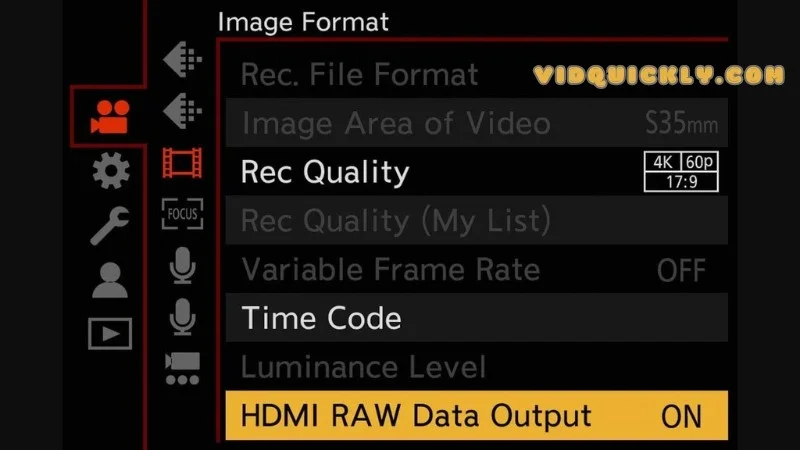
- Raw Video: This format captures all data directly from the camera’s sensor without any compression, processing, or loss of detail. It’s like the digital equivalent of a film negative.
- Technical Specs: Raw video files are large and contain all the information captured by the camera, including color, exposure, and more, which can be adjusted in post-production.
- Use Cases
- Professional Filmmaking: Raw video is essential for filmmakers who need the highest possible quality and the ability to tweak every aspect of the image during editing.
- Post-Production Flexibility: Used in professional editing environments where color grading, visual effects, and other post-processing techniques are applied extensively.
- High-End Photography and Videography: Ideal for capturing high-resolution images and videos for commercial use, advertisements, and detailed visual content creation.
Advantages and Disadvantages of Raw Video Formats
- Advantages
- Maximum Quality: Raw video maintains the highest possible quality, capturing every detail from the camera sensor without any compression.
- Editing Flexibility: Provides extensive flexibility in post-production. Editors can adjust exposure, white balance, and color grading without degrading the image quality.
- Dynamic Range: Raw files retain a wide dynamic range, allowing for more detail in shadows and highlights, which is crucial for high-quality video production.
- Non-Destructive Editing: Changes made during editing don’t affect the original data, meaning you can always revert to the unaltered footage.
- Disadvantages
- Large File Sizes: Raw video files are significantly larger than compressed formats, requiring substantial storage capacity and powerful hardware to process.
- Processing Requirements: Editing raw video demands high-performance computing resources and specialized software, which can be expensive and complex.
- Time-Consuming: The extensive editing capabilities mean more time spent in post-production, which can slow down workflows, especially for large projects.
- Compatibility Issues: Raw formats are often proprietary to specific camera manufacturers, leading to compatibility challenges with different editing software and workflows.
Conclusion
Raw video formats are a powerhouse for those who need uncompromised video quality and extensive editing capabilities. While they come with challenges like large file sizes and the need for powerful hardware, the benefits in terms of quality and flexibility make them indispensable in professional video production.
Choosing the Best Video Format
Best Video Format for Different Purposes
Choosing the right video format can make all the difference in how your content looks and performs. Let’s break down the best formats for streaming, downloading, editing, and sharing.
Streaming & Downloading
- Streaming
- Best Format: MP4 (H.264/AAC)
- Why MP4?: This format is the gold standard for streaming because it offers a great balance of quality and file size. It’s widely supported across all devices and platforms, ensuring smooth playback without buffering.
- Pros: High compatibility, good quality, efficient compression.
- Cons: Slightly less quality than some high-end formats, but the trade-off is negligible for streaming.
- Examples: YouTube, Netflix, and Vimeo primarily use MP4 for their streaming services.
- Downloading
- Best Format: MP4 (H.264/AAC) or MKV (H.265)
- Why MP4?: MP4 is again a strong choice for downloading due to its compatibility and quality. However, MKV is also excellent, especially for high-definition content, as it supports multiple audio tracks and subtitles.
- Pros: MP4 – High compatibility and quality; MKV – Supports multiple tracks and high-quality video.
- Cons: MKV files are larger and might not be supported by all devices without specific software.
- Examples: Movies, TV shows, and large video files are often available in MKV format for downloading due to its high quality.
Editing & Sharing
- Editing
- Best Format: MOV or ProRes
- Why MOV?: MOV files are ideal for editing because they maintain high video quality and are compatible with most editing software, especially on Mac.
- Why ProRes?: ProRes is a codec developed by Apple that offers superior quality and performance for professional video editing. It’s less compressed than other formats, making it easier to work with in editing software.
- Pros: High quality, excellent for detailed editing.
- Cons: Large file sizes, requires powerful hardware.
- Examples: Used in professional filmmaking and high-quality video production.
- Sharing
- Best Format: MP4 (H.264/AAC)
- Why MP4?: MP4 is the best format for sharing because it’s widely compatible, compresses well without losing too much quality, and ensures the video will play on virtually any device.
- Pros: Small file size, high compatibility, good quality.
- Cons: Slightly less quality than raw formats, but perfect for most sharing needs.
- Examples: Social media platforms like Facebook, Instagram, and Twitter recommend MP4 for uploading videos.
Summary
- Streaming: MP4 for its balance of quality and compatibility.
- Downloading: MP4 or MKV for high-definition content.
- Editing: MOV or ProRes for the best quality and editing flexibility.
- Sharing: MP4 for ease of use and wide compatibility.
By choosing the right format for your specific needs, you can ensure your videos look great and play smoothly across different platforms and devices.
Smallest File Format for Video
Looking to save space on your device while keeping your videos looking good? Let’s dive into the video formats that offer the best compression and the trade-offs between file size and quality.
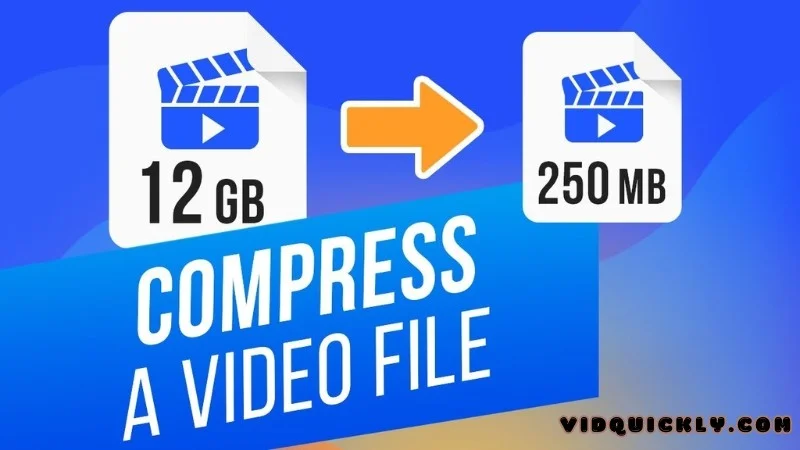
Formats that Offer the Best Compression
- HEVC (H.265)
- Why HEVC?: High Efficiency Video Coding (HEVC), also known as H.265, is one of the most advanced compression formats available. It offers up to 50% better compression than its predecessor, H.264, while maintaining the same level of video quality.
- Pros: Significantly smaller file sizes, excellent quality, ideal for 4K and high-definition videos.
- Cons: Requires more processing power for encoding and decoding, not as widely supported on older devices.
- Examples: Used in 4K streaming services, Blu-ray discs, and high-definition video recording.
- VP9
- Why VP9?: Developed by Google, VP9 is another efficient compression format designed to reduce file size while maintaining quality. It’s particularly effective for streaming and is supported by major platforms like YouTube.
- Pros: Great compression efficiency, royalty-free, widely supported in web browsers.
- Cons: Similar to HEVC, it requires more processing power, and compatibility can be an issue with some older devices.
- Examples: Used by YouTube for streaming high-definition content.
- AV1
- Why AV1?: AV1 is an open-source, royalty-free video coding format developed by the Alliance for Open Media. It provides even better compression than VP9 and HEVC, making it ideal for streaming and online video content.
- Pros: Superior compression, open-source, increasingly supported by browsers and platforms.
- Cons: Still gaining adoption, higher processing requirements for encoding and decoding.
- Examples: Used by platforms like YouTube and Netflix for streaming videos.
Trade-offs Between File Size and Quality
- Quality Reduction
- Compression Artifacts: The more you compress a video, the more likely you are to see artifacts—unwanted distortions or blockiness in the video. This is more noticeable at lower bitrates.
- Color and Detail Loss: Heavy compression can also result in loss of color accuracy and fine details, which can be particularly problematic for videos with lots of movement or intricate visuals.
- Processing Power
- Encoding Time: Advanced codecs like HEVC and AV1 require more computational power to encode, meaning longer processing times when you’re saving or converting files.
- Playback Requirements: These formats also require more power to decode during playback, which can be an issue on older or less powerful devices.
- Compatibility
- Device Support: While newer formats like HEVC and AV1 offer great compression, they may not be supported on all devices, especially older models. This can limit the ability to share videos across different platforms without conversion.
Summary
- Best Compressed Formats: HEVC (H.265), VP9, and AV1 are the top choices for efficient compression.
- Trade-offs: Smaller file sizes come at the cost of increased processing power and potential quality loss. Compatibility with older devices can also be an issue.
Best Video Format for Web
When it comes to putting videos on the web, choosing the right format can make all the difference in performance and viewer experience. Let’s dive into the best formats optimized for web use and what you need to consider for web compatibility and loading times.
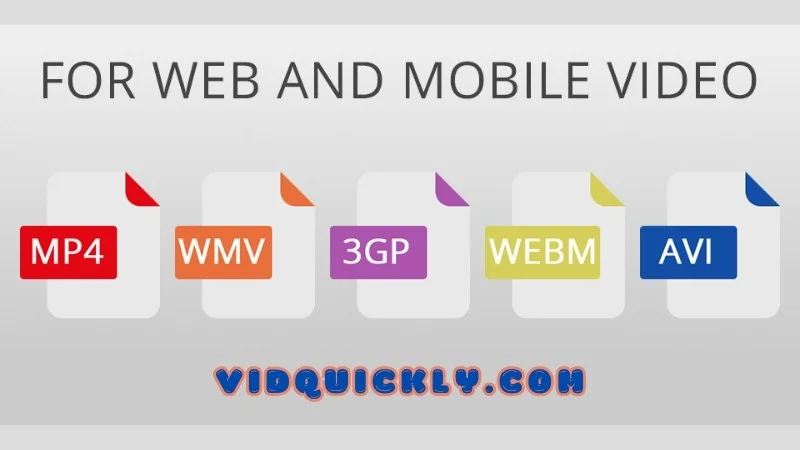
Formats Optimized for Web Use
- MP4 (MPEG-4 Part 14)
- Why MP4?: MP4 is the most widely supported video format across all web browsers and devices. It uses the H.264 codec for video compression, which provides a great balance between quality and file size.
- Pros: High compatibility, good quality, and efficient compression. It also supports multiple streaming protocols and can include subtitles and metadata.
- Cons: Slightly larger file sizes compared to more advanced codecs like HEVC.
- Examples: YouTube, Vimeo, and most online video platforms use MP4 for their content.
- WebM
- Why WebM?: WebM is a video format specifically designed for the web, using the VP9 codec. It’s an open-source format developed by Google, which makes it royalty-free and efficient for web use.
- Pros: Excellent compression, good quality, and optimized for modern web browsers. It’s particularly effective for HTML5 video.
- Cons: Slightly less compatibility with older browsers and devices that do not support the VP9 codec.
- Examples: Many websites using HTML5 for video playback, including YouTube, which offers videos in WebM format as well.
Considerations for Web Compatibility and Loading Times
- Compatibility
- Browser Support: MP4 is universally supported across all major browsers, including Chrome, Firefox, Safari, and Edge. WebM is also widely supported but might require fallback options for older browsers.
- Device Compatibility: Ensure that your video format works well on both desktop and mobile devices. MP4 is a safe bet for broad compatibility, while WebM is ideal for modern devices and browsers.
- Loading Times
- Compression Efficiency: Choose a format that offers good compression without sacrificing quality. MP4 (H.264) and WebM (VP9) both provide efficient compression, helping to reduce loading times while maintaining video quality.
- File Size: Smaller file sizes mean faster loading times, which is crucial for keeping viewers engaged. Ensure your videos are compressed properly to balance quality and loading speed.
- Streaming: Implement adaptive streaming techniques like HLS (HTTP Live Streaming) for MP4 and DASH (Dynamic Adaptive Streaming over HTTP) for WebM to adjust video quality based on the user’s internet speed, ensuring smooth playback without buffering.
Summary
- Best Formats: MP4 for universal compatibility and good quality; WebM for modern, efficient web video delivery.
- Considerations: Focus on compatibility with all devices and browsers, and optimize loading times through efficient compression and streaming techniques.
How to Change Video File Formats
Tools and Software for Video Conversion
Need to convert your video files but don’t know which tool to use? Let’s explore some popular video conversion tools and walk through a step-by-step guide to converting video formats.

Popular Conversion Tools
- HandBrake
- What is HandBrake?: HandBrake is an open-source video transcoder that supports a wide variety of formats. It’s known for its user-friendly interface and powerful features.
- Pros: Free, open-source, supports a wide range of formats, easy to use.
- Cons: Can be slow with large files, fewer advanced features compared to professional software.
- Examples: Great for converting videos for web use, compressing large video files, and preparing videos for streaming.
- FFmpeg
- What is FFmpeg?: FFmpeg is a command-line based tool that’s incredibly versatile for video conversion, processing, and streaming. It’s a favorite among professionals for its flexibility and power.
- Pros: Free, open-source, supports virtually any format, very powerful and flexible.
- Cons: Steeper learning curve due to command-line interface, less intuitive for beginners.
- Examples: Ideal for batch processing, advanced video editing tasks, and automation scripts.
- Online Converters
- What are Online Converters?: These are web-based tools that allow you to convert video files directly from your browser without installing any software. Popular options include CloudConvert, Convertio, and Online-Convert.
- Pros: Convenient, no software installation required, usually free for basic features.
- Cons: File size limitations, dependent on internet speed, may have privacy concerns with sensitive files.
- Examples: Best for quick, small-scale conversions, or when you need a fast solution without installing software.
Step-by-Step Guide to Converting Video Formats
- Using HandBrake
- Step 1: Download and install HandBrake from HandBrake’s official website.
- Step 2: Open HandBrake and click on “Open Source” to import your video file.
- Step 3: Choose a preset from the right panel that suits your needs (e.g., “Fast 1080p30” for quick conversion).
- Step 4: Adjust video settings if needed, such as resolution, codec, and bitrate.
- Step 5: Select the destination for your converted file.
- Step 6: Click “Start Encode” to begin the conversion process.
- Using FFmpeg
- Step 1: Download and install FFmpeg from FFmpeg’s official website.
- Step 2: Open your command-line interface (CMD on Windows, Terminal on Mac/Linux).
- Step 3: Navigate to the directory containing your video file.
- Step 4: Enter the conversion command. For example, to convert an MP4 file to AVI, type:
ffmpeg -i input.mp4 output.avi - Step 5: Press Enter to start the conversion process. FFmpeg will display progress in the terminal.
- Using Online Converters
- Step 1: Go to a trusted online converter website, such as CloudConvert.
- Step 2: Upload your video file by clicking the “Select File” button.
- Step 3: Choose the desired output format (e.g., MP4, AVI, MOV).
- Step 4: Adjust settings if available, such as resolution, bitrate, or codec.
- Step 5: Click “Convert” to start the conversion process.
- Step 6: Download the converted file once the process is complete.
By using these tools and following these steps, you can easily convert your video files to the desired format, ensuring they are ready for any platform or use case. Whether you prefer the simplicity of HandBrake, the power of FFmpeg, or the convenience of online converters, there’s a solution that fits your needs. For more detailed information, check out the official documentation and tutorials available on each tool’s website.
Best Practices for Video Conversion
Converting videos can sometimes be tricky, especially if you want to maintain quality. Let’s dive into some best practices for keeping your videos looking sharp and avoiding common pitfalls during conversion.

Maintaining Quality During Conversion
- Choose the Right Format and Codec
- Format and Codec: Stick with formats like MP4 with H.264 or H.265 codecs for a good balance of quality and file size. These formats are widely supported and provide excellent compression without significant quality loss.
- Why It Matters: Using the right format and codec ensures your video remains high-quality and compatible across different devices and platforms.
- Adjust Bitrate Carefully
- Bitrate Settings: Ensure the bitrate is high enough to maintain quality but not so high that it creates unnecessarily large files. For example, a bitrate of 8 Mbps for 1080p video is usually sufficient.
- Why It Matters: Bitrate directly affects the video’s quality and file size. Too low, and you’ll see artifacts and blurriness; too high, and you waste storage space and bandwidth.
- Maintain Resolution and Frame Rate
- Resolution and Frame Rate: Keep the original resolution and frame rate whenever possible. If you must change these settings, ensure the new settings match the capabilities of your playback devices.
- Why It Matters: Changing resolution or frame rate can introduce artifacts and make the video look choppy or distorted. Matching the original settings preserves the video’s integrity.
- Use High-Quality Conversion Tools
- Tools: Use reliable software like HandBrake, FFmpeg, or professional video editing software to handle conversions. These tools offer advanced settings to tweak quality parameters precisely.
- Why It Matters: High-quality tools ensure the conversion process doesn’t degrade the video unnecessarily and provides options to fine-tune the output.
Common Pitfalls and How to Avoid Them
- Pitfall: Over-Compression
- Issue: Compressing a video too much can lead to a significant loss of quality, with visible artifacts and blurriness.
- Solution: Balance compression and quality by using appropriate bitrate settings and choosing efficient codecs like H.264 or H.265. Always preview the output before finalizing.
- Pitfall: Incorrect Aspect Ratio
- Issue: Changing the aspect ratio without consideration can distort the video, making it look stretched or squished.
- Solution: Maintain the original aspect ratio or use letterboxing to fit different screen sizes without distortion.
- Pitfall: Ignoring Audio Quality
- Issue: Focusing only on video quality and neglecting audio can result in a poor overall viewing experience.
- Solution: Use high-quality audio codecs like AAC and set a bitrate of at least 128 kbps to ensure clear and crisp audio.
- Pitfall: Not Checking Compatibility
- Issue: Converting to a format that isn’t widely supported can lead to playback issues on some devices.
- Solution: Use universally compatible formats like MP4 for most conversions, ensuring smooth playback across all devices and platforms.
- Pitfall: Skipping Quality Checks
- Issue: Converting videos without reviewing the final output can result in unnoticed quality issues.
- Solution: Always preview the converted video to check for any quality loss or issues before sharing or uploading it.
By following these best practices, you can ensure your video conversions maintain the highest possible quality while avoiding common pitfalls. Choose the right tools, adjust settings carefully, and always check your final product to make sure it looks and sounds great.
Video Format Compatibility
Common Video Formats and Their Players
Navigating through various video formats and finding the right player can be tricky. Let’s break down the compatibility of common video formats and recommend some universal players to make your life easier.
Compatibility Chart for Various Formats and Players
| Format | Description | Common Players | Compatibility |
|---|---|---|---|
| MP4 | Widely used for streaming and sharing, offers a good balance of quality and file size. | VLC, Windows Media Player, QuickTime, almost all modern media players. | Excellent across all devices and platforms. |
| AVI | Older format with high quality but large file sizes. | VLC, Windows Media Player, QuickTime (with codecs). | Good on older devices, but can have issues on modern mobile devices without additional codecs. |
| MOV | Developed by Apple, ideal for high-quality video editing. | VLC, QuickTime, iTunes. | Best on Apple devices, but supported by most media players with proper codecs. |
| WMV | Developed by Microsoft, offers good compression and quality. | VLC, Windows Media Player. | Excellent on Windows, requires additional software on other platforms. |
| MKV | Highly flexible format supporting multiple audio and subtitle tracks. | VLC, KMPlayer, PotPlayer. | Excellent for modern players, some older devices may struggle without proper codecs. |
| FLV | Once popular for web video, now less common. | VLC, Adobe Flash Player, some older web browsers. | Poor on mobile devices, better on desktop with proper plugins. |
| WebM | Designed for web use with efficient compression. | VLC, Chrome, Firefox, Edge. | Excellent for web and modern browsers, may need conversion for older systems. |
Recommendations for Universal Players
- VLC Media Player
- Why VLC?: VLC is the go-to universal media player because it supports almost every video and audio format without the need for additional codecs. It’s free, open-source, and available on multiple platforms including Windows, Mac, Linux, iOS, and Android.
- Pros: Wide format support, customizable, can play incomplete or damaged files.
- Cons: Some advanced features might be complex for beginners.
- Download: VLC Media Player
- KMPlayer
- Why KMPlayer?: KMPlayer is another versatile player that handles a wide range of video formats. It offers advanced features like video capture and supports high-definition videos.
- Pros: Customizable, supports 3D and VR formats, robust subtitle support.
- Cons: Includes bundled software, which some users might find intrusive.
- Download: KMPlayer
- PotPlayer
- Why PotPlayer?: PotPlayer is praised for its high performance and low resource usage. It supports an extensive range of formats and provides a smooth playback experience.
- Pros: Lightweight, supports a vast array of codecs, highly customizable.
- Cons: Windows-only, may include bloatware in the installer.
- Download: PotPlayer
- QuickTime Player
- Why QuickTime?: Ideal for Mac users, QuickTime supports MOV and other Apple-preferred formats natively. It’s great for basic playback and editing.
- Pros: Optimized for Mac, simple and clean interface.
- Cons: Limited format support outside Apple’s ecosystem, less powerful than VLC or KMPlayer.
- Download: QuickTime Player
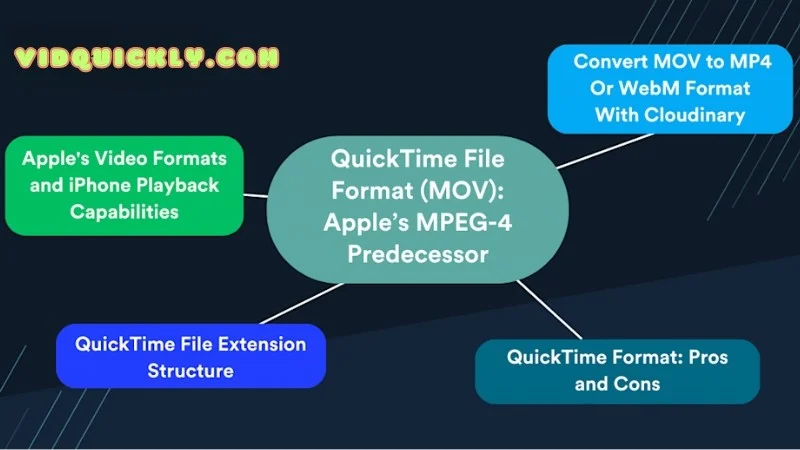
Apple Video File Format
Got an Apple device and want to know the best video formats to use? Let’s explore the formats best supported by Apple devices and some tips for seamless playback on iOS and macOS.
Formats Best Supported by Apple Devices
- MOV (QuickTime Movie)
- Why MOV?: The MOV format, developed by Apple, is designed to work perfectly with Apple devices. It supports high-quality video and audio, making it ideal for professional use.
- Pros: Excellent quality, supports advanced codecs like ProRes, great for editing.
- Cons: Larger file sizes, mainly optimized for Apple devices.
- Examples: Used in Final Cut Pro and iMovie for video editing.
- MP4 (MPEG-4 Part 14)
- Why MP4?: MP4 is a versatile and widely supported format that works seamlessly on Apple devices. It uses the H.264 codec for video compression, providing a good balance between quality and file size.
- Pros: High compatibility, good quality, smaller file size compared to MOV.
- Cons: Slightly less quality than MOV for high-end professional work.
- Examples: Ideal for playback on iPhone, iPad, and streaming on Apple TV.
- HEVC (H.265)
- Why HEVC?: HEVC is a modern codec supported by Apple for its efficiency in compressing high-quality video. It’s great for 4K and high-definition content, providing better compression than H.264.
- Pros: Smaller file sizes with high quality, excellent for 4K content.
- Cons: Requires more processing power for encoding and decoding.
- Examples: Used in iPhone video recording and streaming on Apple TV.
Tips for Seamless Playback on iOS and macOS
- Use Apple-Preferred Formats
- MOV and MP4: Stick to these formats to ensure the best compatibility and performance. Apple’s ecosystem is optimized for these formats, ensuring smooth playback and editing.
- Optimize Video Settings
- Resolution and Bitrate: Use 1080p resolution with a bitrate of around 8 Mbps for high-quality playback on most devices. For 4K content, HEVC with a bitrate of 35-45 Mbps is ideal.
- Frame Rate: Keep the frame rate at 30 fps for general content or 60 fps for high-motion videos like gaming or sports.
- Utilize AirPlay
- What is AirPlay?: AirPlay allows you to stream video from your iPhone, iPad, or Mac directly to your Apple TV or other AirPlay-compatible devices.
- Why It’s Useful: This ensures high-quality streaming without the need for additional cables or hardware. Just ensure all devices are on the same Wi-Fi network.
- Use QuickTime Player
- Why QuickTime?: QuickTime Player is designed by Apple for macOS, ensuring the best performance and compatibility with MOV and MP4 formats.
- How to Use: Simply open your video file with QuickTime Player for smooth playback and additional features like basic editing and conversion.
- Keep Software Updated
- iOS and macOS Updates: Ensure your devices are running the latest versions of iOS and macOS to benefit from the latest improvements in video playback and compatibility.
For the best experience on Apple devices, stick with MOV and MP4 formats, and consider using HEVC for high-definition content. Optimize your video settings for smooth playback and use QuickTime Player for the best performance on macOS. Keeping your software updated ensures compatibility and the best possible viewing experience.
Future Trends in Video Formats
Emerging Formats
Video formats are constantly evolving, like fashion trends. Let’s talk about some of the cool new kids on the block that are changing the game.
Meet the New Kids on the Block: HEVC and AV1
- HEVC (H.265): Think of HEVC as the skinny jeans of video formats. It packs a lot of video into a smaller file size, which is great for saving space and streaming. It’s like magic!
- AV1: This is the new, experimental fashion. It’s even better at squeezing video into small files than HEVC. Plus, it’s open-source, which means it’s free for everyone to use.
HEVC (H.265)
- What is HEVC?
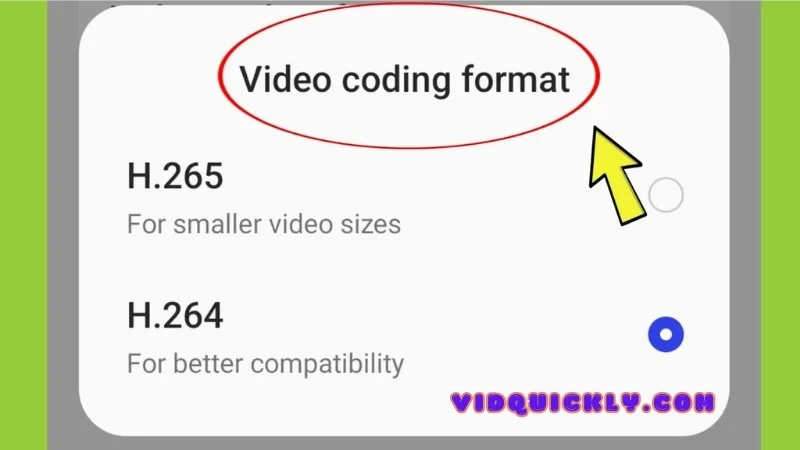
- High Efficiency Video Coding (HEVC), also known as H.265, is a video compression standard designed to replace H.264 (AVC). It offers significantly better compression, meaning higher quality videos at smaller file sizes.
- How It Works: HEVC achieves better compression by using more sophisticated algorithms to reduce redundancy and by supporting higher resolutions, like 4K and even 8K.
- Impact on Video Quality and File Size
- Quality: HEVC can maintain high-quality video, even at lower bitrates. This means you get crisp, clear videos without the need for massive files.
- File Size: HEVC can reduce file sizes by up to 50% compared to H.264, which is huge for storage and streaming efficiency. This reduction helps save bandwidth and makes high-resolution content more accessible.
AV1
- What is AV1?
- AOMedia Video 1 (AV1) is an open, royalty-free video coding format developed by the Alliance for Open Media. It’s designed to be a successor to VP9 and aims to provide better compression than both H.264 and HEVC.
- How It Works: AV1 uses advanced techniques like better motion compensation, larger block sizes, and more efficient entropy coding to compress videos more effectively.
- Impact on Video Quality and File Size
- Quality: AV1 promises superior video quality at lower bitrates. This makes it ideal for streaming high-definition and ultra-high-definition videos without requiring excessive bandwidth.
- File Size: AV1 can reduce file sizes by approximately 30% more than HEVC. This means even smaller files for the same quality, making it perfect for online streaming platforms looking to deliver high-quality content efficiently.
Comparison and Potential Impact
- Efficiency and Adoption
- HEVC: Widely adopted in devices like 4K TVs, Blu-ray players, and streaming services. Its efficiency in reducing file sizes while maintaining quality has made it popular in the industry.
- AV1: Gaining traction, especially among tech giants like Google, Netflix, and Amazon. Its royalty-free nature and better compression efficiency make it attractive for widespread use in the future.
- Future Prospects
- HEVC: Expected to remain a staple for high-quality video encoding, especially in professional environments and consumer electronics.
- AV1: Likely to become the standard for online streaming, given its efficiency and support from major companies pushing for open-source solutions
What This Means for You
These new formats are like having a superpowered camera in your pocket. You can shoot higher quality videos that take up less space on your phone. And when you’re streaming, you can enjoy smoother playback without buffering.
But remember, not all devices can handle these new formats yet. It’s like trying to wear the latest fashion in a small town – you might get some strange looks. But don’t worry, these formats are gaining popularity fast.
Industry Trends
Get ready for a visual feast! The world of video is changing fast, with bigger screens, higher quality, and more ways to watch than ever before.
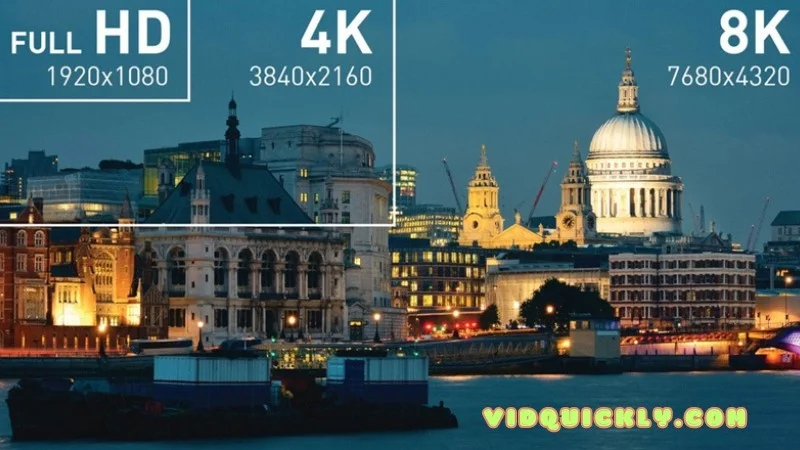
Say Hello to Ultra HD
- 4K Video
- What is 4K?: 4K video, also known as Ultra High Definition (UHD), has a resolution of 3840 x 2160 pixels, providing four times the detail of Full HD (1080p).
- Why It Matters: As more consumers purchase 4K TVs and monitors, the demand for 4K content is skyrocketing. This resolution offers sharper, more detailed images, which is crucial for immersive viewing experiences in movies, sports, and gaming.
- 8K Video
- What is 8K?: 8K video has an impressive resolution of 7680 x 4320 pixels, providing sixteen times the detail of Full HD. It’s the next frontier in video quality.
- Why It Matters: Although still in its early stages, 8K is gaining traction, especially in high-end markets. It’s essential for applications like large-scale displays, detailed medical imaging, and future-proofing content as display technology evolves.
- Adoption and Infrastructure
- Broadcasters and Streamers: Platforms like Netflix, YouTube, and Amazon Prime Video are increasingly offering 4K content. Broadcasters are also starting to experiment with 8K broadcasts, particularly for major events like the Olympics.
- Hardware Support: The availability of 4K and 8K TVs, monitors, and cameras is expanding, making high-resolution content more accessible to consumers. Additionally, next-gen gaming consoles like the PS5 and Xbox Series X support 4K and 8K gaming.
Trends in Streaming and On-Demand Video Services

- Rise of Streaming Services
- Dominance of OTT Platforms: Over-the-top (OTT) services like Netflix, Disney+, and Amazon Prime Video continue to grow, offering a vast library of content that users can stream on-demand. These platforms are investing heavily in original content to attract and retain subscribers.
- Live Streaming: Services like Twitch and YouTube Live are booming, providing platforms for live events, gaming, and interactive content. This trend is driven by the growing interest in real-time content and social interaction.
- Personalization and AI
- Content Recommendations: Streaming platforms use advanced algorithms and AI to provide personalized content recommendations based on viewing habits. This enhances user experience by making it easier to discover new content that aligns with individual preferences.
- Adaptive Streaming: Technologies like adaptive bitrate streaming adjust the quality of a video stream in real-time based on the viewer’s internet connection, ensuring smooth playback and reducing buffering.
- Interactive and Immersive Experiences
- Interactive Content: Platforms are experimenting with interactive storytelling, where viewers can influence the plot by making choices. Netflix’s “Bandersnatch” is a prime example of this innovative format.
- Virtual Reality (VR) and Augmented Reality (AR): VR and AR are emerging trends, offering immersive experiences that merge digital and physical worlds. Companies are exploring these technologies for gaming, live events, and virtual tours.
- Global Expansion
- Localized Content: Streaming services are increasingly producing and promoting content tailored to regional markets, recognizing the diverse tastes and preferences of global audiences. This includes subtitles, dubbing, and original content in local languages.
- Mobile Streaming: With the proliferation of smartphones, mobile streaming has become a major focus. Platforms optimize their apps for mobile devices, offering features like offline downloads and data-saving modes to cater to users on the go.
The future of video is bright, with 4K and 8K resolutions setting new standards for quality, and streaming services leading the way in how we consume content. As technology continues to evolve, expect more personalized, immersive, and globally diverse video experiences.
Conclusion
Understanding video formats is crucial for professional video creators and editors. The right format can significantly impact your video’s quality, compatibility, and overall viewer experience. Whether you’re shooting in high-definition for cinematic quality or compressing for quick uploads, knowing when to use MP4, MOV, or MKV can make all the difference.
Stay ahead in the digital video landscape by continually refining your knowledge and techniques. For more in-depth tutorials, tips, and the latest news, visit the VidQuickly Blog – your ultimate resource for mastering video formats and downloading content from Facebook, YouTube, TikTok, Instagram, and more.
VidQuickly’s Tips for Social Media Video Creators
Creating engaging and high-quality videos for social media can make all the difference in your digital presence. Here are VidQuickly’s top tips for social media video creators:
- Know Your Platform: Each social media platform has its own preferred video formats, resolutions, and lengths. For example, Instagram favors vertical videos, while YouTube supports longer, high-definition content. Tailor your videos to meet these specifications for optimal performance.
- Keep It Short and Sweet: Attention spans on social media are short. Aim for concise videos that deliver your message quickly and effectively. Videos under one minute tend to perform best, but even shorter content can be powerful if it’s engaging and to the point.
- Engage Quickly: Capture viewers’ attention within the first few seconds. Use vibrant visuals, catchy music, or intriguing questions to hook your audience right away. The first few seconds are crucial for preventing viewers from scrolling past your content.
- Optimize for Mobile: Most social media users access content on their phones. Ensure your videos are mobile-friendly by using vertical formats and high resolutions. Test your videos on different devices to ensure they look good everywhere.
- Use Captions and Subtitles: Many users watch videos without sound. Adding captions or subtitles can make your content accessible and keep viewers engaged even with the sound off. This is especially important for conveying key messages and information.
- Leverage Trends and Hashtags: Stay updated on the latest trends and incorporate popular hashtags to increase your video’s reach. Participating in trending challenges or using popular music can boost your content’s visibility and engagement.
- Analyze Performance: Use analytics tools to track your videos’ performance. Pay attention to metrics like view count, engagement rate, and audience retention. Use this data to refine your strategy and create content that resonates with your audience.
Remember: Consistency is key. Post regularly and keep your audience engaged. With a little effort and creativity, you can create amazing videos that go viral.
Want to learn more about specific social media platforms or video editing tips? Let me know!
FAQs about Video Formats (Video File Formats)
What Are Video Formats and Why Are They Important?
Video formats are standardized file types used to store and compress video data. They are crucial for ensuring compatibility across different devices and platforms, maintaining video quality, and managing file sizes effectively.
Which Video Format Should I Use for Social Media?
MP4 is the most widely recommended format for social media due to its high compatibility, good quality, and efficient compression. It works well on platforms like YouTube, Instagram, Facebook, and Twitter.
How Do I Convert Videos to Different Formats Without Losing Quality?
Use reliable software like HandBrake or FFmpeg for video conversion. Ensure you set the output settings to maintain the original resolution, bitrate, and frame rate to preserve quality.
What Is the Difference Between Lossy and Lossless Video Formats?
Lossy formats (e.g., MP4, AVI) compress video by removing some data, resulting in smaller file sizes but slightly reduced quality. Lossless formats (e.g., MOV, some MKV) preserve all data, maintaining perfect quality but resulting in larger file sizes.
What Are HEVC and AV1, and Why Are They Important for the Future of Video?
HEVC (H.265) and AV1 are advanced video compression formats that offer significantly better compression than older formats like H.264. They provide high-quality video at smaller file sizes, making them ideal for streaming and high-definition content.

