Want to know how to turn your creativity into cash using Facebook Reels? Whether you’re looking to download videos for other platforms or make money directly from Reels, this is the place to start. Facebook Reels is all about quick, engaging content that can reach a massive audience—perfect for growing your brand and earning some serious income.
Read on to dive deep into how Facebook Reels work, why they matter, and how you can cash in. Welcome to your ultimate guide on mastering Reels!
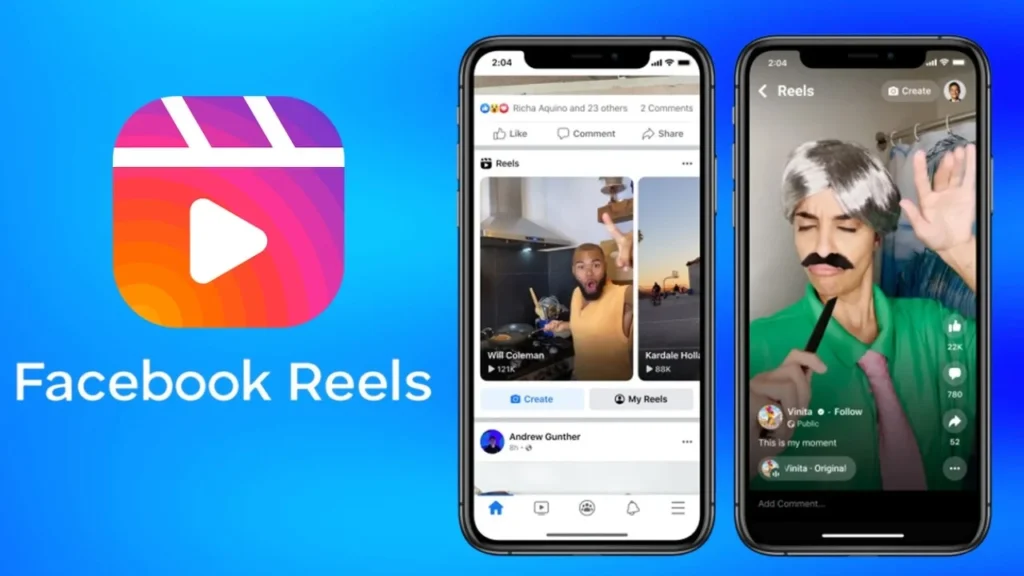
Introduction to Facebook Reels
What is a Reel on Facebook?
A Facebook Reel is a short, vertical video up to 90 seconds long, designed for easy sharing and discovery on the platform. Featuring music, effects, and creative tools, Reels help users engage a wider audience, boost visibility, and showcase their creativity with dynamic, entertaining content.
Difference between Reels and other video formats (Stories, regular posts)
Reels: Reels are short, vertical videos designed for discovery by a broader audience. They have up to 90 seconds of content and are ideal for reaching new users, encouraging engagement like likes, comments, and shares.
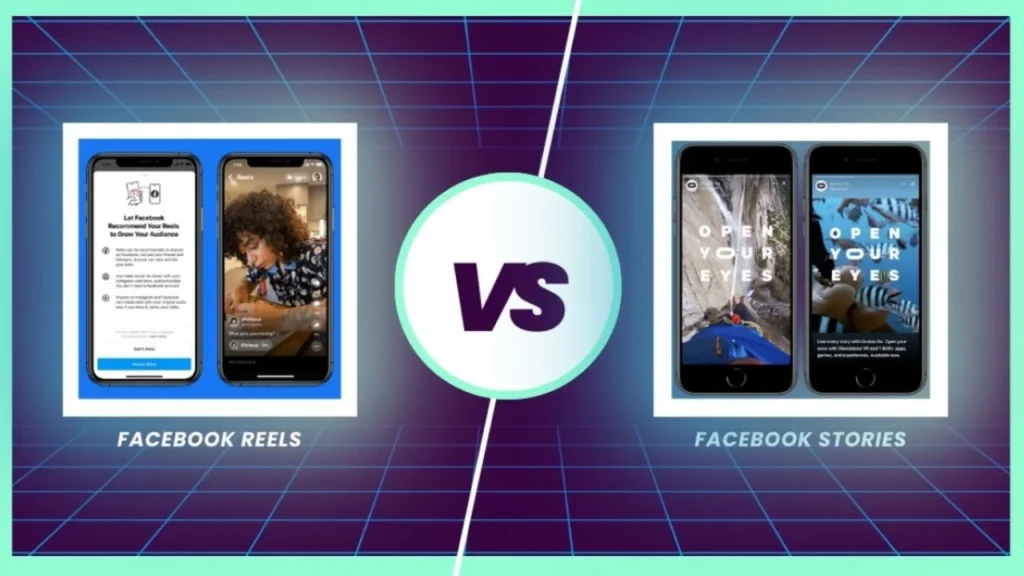
Stories: Stories are more personal, disappearing after 24 hours. They’re meant for more casual, day-to-day updates shared with friends or followers.
Regular Posts: These can be photos, text, or videos that remain on your timeline until deleted, primarily aimed at engaging with your existing followers.
Importance of Reels in social media marketing
Facebook Reels have become essential in social media marketing due to their ability to boost discoverability and engagement. Unlike regular posts, Reels are pushed to a wider audience, including non-followers, through algorithmic recommendations. This makes them ideal for brand awareness, viral content, and reaching new demographics.
Marketers can use Reels to tap into current trends, share authentic stories, and showcase products, all while maintaining high engagement rates. Additionally, Reels’ short-form format encourages quick, impactful storytelling, crucial for retaining user attention in today’s fast-paced digital environment.
How to Create a Facebook Reel
Step-by-step guide on making a Reel on mobile and desktop
Creating Facebook Reels is a straightforward process that allows you to share engaging short-form videos with your audience. This guide will provide you with detailed steps for making Reels on both mobile devices and desktop.
Creating a Reel on Mobile

- Open the Facebook App:
- Launch the Facebook app on your mobile device. Ensure you have the latest version installed for optimal performance.
- Access the Reels Creator:
- Tap on the camera icon located at the top left of your screen or click the “Reels” button at the center bottom of the screen.
- Alternatively, you can swipe left from your news feed to enter Create Mode.
- Choose Your Video Content:
- You can either record a video directly within the app by pressing and holding the capture button or upload pre-recorded clips from your gallery by tapping the photo icon in the bottom left corner.
- Add Music and Text:
- To enhance your Reel, tap on the “Music” icon to select a song from Facebook’s music library.
- To add text, click the “Text” button, type your message, and customize it by adjusting the font, color, and position.
- Incorporate Creative Elements:
- Use the AR Effects to apply filters to your video.
- Utilize the Timer feature for hands-free recording.
- The Align tool is helpful for creating seamless transitions between clips.
- Review and Edit:
- After recording or uploading, review your clips. You can trim or delete clips by clicking the “Scissors” icon if needed.
- Once satisfied, click “Next” to proceed.
- Add a Caption and Audience Settings:
- Write a description for your Reel, and consider adding relevant hashtags.
- Choose your audience settings (Public, Friends, Custom, Only Me) to control who can view your Reel.
- Share Your Reel:
- Tap the “Share” button to publish your Reel immediately, or select “Save Draft” if you want to make changes later.
Creating a Reel on Desktop
- Open Facebook in Your Browser:
- Go to www.facebook.com using a web browser like Google Chrome or Firefox and log into your account.
- Access the Reels Section:
- Click on the “Reels” tab in the left sidebar or navigate to your profile and select the Reels section.
- Create a New Reel:
- Click on “Create New Reel” or the “+” icon.
- Select a video file from your computer to upload.
- Edit Your Reel:
- After uploading, you can add captions, music, and text. Use the editing tools available to trim or adjust your video as needed.
- Review Your Content:
- Once you’ve made your edits, review the final product to ensure everything looks good.
- Set Audience Preferences:
- Choose who can view your Reel (Public, Friends, Custom).
- Publish Your Reel:
- Click “Share” to post your Reel immediately, or select “Save Draft” for future edits.
Tips for Creating Engaging Reels
- Be Creative: Utilize all available creative tools, including music, effects, and text, to make your Reels stand out.
- Keep It Short and Engaging: Aim for content that is engaging within the first few seconds to capture viewers’ attention quickly.
- Stay Updated: Regularly check for updates to the Facebook app to access new features and improvements.
Tools and features: Adding music, filters, stickers, etc.
Creating engaging Facebook Reels involves utilizing various tools and features that enhance your videos and make them more appealing to your audience. Below, we’ll explore how to add music, filters, stickers, and other creative elements to your Reels, ensuring you can produce captivating content.
Adding Music to Your Reels
Music is a powerful tool that can elevate the emotional impact of your Reels. Here’s how to add music using the Facebook app on mobile devices and desktop:
On Mobile
- Open the Facebook App: Make sure you have the latest version of the app installed.
- Create a Reel: Tap on the Reels tab and click the Create Reel button.
- Select Music:
- Tap the Audio button on the right side of the screen.
- You can browse through the app’s built-in audio library or search for specific songs or artists.
- Once you find the desired track, select it and choose the specific portion you want to use in your Reel.
- Finalize Your Reel: After adding music, continue editing your Reel by adding text, effects, or stickers, and then share it.
On Desktop
Currently, the Facebook desktop version does not allow users to add music directly to Reels. Instead, you must add music using a video editing software before uploading your video to Facebook. This means you should:
- Edit your video with music using a video editor (like Adobe Premiere Pro or iMovie).
- Save the video in an appropriate format (preferably MP4) and upload it to Facebook as a Reel.
Incorporating Filters and Effects
Filters and effects can significantly enhance the visual appeal of your Reels. Here’s how to add them:
- Open the Reels Creator: Access the Reels creation interface as previously described.
- Choose Your Video: Record a new video or upload an existing one.
- Add Filters:
- Look for the Effects or AR Effects icon on the right side of the screen.
- Browse through various filters and effects available in the app. You can apply them to your video before or after recording.
- Adjust Video Speed: Use the speed adjustment tool to create slow-motion or fast-motion effects, adding a dynamic element to your content.
Adding Stickers and Text
Stickers and text can make your Reels more engaging and informative. Here’s how to add them:
- Text:
- After recording or uploading your video, tap the Text button.
- Type your desired text and customize it by changing the font, color, and position on the screen.
- You can also adjust the duration for which the text appears in your Reel.
- Stickers:
- Tap the Stickers icon to access a variety of stickers, including emojis, GIFs, and interactive stickers like polls or questions.
- Choose a sticker and place it on your video. You can resize and reposition it as needed.
Additional Creative Tools
- Timer: Use the timer feature to record hands-free. This is particularly useful for solo creators who want to appear in their own videos without needing someone to press the record button.
- Align Tool: This tool helps create seamless transitions between clips, making it easier to maintain continuity in your storytelling.
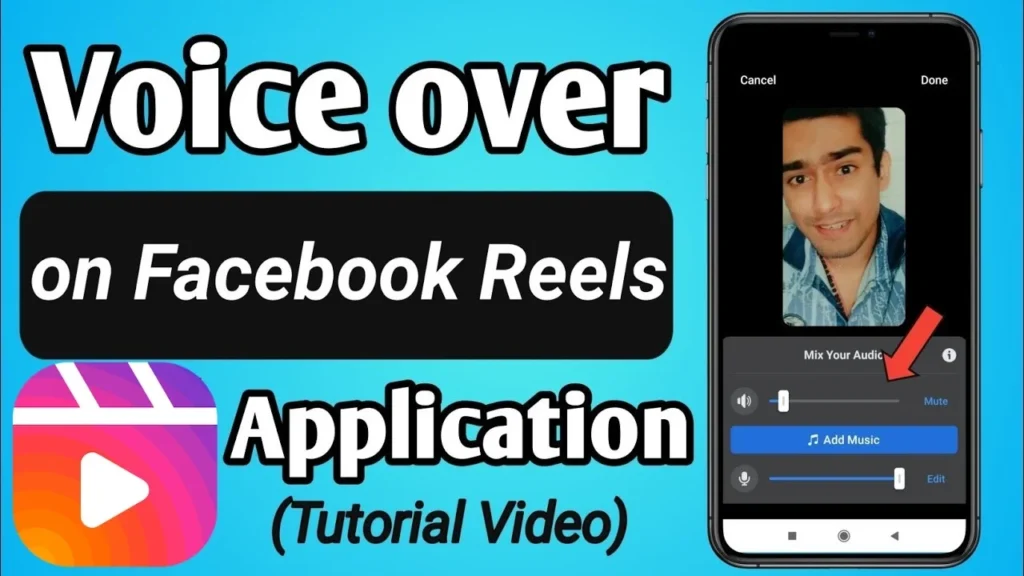
- Voiceover: You can add voiceovers by tapping the audio feature after recording your video. This allows you to narrate or add commentary to your Reel.
Tips for creating high-quality content (lighting, audio, transitions)
Creating high-quality content involves more than just writing engaging copy. To truly captivate your audience, you need to pay attention to the visual and audio elements that bring your content to life.
Lighting

Proper lighting can make a significant difference in the overall look and feel of your video content. Here are some lighting tips to keep in mind:
- Use natural light whenever possible: Position your setup near a window to take advantage of the soft, flattering glow of natural light.
- Invest in basic lighting equipment: A simple three-point lighting setup (key light, fill light, and backlight) can dramatically improve your video quality, even on a budget.
- Avoid harsh shadows and hot spots: Diffuse your lights with softboxes or bounce them off walls to create even, flattering illumination.
- Experiment with color temperature: Warmer color temperatures (2700K-3000K) create a cozy, intimate feel, while cooler temperatures (5000K-6500K) appear more professional and modern.
Audio
High-quality audio is essential for engaging your audience. Poor audio can be a major turnoff, even if your content is visually stunning. Here are some tips for improving your audio:
- Use a dedicated microphone: Avoid relying on your camera’s built-in mic. Invest in a quality USB or XLR microphone to capture clear, professional-sounding audio.
- Record in a quiet environment: Background noise can ruin even the best audio. Choose a room with minimal echo and external sounds for your recordings.
- Monitor your levels: Use headphones to ensure your audio levels are not clipping or distorting. Aim for a consistent volume throughout your recording.
- Consider adding background music: Subtle background music can help set the mood and keep your audience engaged, but be sure not to overpower your voiceover.
Transitions
Smooth transitions between scenes or topics can make your content feel more polished and professional. Here are some tips for using transitions effectively:
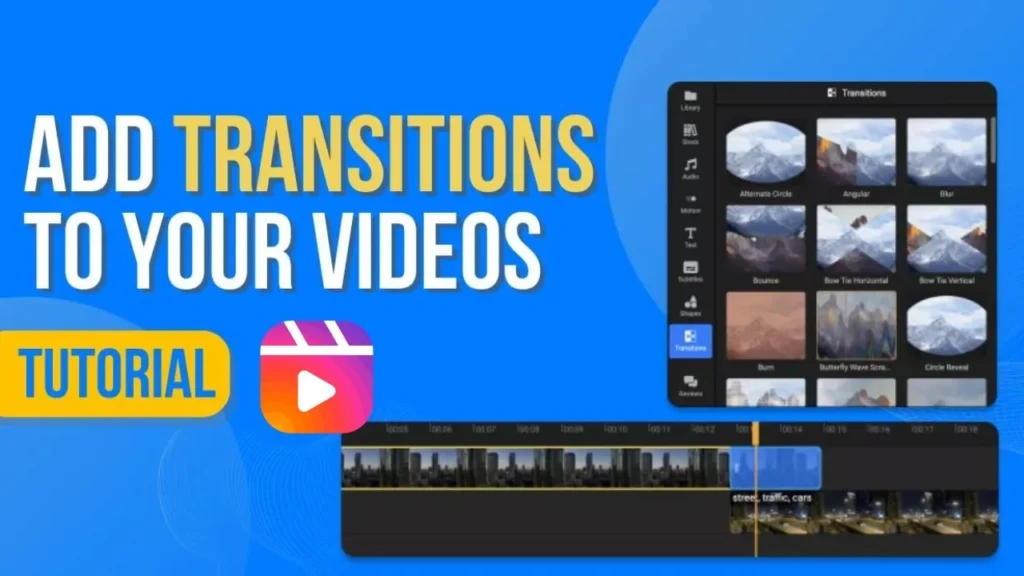
- Keep transitions simple: Avoid using flashy, distracting transitions. Stick to basic cuts, fades, or wipes to maintain a clean, consistent look.
- Match the tone of your content: Choose transitions that complement the mood and pacing of your video. For example, use quick cuts for fast-paced content and slower fades for more contemplative pieces.
- Use transitions to guide the viewer: Transitions can help direct the viewer’s attention and create a sense of flow between scenes. Use them to highlight important points or shift between topics.
- Be consistent: Use the same transitions throughout your video or series to create a cohesive, branded look.
By focusing on these key elements of lighting, audio, and transitions, you can elevate the quality of your content and create a more engaging, professional-looking final product. Remember, attention to detail is key when it comes to creating high-quality content that stands out in a crowded digital landscape.
Facebook Reel Dimensions and File Specifications
Got a killer video ready for your Facebook Reel but unsure if it’ll look crisp and fly? Don’t sweat it—here’s how to make sure your Reels hit just right!
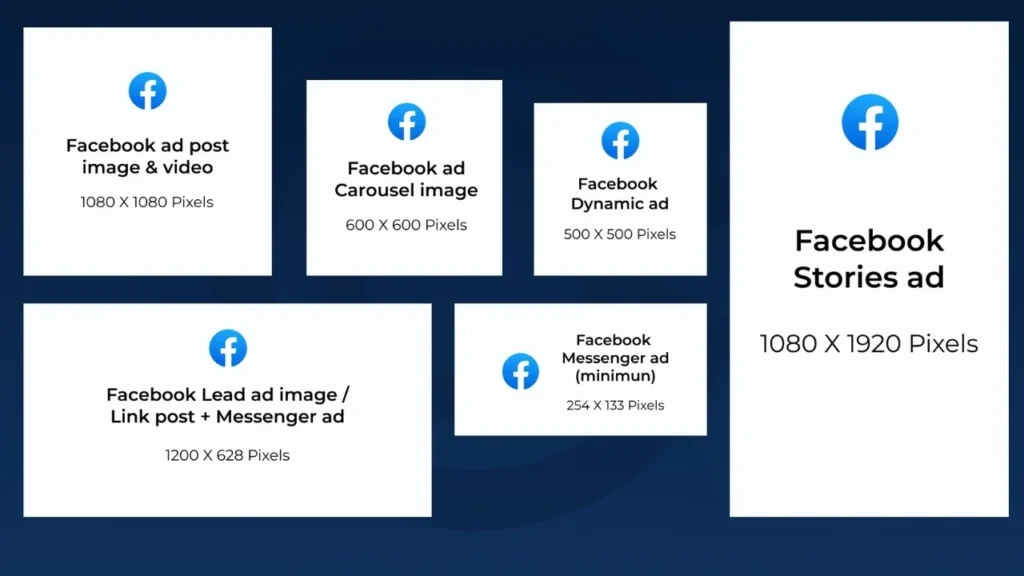
Facebook Reel Size and Pixel Resolution:
For Facebook Reels, the video format is vertical and optimized for 9:16 aspect ratio, making the ideal pixel resolution 1080 x 1920 pixels. In inches, that’s the equivalent of filling up your entire mobile screen vertically. Anything outside this resolution can get cropped or distorted.
File Format Recommendations:
When uploading, stick with MP4 or MOV file formats—both deliver the best quality without lag or compatibility issues. These are industry standards and ensure smooth uploads across devices.
Video Length Limitations:
Facebook Reels allow videos to run up to 90 seconds, giving you just enough time to tell a short, compelling story, grab attention, and show off your content. Anything longer won’t make the cut, so keep it punchy and to the point.
Hashtags and SEO for Facebook Reels
How to add hashtags before and after posting a Reel
Adding hashtags to your Facebook Reels is a crucial step to enhance visibility and engagement. Here’s a detailed guide on how to effectively incorporate hashtags both before and after posting your Reel.
Adding Hashtags Before Posting a Reel
- Open the Facebook App: Launch the app on your mobile device and navigate to the Reels creation section.
- Create Your Reel: Tap on the camera icon or the “Create” button to start recording your video or upload an existing one.
- Edit Your Reel: After recording or uploading, you’ll be taken to the editing screen. Here, you can add music, effects, and text.
- Add a Caption: In the caption area, you can start typing your description. This is where you’ll also include your hashtags.
- Incorporate Hashtags:
- Use the “#” symbol followed by your desired keyword or phrase (e.g., #TravelTips, #FunWithFriends).
- Aim for 3 to 5 relevant hashtags that are trending or specific to your content to maximize reach.
- Mix popular hashtags with niche ones to target both broad and specific audiences.
- Finalize Your Reel: Once you’re satisfied with your caption and hashtags, tap “Share” to post your Reel.
Adding Hashtags After Posting a Reel
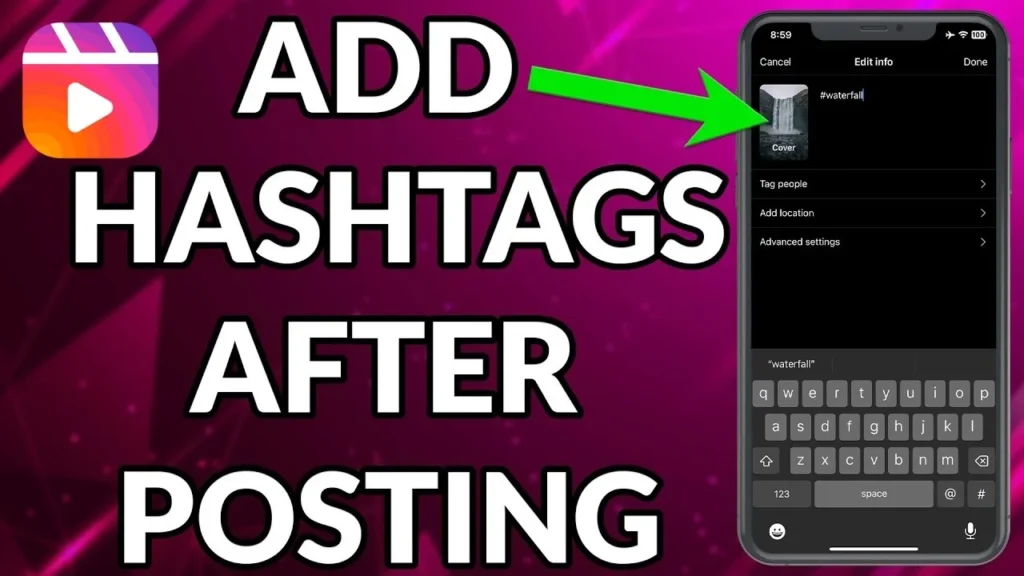
Currently, Facebook does not allow you to add hashtags to a Reel after it has been posted. However, you can edit the caption of your Reel to include hashtags if you notice a missing tag or want to optimize your post further. Here’s how:
- Locate Your Reel: Go to your profile and find the Reel you want to edit.
- Open the Reel: Tap on the Reel to view it.
- Access the Edit Menu: Look for the three-dot menu icon (ellipsis) on the Reel and tap it.
- Select “Edit Post”: This option allows you to modify the existing caption.
- Edit the Caption:
- Tap on the caption area and add your hashtags.
- Ensure that the hashtags are relevant and check for any typos before saving.
- Save Changes: After making your edits, tap “Save” to update your Reel with the new hashtags.
Important Considerations
- Hashtag Strategy: Regularly update your hashtags based on current trends and the specific content of each Reel. This keeps your posts relevant and engaging.
- Engagement Impact: Using effective hashtags can significantly boost the discoverability of your Reels, helping you reach a wider audience and garner more engagement.
- Limitations: While you can edit captions, remember that you cannot change the video content itself after posting. If significant changes are needed, you may have to delete the original Reel and re-upload it with the correct hashtags.
Importance of relevant hashtags for discoverability

1. Categorization and Organization
Hashtags serve as a method of categorizing content, making it easier for users to find posts related to specific topics. When you include relevant hashtags in your Facebook Reels, you help users who are interested in those topics discover your content. This categorization is crucial, especially on platforms where users may not follow you directly but are searching for specific themes or trends.
2. Enhanced Discoverability
When users search for or click on a specific hashtag, they are directed to a feed of posts that include that hashtag. This means that your content can be seen by a wider audience, including those who may not already follow you. By using a mix of popular and niche hashtags, you can increase the chances of your Reels being discovered by potential followers who share similar interests.
3. Increased Engagement
Using relevant hashtags can significantly boost engagement on your posts. Hashtags make your content more searchable, allowing users to find your Reels during their explorations of trending topics. This increased visibility can lead to more likes, shares, and comments, ultimately enhancing your brand’s presence on the platform. According to Sprout Social, hashtags help users discover content they care about and guide brands to target audiences interested in their niche.
4. Participation in Conversations
Hashtags allow you to join larger conversations happening across social media. By using trending hashtags, you can tap into current discussions and events, making your content more relevant. This not only increases your visibility but also positions your brand as an active participant in ongoing dialogues, which can foster community engagement and loyalty.
5. Building Brand Awareness
Strategically using hashtags can help build brand awareness. When users see your content associated with specific hashtags, it reinforces your brand identity and values. Creating a branded hashtag can also encourage user-generated content, as followers may use the hashtag when sharing their experiences related to your brand, further amplifying your reach.
6. Data and Insights
Tracking the performance of your hashtags provides valuable insights into what resonates with your audience. By analyzing which hashtags drive the most engagement, you can refine your strategy and focus on the tags that yield the best results. Tools like Meta Business Suite can help you assess the impact of your hashtag usage, allowing you to adapt and optimize your approach over time.
Best hashtags for Facebook Reels: Trending vs. niche

The Power of Trending Hashtags
Trending hashtags are popular tags that are currently being used widely across social media platforms. They often relate to current events, popular culture, or viral challenges. Here’s why incorporating trending hashtags can be beneficial:
- Increased Visibility: Using trending hashtags can help your Reels appear in searches and feeds where users are actively looking for popular content. For instance, hashtags like #Viral, #Trending, or #Reels can attract a larger audience, as many users search for these tags to discover new content.
- Jump on Trends: By aligning your content with trending hashtags, you can participate in larger conversations and trends, making your Reels more relevant. This can lead to higher engagement rates as users are more likely to interact with content that resonates with current interests.
- Broader Audience Reach: Trending hashtags can help you reach users who may not follow you but are interested in the topics you’re covering. This can lead to increased views, likes, and shares, expanding your audience base.
The Importance of Niche Hashtags
On the other hand, niche hashtags are more specific and cater to a targeted audience. They often relate to particular interests, industries, or communities. Here’s why niche hashtags are equally important:
- Targeted Engagement: Niche hashtags help you connect with users who have specific interests related to your content. For example, if you’re posting about healthy recipes, using hashtags like #HealthyEating or #FoodBloggers can attract viewers who are genuinely interested in that topic.
- Less Competition: While trending hashtags can be crowded, niche hashtags often have less competition. This means your content has a better chance of standing out and being discovered by users looking for specific content.
- Building a Community: Using niche hashtags can foster a sense of community among users with similar interests. This can lead to more meaningful interactions and connections, as viewers who find your content through niche hashtags are likely to engage with it more deeply.
Crafting Your Hashtag Strategy
To effectively use hashtags in your Facebook Reels, consider the following strategies:
- Mix Trending and Niche Hashtags: Combine popular hashtags with niche ones to maximize both visibility and targeted reach. For example, you might use #Viral alongside #HealthyRecipes to attract both a broad audience and those specifically interested in health-related content.
- Research and Adapt: Stay updated on trending hashtags relevant to your niche and adapt your strategy accordingly. Tools like hashtag generators can help you find effective hashtags based on current trends.
- Limit the Number of Hashtags: While it can be tempting to use as many hashtags as possible, focusing on 3 to 5 relevant hashtags per Reel is generally more effective. This keeps your content clean and targeted, making it easier for users to engage.
- Monitor Performance: Keep track of which hashtags drive the most engagement and adjust your strategy over time. This can help you refine your approach and ensure that you’re using the most effective hashtags for your content.
Facebook Reels Algorithm and Visibility
Facebook Reels Algorithm and Visibility Explained

How the Facebook Reels Algorithm Works:
The Facebook Reels algorithm is designed to enhance the visibility of content that resonates with users. Much like other social media algorithms, it aims to keep users engaged by recommending Reels that match their interests. It works by analyzing user interactions such as what types of videos they watch, like, comment on, or share, and then curates their Reels feed accordingly. The more a user interacts with a particular kind of content, the more the algorithm serves them related videos.
This means that if you consistently engage with cooking tutorials, the algorithm will prioritize similar Reels, providing you with a steady stream of content you’re likely to enjoy. The key is that the algorithm prioritizes relevance, making sure the content it shows keeps you on the app and engaged for as long as possible.
Factors Affecting Reel Recommendation:
Several factors influence how and when your Reel will be recommended to users beyond your followers. Here are the top factors:
- Engagement: High engagement—likes, comments, shares, and saves—signals the algorithm that your content is valuable. The more people interact with your Reel, the higher the likelihood it will be recommended to others. Reels that encourage engagement (like asking questions or using trending challenges) tend to perform better.
- Music and Audio: Using trending audio clips or popular music increases the chances of your Reel being shown to a wider audience. This is because users often seek out Reels featuring the latest trending sounds. The algorithm recognizes this and rewards content creators who incorporate popular audio into their posts.
- Originality and Creativity: Unique and creative content is more likely to catch the algorithm’s attention. Facebook prioritizes original content, so putting your personal spin on a trending topic can help your Reel stand out. If users watch your Reel multiple times or share it with others, this boosts its algorithmic favor even more.
- Timing and Frequency: When you post your Reel also affects its visibility. Posting at times when your audience is most active can help boost initial engagement, signaling to the algorithm that your content is relevant and worth promoting. Posting consistently helps keep your content in front of your audience, encouraging ongoing interaction.
- Video Length and Retention: While Facebook Reels can be up to 90 seconds long, keeping your audience engaged for the full duration is critical. The longer people watch your Reel, the better it performs in the algorithm. Reels that get replays or hold users’ attention for most of the video are more likely to be recommended to others.
Strategies to Increase Views and Reach:
To make the most of Facebook Reels and increase your visibility, here are some strategies you can employ:
- Post Consistently: Consistency is key when it comes to getting your content in front of more users. Regular posting not only keeps your audience engaged but also helps the algorithm recognize that you’re an active creator. This steady stream of content gives the algorithm more opportunities to promote your Reels to users.
- Use Trending Audio and Hashtags: As mentioned earlier, leveraging trending sounds can boost your Reel’s visibility. Similarly, using relevant and trending hashtags allows your content to reach audiences interested in specific topics. Mixing niche and trending hashtags ensures you’re targeting both broad and specific audiences.
- Encourage Engagement: Call-to-actions (CTAs) that prompt viewers to like, comment, or share your Reel help boost engagement rates. Asking a question or encouraging viewers to try something you’ve demonstrated in the video increases the likelihood that they’ll interact, boosting your Reel’s algorithmic performance.
- Create Shareable Content: If your content is easy to share, viewers will spread it to their networks, organically increasing your reach. Content that’s relatable, funny, or informative tends to be shared more widely, and the more shares your Reel gets, the higher it climbs in the algorithm.
- Optimize for Mobile Viewing: Since Facebook Reels are primarily consumed on mobile devices, ensure your videos are formatted correctly. Vertical video (9:16 aspect ratio) is the standard. Also, adding subtitles can make your content accessible to a broader audience, including those watching without sound.
- Track Performance and Refine: Utilize Facebook’s analytics to monitor which Reels perform well. Pay attention to watch time, likes, shares, and comments. Use this data to refine your content strategy, posting more of what works and improving on areas that don’t resonate with your audience.
By understanding how the Facebook Reels algorithm works and applying these strategies, you can boost your Reels’ visibility, increase engagement, and ultimately grow your presence on the platform.
Monetization of Facebook Reels
Overview of Facebook Reels Play Bonus Program
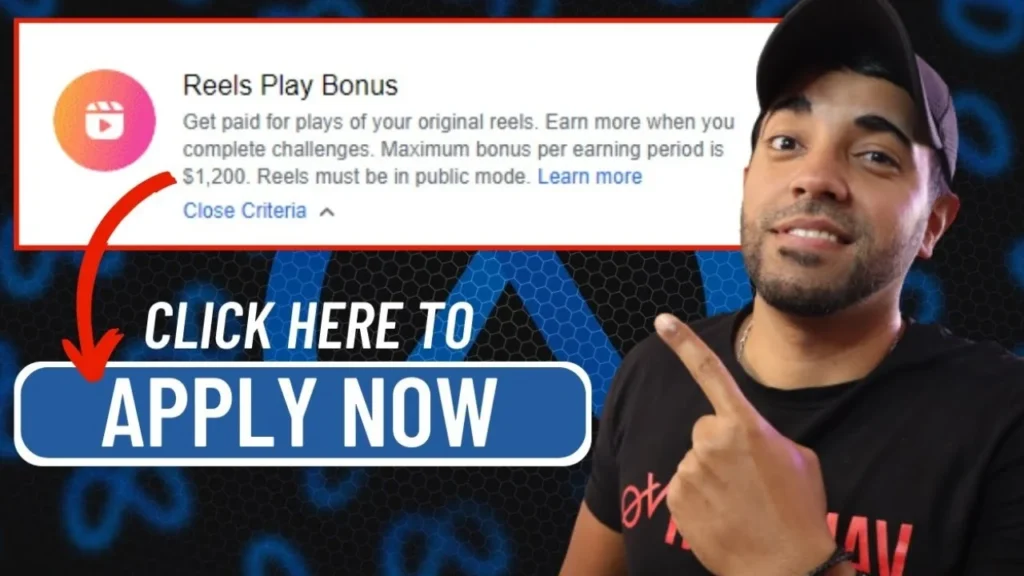
The Facebook Reels Play Bonus Program is a monetization initiative that rewards creators for producing engaging short-form video content on Facebook Reels. By meeting specific eligibility criteria and performance targets, creators can earn bonus payments from Facebook based on the views their Reels receive. Here’s a comprehensive overview of how the program works:

Eligibility Requirements
To be eligible for the Reels Play Bonus Program, creators must meet the following criteria:
- Be at least 18 years old
- Have a Facebook Page or a Facebook account set to professional mode
- Post at least 5 original Reels within a 30-day period
- Achieve at least 1,000 Reels views within that 30-day period
Invitation Process
The Reels Play Bonus Program operates on an invite-only basis. Creators who meet the eligibility requirements will receive an email invitation from Facebook with details on the program and their specific bonus opportunity. The invitation will include:
- A start date for the creator’s bonus program
- A maximum bonus amount they can earn within a given time period (usually 30 days)
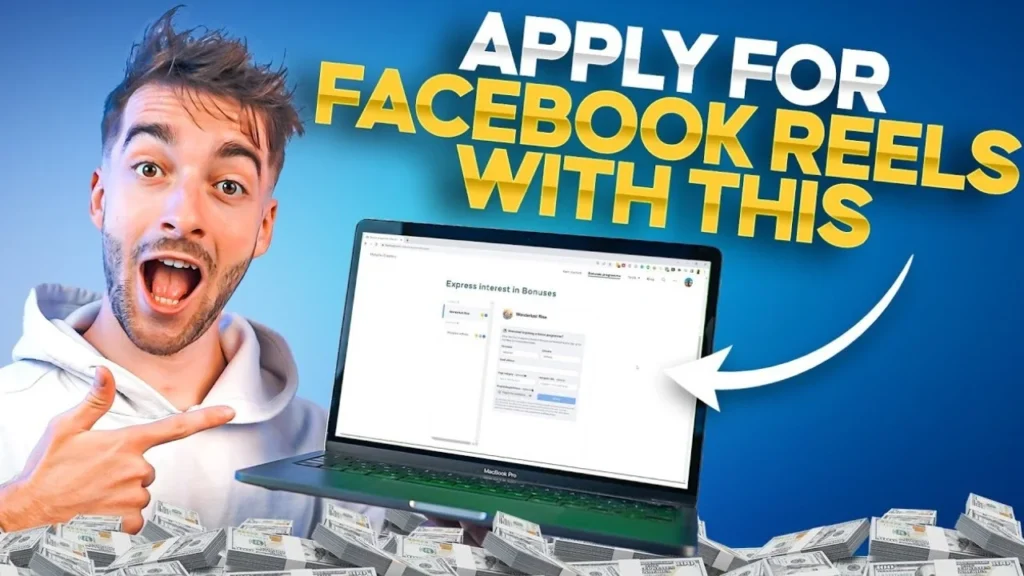
Creators can also express interest in the program by visiting facebook.com/creators/programs/bonuses and submitting their information.
Bonus Calculation
Once a creator is enrolled in the Reels Play Bonus Program, their bonus earnings are calculated based on the number of views their Reels receive. The exact payout per view varies, but the maximum bonus amount is typically capped at $1,200 per creator per month.Creators can track their bonus progress and earnings within the Facebook Creator Studio dashboard. This allows them to see how much they’ve earned from the Reels Play Bonus Program in addition to any other monetization streams they may be part of.
Payout Process
Bonus payments are processed on a monthly basis. Creators must meet the minimum eligibility requirements each month to continue earning bonuses. Payments are made via direct deposit or other approved payment methods once a creator’s account is verified and their tax information is provided.
Exclusions and Limitations
It’s important to note that the Reels Play Bonus Program is currently only available to creators in the United States. Additionally, certain types of content are ineligible for bonus payments, such as branded content, content with watermarks from other platforms, and content that violates Facebook’s policies.
How much Facebook Reels pay per 1,000 views
Facebook Reels offers creators multiple ways to monetize their content and earn money based on views and engagement. However, calculating the exact payout per 1,000 views is not straightforward, as it depends on several factors:
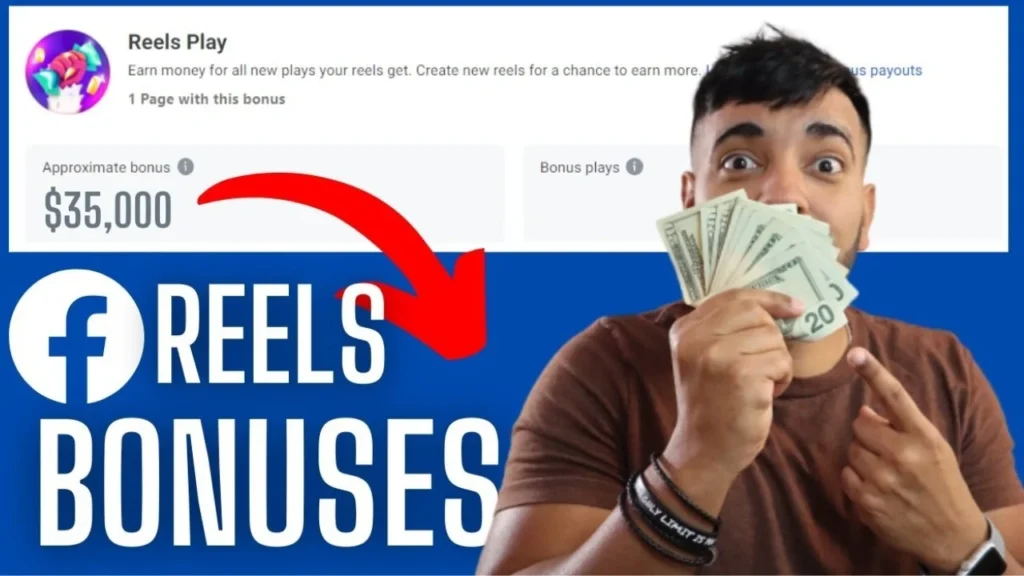
Monetization Methods
Facebook Reels currently offers three main monetization methods:
- Ads on Reels: Creators can earn a share of the ad revenue generated from ads displayed on their Reels. Payouts are based on the number of views and engagement.
- Facebook Stars: Fans can purchase stars and send them to creators during Reels. Each star is worth $0.01, and creators receive 100% of the stars they earn.
- Reels Play Bonus Program: An invite-only program that pays creators a bonus based on the number of views their Reels receive, up to a certain threshold.
Payout Rates
While Facebook doesn’t disclose exact payout rates, estimates suggest creators can earn anywhere from $4 to $20 per 1,000 views, depending on various factors:
- Audience Location: Creators in the United States and other high-income countries tend to earn more per view compared to those in lower-income regions.
- Engagement Metrics: Reels with higher completion rates, shares, and positive reactions generally earn more per view.
- Ad Revenue: The amount of ad revenue generated on a Reel depends on factors like the advertiser’s bid and the viewer’s location.
Factors Influencing Earnings
In addition to the monetization method and payout rates, several other factors can impact a creator’s earnings from Facebook Reels:
- Content Quality: High-quality, engaging Reels that keep viewers watching tend to perform better and earn more.
- Audience Size and Demographics: Creators with larger, more engaged followings and audiences in desirable demographics can earn higher payouts.
- Consistency: Regularly posting new Reels and maintaining an active presence on the platform can lead to increased views and earnings over time.
Potential Earnings
While the potential earnings from Facebook Reels can vary widely, some estimates suggest that creators with a large following and high-performing Reels can earn significant amounts:
- Top Creators: The highest-earning creators on Facebook Reels may earn tens of thousands of dollars per month, depending on their reach and engagement.
- Smaller Creators: Even smaller creators with a few thousand followers can potentially earn hundreds or thousands of dollars per month through a combination of monetization methods.
Eligibility for Reels monetization and how to join the program
The Facebook Reels monetization program offers creators an opportunity to earn money through their short-form video content. However, to qualify for monetization, creators must meet specific eligibility criteria and follow certain steps to join the program. Here’s a detailed overview of what you need to know.
Eligibility Requirements
- Age and Account Type:
- You must be at least 18 years old.
- You need to have a Facebook Page or a professional account. Personal accounts are not eligible for monetization.
- Geographical Availability:
- The monetization features, including ads on Reels, are available in specific countries. As of now, Facebook has rolled out these features in 58 countries. You can check the latest list of eligible countries on Facebook’s official resources.
- Content Guidelines:
- Your Reels must adhere to Facebook’s Community Standards and Content Monetization Policies. This includes ensuring that your content is original and does not infringe on copyright or intellectual property rights.
- Reels should be between 15 and 60 seconds in length and formatted in a 9:16 vertical aspect ratio.
- Follower and Engagement Thresholds:
- To qualify for certain monetization features, it is generally recommended to have a substantial following and consistent engagement. Specific thresholds include:
- At least 5,000 followers.
- A minimum of 60,000 view minutes in the last 60 days.
- At least five active videos (excluding cross-posted videos).
- To qualify for certain monetization features, it is generally recommended to have a substantial following and consistent engagement. Specific thresholds include:
- Ad Breaks for Longer Videos:
- If your videos are at least 3 minutes long, they may be eligible for ad breaks. However, this applies primarily to longer video content, as ads on Reels are typically embedded automatically based on your eligibility.
How to Join the Program
- Check Eligibility:
- Log into your professional account on the Facebook app.
- Navigate to your profile and tap on See Dashboard to access the Professional Dashboard.
- Under the Monetization section, check if you see the option for Ads on Reels. If eligible, you can set it up immediately.
- Invitation to Ads on Reels:
- Facebook may invite you to join the Ads on Reels program even if you do not meet the follower and view requirements. If you receive an invitation, you can start embedding ads in your Reels right away.
- Setting Up Your Payment Account:
- To receive payments, you must link a valid payment method (like a bank account or PayPal) to your Facebook account. This is necessary to ensure you can collect your earnings from the monetization program.
- Participate in the Reels Play Bonus Program:
- This is an invite-only program that rewards creators for achieving performance targets with their Reels. If you receive an invitation, you can earn bonuses based on the views your Reels generate.
Managing and Saving Facebook Reels
How to find saved and previously watched Reels
Finding your saved and previously watched Reels on Facebook is a straightforward process, whether you’re using the mobile app or the desktop site. Here’s a detailed guide to help you navigate through both platforms.
On Mobile (iOS and Android)
- Open the Facebook App: Launch the app on your mobile device and log in to your account.
- Access the Menu: Tap the hamburger menu icon (three horizontal lines) located in the bottom right corner of the screen.
- Navigate to Saved: Scroll down and select Saved. If you don’t see it immediately, you may need to tap See More to find it.
- View All Saved Items: In the Saved section, tap See All to view all your saved content.
- Filter for Reels: In the top-right corner, tap All and choose Reels. This will filter your saved items to show only the Reels you’ve saved.
- Watch Your Saved Reels: Tap on any Reel to watch it. If you want to remove a Reel from your saved list, tap the three dots next to it and select Unsave.
On Desktop
- Go to Facebook.com: Open a web browser and navigate to Facebook.com, then log in to your account.
- Select Saved: In the left sidebar, click on Saved. This will take you to a page displaying all your saved items.
- Filter for Reels: In the top-right corner of the saved items list, click the filter icon. Then, select Reels to view only your saved Reels.
- Watch Your Saved Reels: Click on any Reel from the list to watch it. To unsave a Reel, click the three dots next to it and choose Unsave.
Finding Previously Watched Reels
Currently, Facebook does not have a dedicated section for previously watched Reels like it does for saved Reels. However, you can use the Activity Log to find your viewing history:
On Mobile
- Open the Facebook App: Launch the app and log in.
- Access Your Profile: Tap on your profile picture in the top left corner.
- Go to Activity Log: Tap on the three dots next to Edit Profile and select Activity Log.
- Filter by Videos: In the Activity Log, scroll down to find the Videos You’ve Watched section. Tap on it to view your previously watched Reels.
On Desktop
- Go to Facebook.com: Open a web browser and log in to your account.
- Access Your Profile: Click on your profile picture in the top right corner.
- Select Settings & Privacy: From the dropdown menu, click on Settings & Privacy, then select Activity Log.
- View Your Activity: In the Activity Log, look for the Videos You’ve Watched section in the left column. This will show you a history of all the videos, including Reels, that you have watched.
Editing, deleting, and saving Reels
Facebook Reels provide a dynamic way for users to create and share short videos, similar to TikTok and Instagram Reels. Understanding how to effectively manage your Reels—specifically how to save, edit, and delete them—is crucial for maximizing your content’s impact.
Saving Reels allows you to bookmark videos for later viewing. Here’s how to save a Reel on both mobile and desktop:
Saving Reels
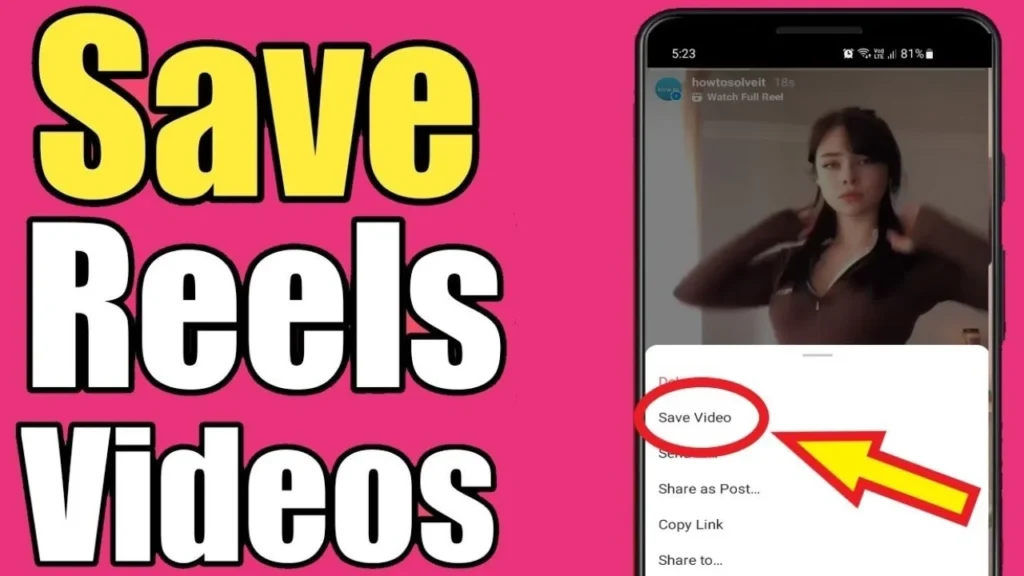
On Mobile (iOS and Android)
- Open the Facebook App: Launch the app on your device and log in to your account.
- Find the Reel: Browse through your feed or search for the specific Reel you want to save.
- Save the Reel:
- Tap the three-dot menu icon in the bottom-right corner of the Reel.
- Select “Save Reel” from the options provided. The Reel will now be added to your saved items.
On Desktop
- Go to Facebook.com: Open a web browser and navigate to Facebook.
- Locate the Reel: Find the Reel you wish to save.
- Save the Reel:
- Click on the three-dot menu icon in the top-right corner of the Reel.
- Choose “Save Reel” to add it to your saved items.
Viewing Saved Reels
Once you’ve saved Reels, you can easily access them later:
On Mobile
- Open the Facebook App: Launch the app and log in.
- Access the Menu: Tap the hamburger menu (three horizontal lines) in the bottom-right corner.
- Navigate to Saved: Tap on Saved. If you don’t see it, you may need to tap See More.
- Filter for Reels: Tap See All to view all saved items. In the top-right corner, tap All and select Reels to filter your saved content.
- Watch Your Saved Reels: Tap on any Reel to watch it. To remove a Reel from your saved list, tap the three dots next to it and choose Unsave.
On Desktop
- Go to Facebook.com: Log into your account.
- Select Saved: Click on Saved from the left sidebar.
- Filter for Reels: In the top-right corner of your saved items list, click the filter icon and select Reels.
- View Your Saved Reels: Click on any Reel to watch it. To remove it from your saved list, click the three dots next to the Reel and choose Unsave.
Editing Reels
Currently, Facebook does not allow users to edit Reels after they have been posted. However, you can edit the caption of your Reel, which includes adding or modifying hashtags. Here’s how:
- Locate Your Reel: Go to your profile and find the Reel you want to edit.
- Open the Reel: Tap on the Reel to view it.
- Edit the Caption:
- Click on the three-dot menu icon and select Edit Post.
- Modify the caption as needed, including adding or changing hashtags.
- Save Changes: Once you’re satisfied with the edits, click Save to update the Reel.
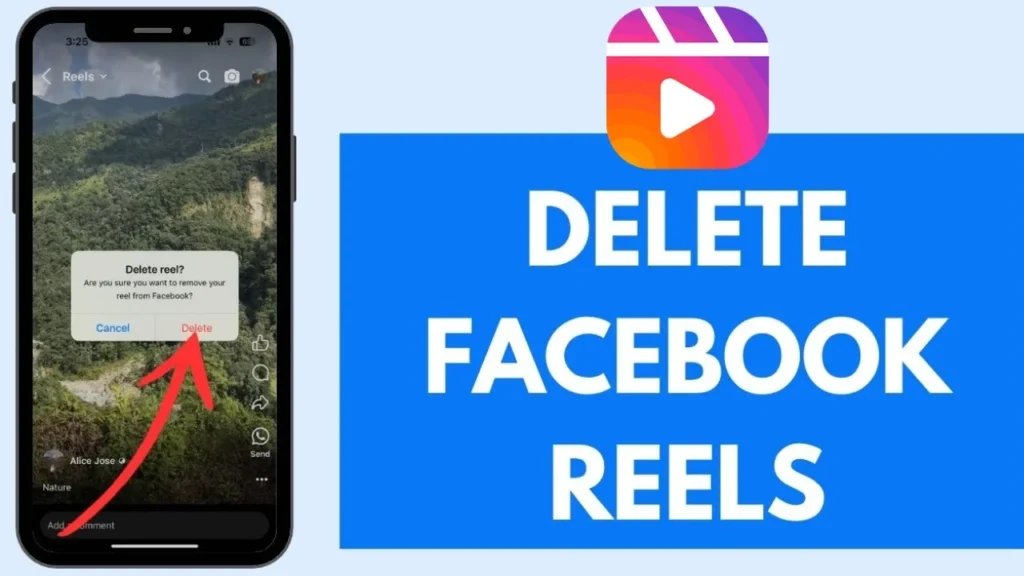
Deleting Reels
If you want to remove a Reel from your profile entirely, you can delete it. Here’s how to do it on both mobile and desktop:
On Mobile
- Open the Facebook App: Launch the app and log in.
- Find Your Reel: Navigate to your profile and locate the Reel you want to delete.
- Delete the Reel:
- Tap on the three-dot menu icon in the top-right corner of the Reel.
- Select Delete and confirm your choice.
On Desktop
- Go to Facebook.com: Log into your account.
- Access Your Profile: Click on your profile picture.
- Find the Reel: Navigate to the Reels section of your profile.
- Delete the Reel:
- Click on the three-dot menu icon in the top-right corner of the Reel.
- Choose Delete and confirm your action.
How to download Facebook Reels to MP4 format
If you want to download Facebook Reels in MP4 format, VidQuickly is a user-friendly tool that simplifies the process. Here’s a step-by-step guide on how to use VidQuickly to download your favorite Reels.
Step-by-Step Guide
- Open Facebook: Launch the Facebook app or website and navigate to the Reel you want to download.
- Copy the Reel Link:
- On the Facebook app, tap the Share button below the Reel.
- Select Copy Link to copy the URL of the Reel to your clipboard.
- Visit VidQuickly:
- Open your web browser and go to VidQuickly’s Facebook Video Downloader.
- Paste the Link:
- In the VidQuickly interface, you’ll see a text box where you can paste the copied link. Click inside the box and press Ctrl + V (or Command + V on Mac) to paste the URL.
- Select Download Format:
- After pasting the link, you may have options to select the video format. Ensure you choose MP4 for the best compatibility.
- Click Download:
- Once you’ve pasted the link and selected the format, click the Download button. VidQuickly will process the link and prepare the video for download.
- Save the Video:
- After processing, you will see download links for different resolutions. Choose the desired quality (e.g., 720p, 1080p) and click the corresponding download link.
- The video will start downloading to your device in MP4 format.
Important Considerations
- Respect Copyright: Ensure that you have permission to download and use the Reel, especially if you plan to share it or use it for commercial purposes.
- Check for Quality Options: VidQuickly may offer different resolutions for the downloaded video. Choose the one that best suits your needs.
- Browser Compatibility: VidQuickly works best on modern web browsers. If you encounter issues, try using a different browser or clearing your cache.
Downloading Facebook Reels in MP4 format using VidQuickly is a straightforward process that allows you to save your favorite videos for offline viewing. By following the steps outlined above, you can easily download and enjoy Reels whenever you want. Just remember to respect the rights of the original creators and use the downloaded content responsibly!
Facebook Reels Settings and Privacy
How to adjust Reels privacy settings
Facebook Reels allow you to control who can view your short-form video content. By adjusting the privacy settings, you can choose to share your Reels publicly, with friends, or with a custom audience.
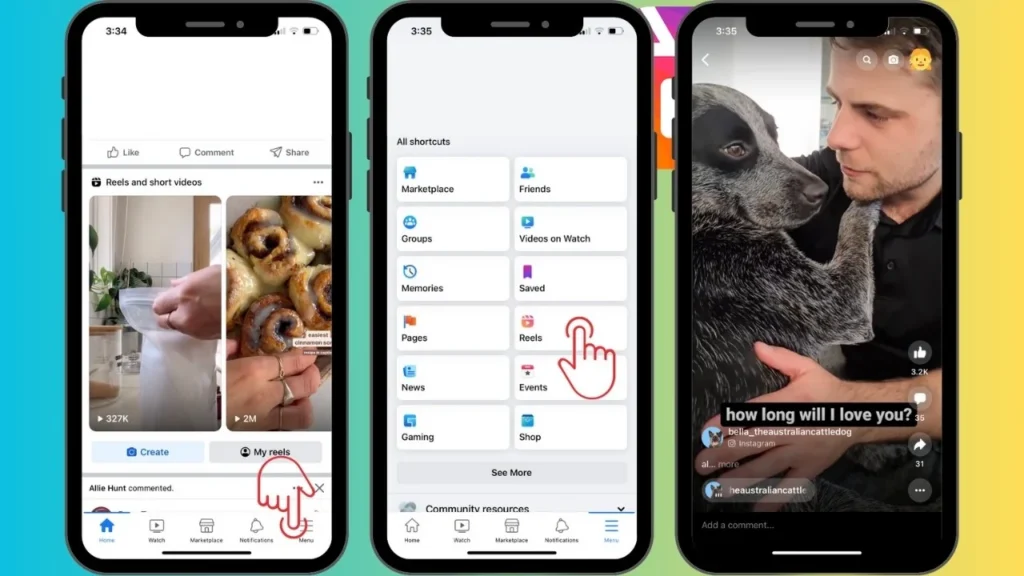
Adjusting Privacy When Creating a Reel
- Open the Facebook App: Launch the Facebook app on your mobile device and navigate to the Reels creation section.
- Create Your Reel: Record or upload your video content and add any desired effects, music, or text overlays.
- Adjust Privacy Settings:
- Before posting your Reel, tap on the “Audience” option at the bottom of the screen.
- You’ll see several privacy choices:
- Public: Anyone on or off Facebook can view your Reel.
- Friends: Only your Facebook friends can see your Reel.
- Friends except: Your Reel will be visible to your friends except for specific individuals you choose to exclude.
- Custom: You can create a custom audience by including or excluding certain people.
- Only me: Your Reel will only be visible to you and won’t be shared publicly.
- Select Your Desired Privacy Level: Choose the audience you want to share your Reel with based on your preferences.
Changing Privacy Settings for an Existing Reel
- Find the Reel: Go to your Facebook profile and locate the Reel you want to adjust the privacy settings for.
- Access the Menu: Tap on the three-dot menu icon in the top-right corner of the Reel.
- Select “Edit Privacy”: Choose this option to modify the privacy settings for the specific Reel.
- Choose the New Privacy Level: Select the desired audience from the available options (Public, Friends, Friends except, Custom, Only me).
- Save Changes: Tap “Done” or “Save” to apply the new privacy settings to your Reel.
Setting a Default Audience for Future Reels
- Open Facebook Settings: Tap on the menu icon and go to “Settings & Privacy” > “Settings.”
- Access Reels Settings: Scroll down and tap on “Reels.”
- Set Default Audience: Tap on “Default audience for Reels” and select the audience you want to set as the default for all future Reels you create.
- Save Changes: Your chosen default audience will be automatically applied to any new Reels you post going forward.
Options for limiting audience visibility
Facebook Reels provide creators with various options to control who can view their content. Understanding these options is crucial for maintaining privacy and ensuring that your Reels reach the intended audience.
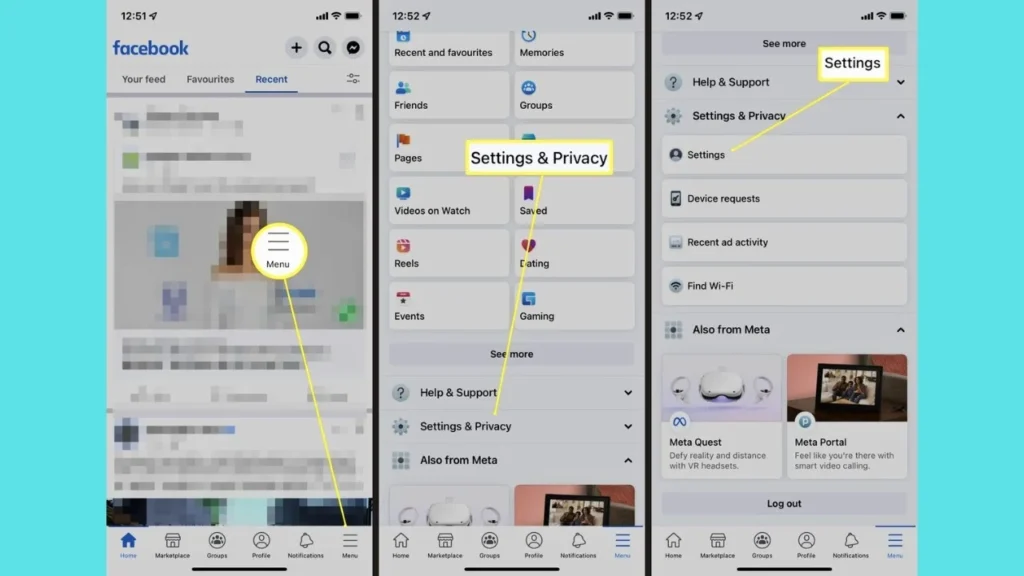
Audience Visibility Options
- Public:
- Setting your Reel to public means that anyone, including people who do not have a Facebook account, can view your content.
- This option is ideal for creators looking to maximize reach and engagement, as it allows your Reels to be discovered by a broader audience.
- Friends:
- When you select the “Friends” option, only your Facebook friends can see your Reel.
- This setting is suitable for personal accounts where you want to share content with a close-knit audience without exposing it to the general public.
- Friends Except:
- This option allows you to share your Reel with all your friends except for specific individuals you choose to exclude.
- It’s a useful feature for creators who want to maintain privacy from certain friends while still sharing content with the majority of their social circle.
- Custom:
- The custom audience setting lets you specify exactly who can see your Reel by including or excluding certain people.
- This level of control is beneficial for creators who want to tailor their audience based on specific relationships or contexts.
- Only Me:
- Selecting “Only Me” makes the Reel visible only to you. This option is perfect for testing content or sharing personal moments that you do not want anyone else to see.
Setting Default Audience for Future Reels
You can also set a default audience for all your future Reels, which simplifies the posting process:
- Access Settings:
- Open the Facebook app and tap on the menu icon (three horizontal lines).
- Navigate to Settings & Privacy, then select Settings.
- Find Reels Settings:
- Scroll down to the Audience and Visibility section and tap on Reels.
- Choose Default Audience:
- Here, you can select your preferred default audience (Public, Friends, Friends Except, Custom).
- This setting will apply to all future Reels you create unless you change the audience for a specific post.
Adjusting Privacy for Existing Reels
If you want to change the audience visibility for an already posted Reel, follow these steps:
- Locate Your Reel:
- Go to your profile and find the Reel you want to adjust.
- Edit Privacy Settings:
- Tap on the three-dot menu icon on the Reel.
- Select Edit Privacy to access the audience options.
- Select New Audience:
- Choose your desired audience from the available options (Public, Friends, Friends Except, Custom).
- Save your changes to update the visibility of your Reel.
Important Considerations
- Separate from Stories: It’s important to note that the privacy settings for Reels are separate from those for Facebook Stories. Adjusting one will not affect the other.
- Default Audience for Instagram Shares: If you share a Reel from Instagram to Facebook, the default audience will be set based on your Instagram account’s privacy settings. Ensure you check and adjust the audience on Facebook if necessary.
- Regular Updates: Facebook frequently updates its features and privacy settings. Always check for the latest options and guidelines to ensure you are using the most current settings.
How to get rid of or hide Reels in your feed
If you find Facebook Reels distracting or overwhelming, you have several options to limit their visibility in your feed. Here’s a comprehensive guide on how to hide or get rid of Reels on Facebook, whether you’re using the mobile app or the desktop version.
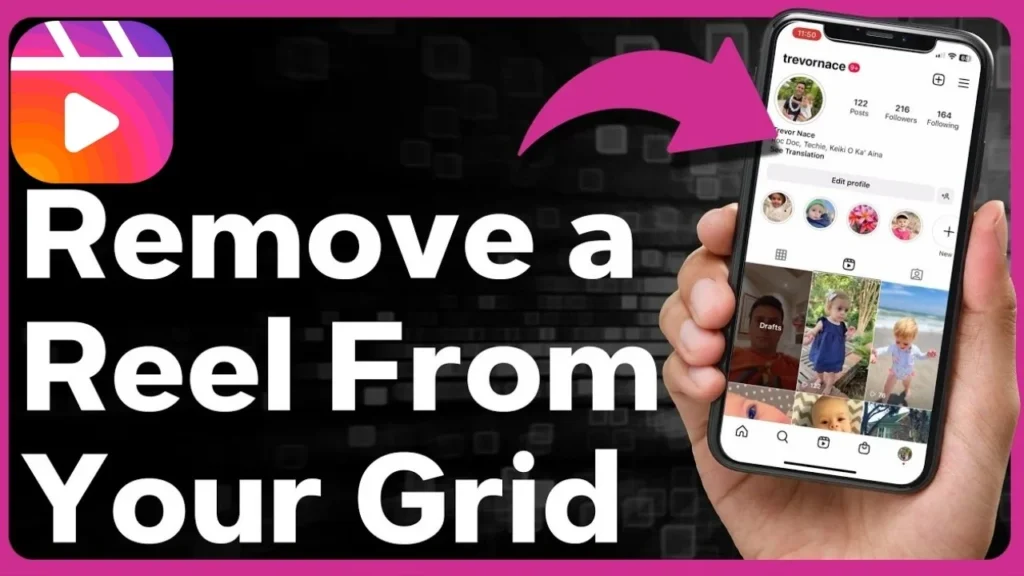
Hiding Individual Reels
To hide a specific Reel from your feed, follow these steps:
On Mobile
- Open the Facebook App: Launch the app on your mobile device.
- Locate the Reel: Scroll through your feed until you find the Reel you want to hide.
- Tap the Three-Dot Icon: In the top right corner of the Reel, tap the three-dot icon (ellipsis).
- Select “Hide Reel”: From the dropdown menu, choose Hide Reel. You will see a confirmation message indicating that you won’t see this post in your News Feed anymore. This action will reduce the number of Reels shown to you in the future.
On Desktop
- Go to Facebook.com: Open a web browser and log into your Facebook account.
- Find the Reel: Navigate through your feed to locate the Reel you wish to hide.
- Click the Three-Dot Menu: Click on the three-dot icon in the top right corner of the Reel.
- Choose “Hide Reel”: Select Hide Reel from the options. This will prevent that specific Reel from appearing in your feed again.
Turning Off Auto-Play for Reels
If you want to stop Reels from automatically playing in your feed, you can adjust your settings:
On Mobile
- Access Settings: Tap the three horizontal lines (menu icon) in the top right corner of the app.
- Go to Settings & Privacy: Tap on Settings & Privacy, then select Settings.
- Scroll to Media Settings: Scroll down to find the Media section.
- Adjust Auto-Play Settings: Under the Autoplay section, select Never Autoplay Videos. This will stop all videos, including Reels, from playing automatically in your feed.
On Desktop
- Open Settings: Click your profile icon in the top right corner and select Settings & Privacy, then Settings.
- Navigate to Media: Click on Media in the left-hand menu.
- Turn Off Auto-Play: Under Auto-Play Videos, select Off. This will prevent videos from auto-playing, including Reels.
Hiding Reels from Specific People or Pages
If you want to hide Reels from certain friends or pages, you can do so by unfollowing or blocking them:
- Go to the Profile or Page: Navigate to the profile or page of the person or entity whose Reels you want to hide.
- Click the Three Dots: In the top right corner of their profile, click the three-dot icon.
- Select Unfollow or Block:
- Unfollow: This will stop their content, including Reels, from appearing in your feed while still remaining friends.
- Block: This will prevent them from seeing your activity and you from seeing their content entirely.
Troubleshooting Facebook Reels
Common Issues (Freezing, Playback Errors):
Facebook Reels, like any video platform, can experience common technical glitches. Users often report issues such as videos freezing, poor playback quality, or sudden crashes while viewing or uploading Reels. These issues can arise due to multiple reasons: connectivity problems, outdated app versions, corrupted cache, or even device-specific performance glitches. If your Reel consistently freezes or won’t play, it can be frustrating, especially if you rely on the platform for content creation or consumption.
How to Fix Facebook Reels Freeze-Ups:
- Check Your Internet Connection: A weak or unstable internet connection is one of the most common causes of Reels freezing. Ensure you are connected to a reliable Wi-Fi network or have a strong mobile data connection. If you’re on Wi-Fi, try restarting the router or switching to mobile data to see if the problem persists.
- Clear Cache: Over time, cache files can build up and cause apps like Facebook to lag or freeze. On both iOS and Android, clearing your Facebook app’s cache can resolve freezing issues. Simply go to your device’s settings, find the Facebook app, and select the “Clear Cache” option. This won’t delete any of your personal data but will remove unnecessary files that might be causing the app to slow down.
- Update the Facebook App: Outdated versions of Facebook often result in glitches, including playback errors or freezing. Go to the App Store or Google Play Store, check if there’s an available update for Facebook, and install it. Developers frequently release updates that address bugs and improve performance, which may resolve the freezing issues.
- Restart Your Device: Sometimes, the easiest solution is to restart your phone or tablet. This can clear up temporary issues that may be causing Facebook Reels to freeze. Rebooting helps free up memory and refresh system functions.
- Reinstall the Facebook App: If the issue persists, uninstalling and reinstalling the Facebook app may fix deeper issues. After removing the app, go to the App Store or Google Play Store and install the latest version. This process ensures that you’re using the most recent, fully optimized version of the app.
- Check for Facebook Outages: Occasionally, Facebook may be experiencing technical issues on their end. You can check websites like DownDetector to see if there are widespread problems with Facebook’s servers. If there’s an outage, the best option is to wait for Facebook to resolve the issue.
Understanding and Resolving Reel History Problems:

Another issue that can cause confusion is when users try to access their Reel history (videos they’ve watched or uploaded) and find it incomplete or missing. Reel history helps you keep track of content you’ve enjoyed or posted, and problems with this feature can affect your user experience.
- Syncing Issues: Reel history might not display correctly if the app is having trouble syncing with Facebook’s servers. To resolve this, try refreshing the app, logging out and back in, or checking your internet connection.
- Clear App Data: If Reel history isn’t updating properly, clearing app data or cache (as mentioned earlier) can often resolve this. It forces the app to reload information, which might correct the issue with displaying your watched or posted Reels.
- Accessing Reel History: To view your Reel history, navigate to the Watch section of the app, click on your profile icon, and then go to History. If the Reels don’t show up there, it could be a temporary server-side issue. Be patient, as Facebook typically resolves these issues quickly.
- Check Privacy Settings: Sometimes, if your Reel settings are too restrictive (i.e., limited to “Only Me” or certain friends), your Reels might not show up in the expected places. Double-check your privacy settings to ensure your Reels are visible to the desired audience.
Facebook Reels vs Stories
Key differences between Facebook Reels and Stories
| Feature | Facebook Reels | Facebook Stories |
|---|---|---|
| Content Type | Short-form videos, typically ranging from 3 to 60 seconds. | Photos, videos, or animations that disappear after 24 hours. |
| Visibility | Potentially visible to a wide public audience, including non-friends. | Only visible to a user’s friends or followers. |
| Duration | Up to 60 seconds, designed for quick, engaging storytelling. | Each Story can be up to 20 seconds long, with multiple Stories forming a sequence. |
| Accessibility | Found in a dedicated Reels section within the Facebook app. | Appears at the top of the feed and is easily accessible. |
| Engagement | Encourages interaction through likes, comments, and shares. | Designed for quick updates and engagement, often with stickers and text. |
| Creative Tools | Offers various editing features, including music, filters, and text overlays. | Includes stickers, text, and music, but generally fewer editing options than Reels. |
| Monetization | Eligible creators can earn through the Reels Play Bonus Program and ad monetization. | No direct monetization options available. |
| Lifespan | Permanent until deleted by the user. | Disappears after 24 hours, creating a sense of urgency. |
| Target Audience | Aimed at a broader audience, including potential new followers. | Primarily targets existing friends or followers. |
| Algorithmic Reach | Enhanced visibility through Facebook’s recommendation algorithms, potentially reaching millions. | Limited to followers, with less emphasis on algorithmic promotion. |
When to use Reels vs. Stories for your content strategy
Understanding when to use Facebook Reels versus Stories is crucial for optimizing your content strategy. Both formats serve unique purposes and cater to different audience engagement styles. Here’s a detailed breakdown to help you decide which format to use based on your goals and content type.

Facebook Reels: Best Use Cases
- Engaging a Broader Audience:
- Discoverability: Reels are designed for public visibility, making them ideal for reaching new audiences. When you create a Reel, it can be discovered by users who do not follow you, increasing your chances of gaining new followers.
- Trending Content: If you want to participate in trending challenges or use popular music, Reels are the best format. They allow you to leverage current trends to attract viewers.
- Creative Storytelling:
- Short, Engaging Videos: Reels are typically 3 to 60 seconds long, making them perfect for quick, entertaining storytelling. Use this format to showcase your products, share tips, or create fun, engaging content that captures attention quickly.
- Incorporating Effects and Music: The creative tools available for Reels, such as music, filters, and text overlays, allow you to produce visually appealing content that enhances storytelling.
- Building Brand Awareness:
- Showcasing Products or Services: Use Reels to highlight new products, demonstrate their use, or share customer testimonials. This format is effective for visually showcasing what you offer in a dynamic way.
- Engaging with Challenges: Participating in or creating challenges can help your brand go viral, as users often share and engage with content that resonates with popular trends.
Facebook Stories: Best Use Cases
- Connecting with Your Existing Audience:
- Personal Updates: Stories are ephemeral and only visible to your friends or followers, making them ideal for sharing personal updates, behind-the-scenes content, or casual interactions. This format fosters a sense of intimacy and connection with your audience.
- Real-Time Engagement: Use Stories to share live updates, polls, or questions to engage your audience in real-time. This format encourages immediate interaction and feedback.
- Creating Urgency:
- Time-Sensitive Content: Since Stories disappear after 24 hours, they are perfect for sharing limited-time offers, flash sales, or event reminders. This creates a sense of urgency, prompting viewers to act quickly.
- Daily Engagement: Regularly posting Stories keeps your audience engaged with your brand on a daily basis, helping to maintain visibility and relevance.
- Casual and Authentic Content:
- Less Polished Content: Stories allow for more casual, unedited content, which can feel more authentic to viewers. Use this format to share candid moments, quick tips, or informal updates that reflect your brand’s personality.
- Interactive Features: Utilize features like polls, quizzes, and question stickers in Stories to engage your audience and gather insights about their preferences.
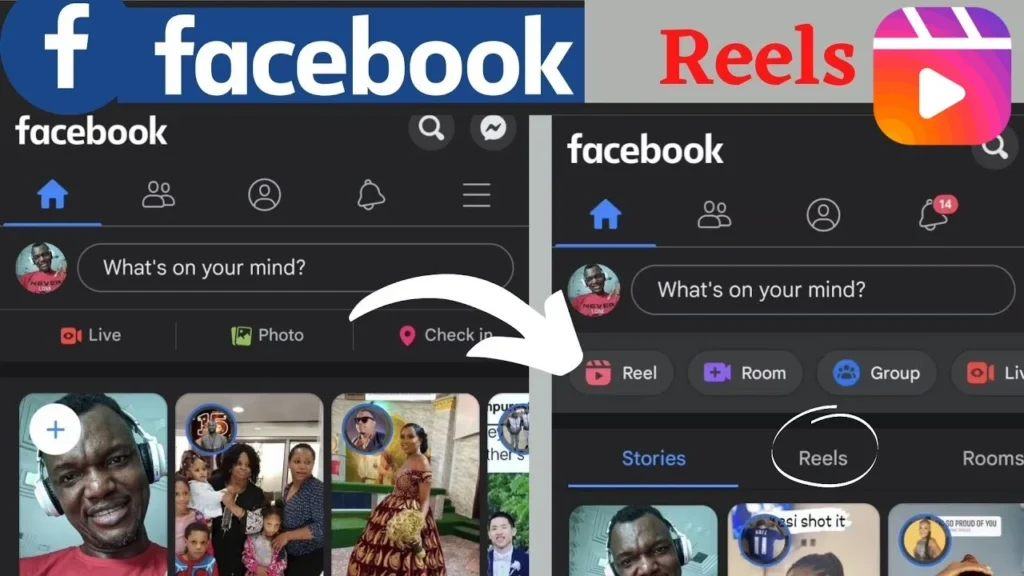
Conclusion
Facebook Reels offers an exciting way to grow your brand, boost visibility, and make money—whether by downloading and sharing content or earning directly through the platform. With the right tools and strategy, Reels can be your gateway to tapping into social media success. Ready to turn your creative videos into income?
Keep following VidQuickly’s Twitter Channel for more tips and tutorials on how to master social networks and maximize your earning potential. From Reels to other platforms, we’ve got you covered on your journey to becoming a content pro!
FAQs
How to create a Reel on Facebook?
To create a Reel, open the Facebook app, tap “Reels” in the Feed, then tap “Create.” You can record new videos or upload from your gallery, add effects, music, stickers, and share.
How to find saved Reels on Facebook?
Go to your profile, click on Menu, and select Saved. All your saved Reels will be stored there.
How long can a Facebook Reel be?
Facebook Reels can be up to 90 seconds long.
Can you see who views your Reels on Facebook?
No, Facebook does not allow you to see individual viewers of your Reels.
How to turn off Reels on Facebook?
You can reduce Reels visibility by tapping the ellipsis in the Reels section and selecting Hide. However, they can’t be fully disabled.
How to download Reels from Facebook?
Use tools like VidQuickly to paste the Reel’s URL and download it as an MP4 file.
Does Facebook pay for Reels?
Yes, Facebook offers monetization through its Reels Play Bonus Program, where creators can earn money based on views.
How much does Facebook pay for Reels?
Payouts vary but typically range from $5 to $35 per 1,000 views, depending on engagement and location.
How to see who watched your reels on Facebook?
Facebook does not allow users to see who specifically watched their Reels. You can only view the total number of views.
How to view liked reels on Facebook?
To view liked Reels, go to your profile, tap on the “Activity Log,” and select “Likes.” Here, you can find all the Reels and other content you have liked.
How to tag someone in a reel on Facebook?
To tag someone in a Reel, create or edit your Reel and look for the tagging option. Type the person’s name in the tagging field, and they will be notified once the Reel is shared.

